

Where there’s a wall, there’s a way
Advertisement
Read this article for free:
or
Already have an account? Log in here »
To continue reading, please subscribe:

Digital Subscription
One year of digital access for only $205*
- Enjoy unlimited reading on winnipegfreepress.com
- Read the E-Edition, our digital replica newspaper
- Access News Break, our award-winning app
- Play interactive puzzles
*First annual payment billed as $205.00 + GST for one year. This annual subscription will automatically renew at $233.00 + GST every 52 weeks (10% off the regular annual price of $259.35). Offer available to new and qualified returning subscribers only. Cancel any time.
To continue reading, please subscribe:
Add Free Press access to your Brandon Sun subscription for only an additional
$1 for the first 4 weeks*
- Enjoy unlimited reading on winnipegfreepress.com
- Read the E-Edition, our digital replica newspaper
- Access News Break, our award-winning app
- Play interactive puzzles
*Your next Brandon Sun subscription payment will increase by $1.00 and you will be charged $17.95 plus GST for four weeks. After four weeks, your payment will increase to $24.95 plus GST every four weeks.
Read unlimited articles for free today:
or
Already have an account? Log in here »
Hey there, time traveller!
This article was published 10/01/2026 (250 days ago), so information in it may no longer be current.
When finalizing plans to upgrade existing flooring in homes, other smaller yet imperative tasks often tend to present themselves as well.
At a recent job site, the entire main floor of the house was to receive new vinyl-plank flooring. Once the existing floors were fully prepped, priority shifted towards the wall dividing the kitchen and dining room areas — a wall that would be removed before the new vinyl was installed.
The square footage of this dwelling was not originally large, likely the reason for an addition to the backside of the house that serves as a main seating area.
Marc LaBossiere / Free Press
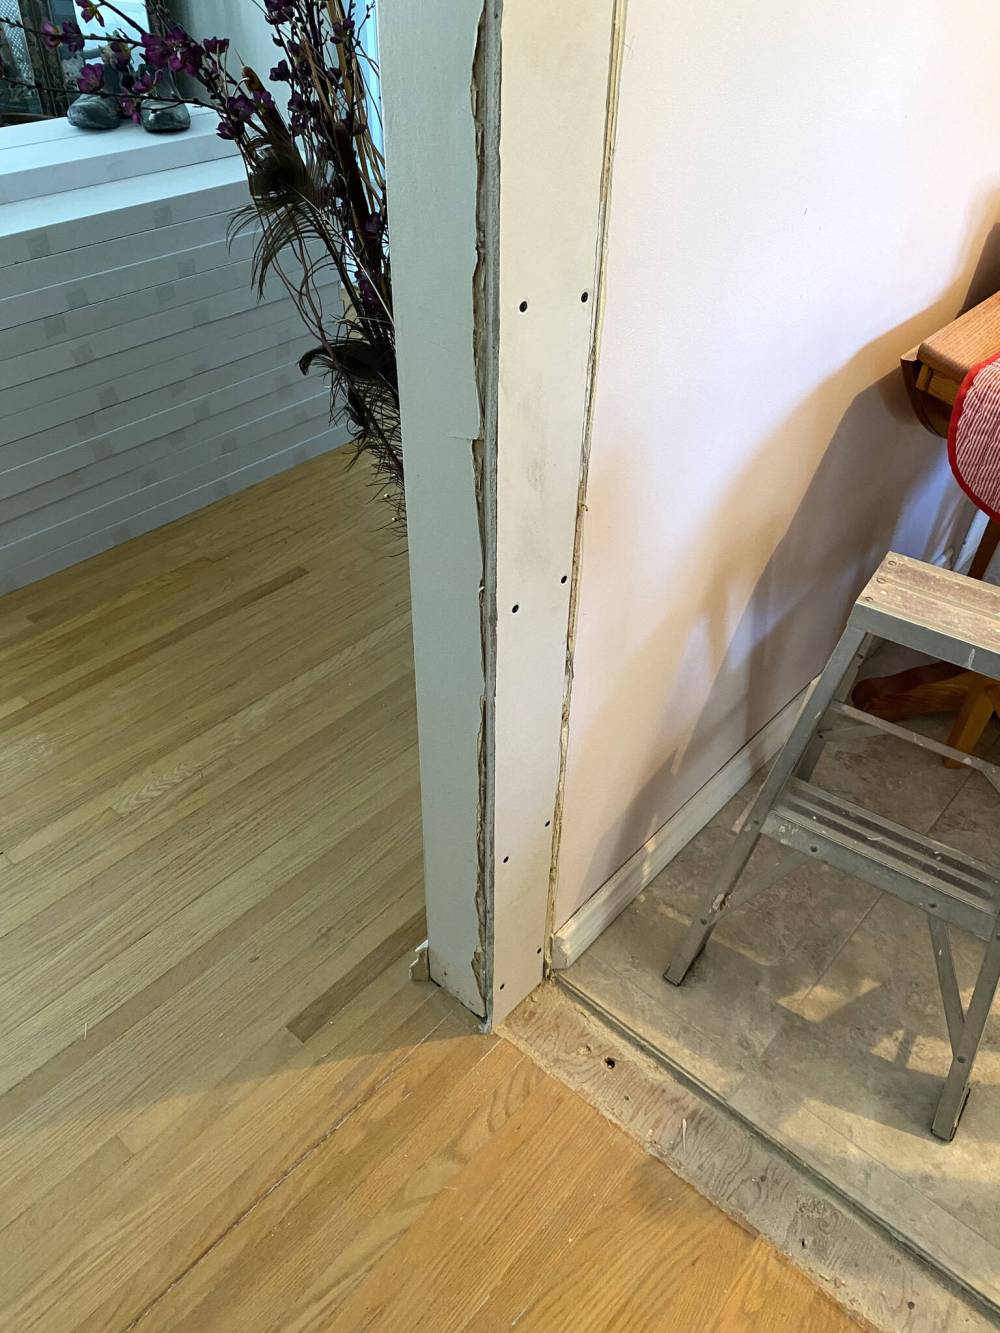
All exposed framing was sheathed with drywall, taped and mudded before being primed and painted.
To alleviate the confinement within the kitchen, the dividing wall adjacent the dining room had been fitted with an opening at some point. While this added to an open-concept feel, the homeowners decided the wall could be removed entirely, to better suit them.
This interior wall, the L-wing of the main wall that separated the kitchen from the living room, was only four-feet wide, and contained a dimmer switch for the dining-room light fixture. As such, it was necessary to evaluate the electrical wiring once the drywall was removed from the existing studs. And because this leg of the “L” was not a supporting wall, the studs and framing could be completely removed once the wiring was re-routed.
The ceilings, however, were mostly stippled. Much like trying to patch stucco on the exterior of a house, touching up stipple is nearly impossible. No matter how well the patching is done, in all likelihood the infill would remain visible.
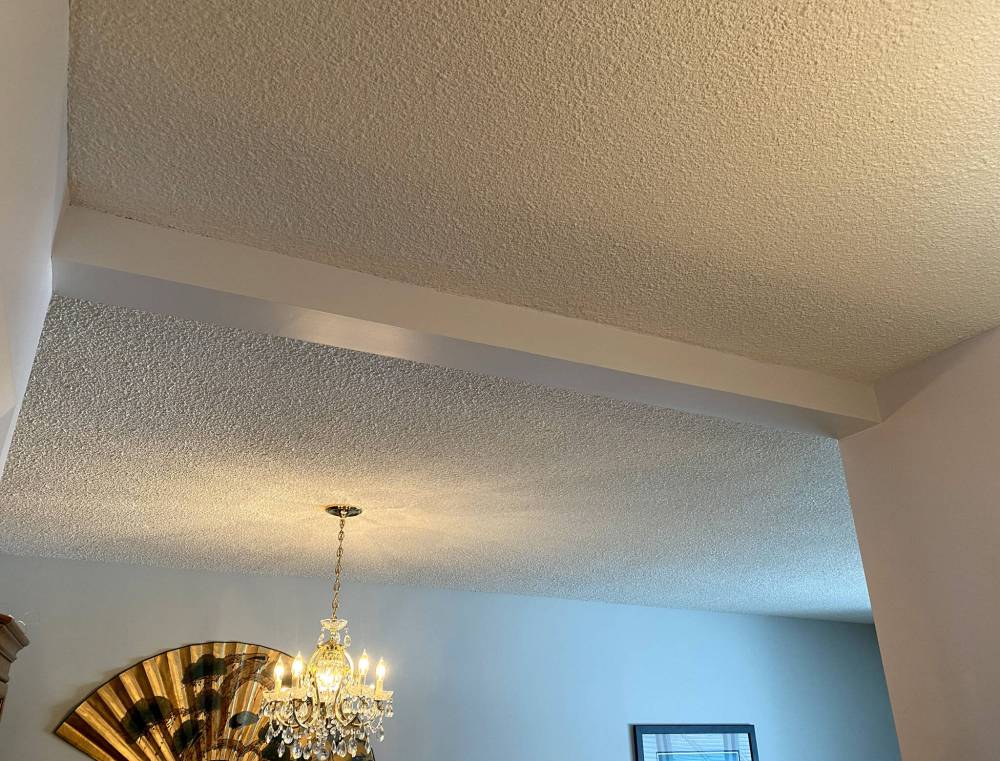
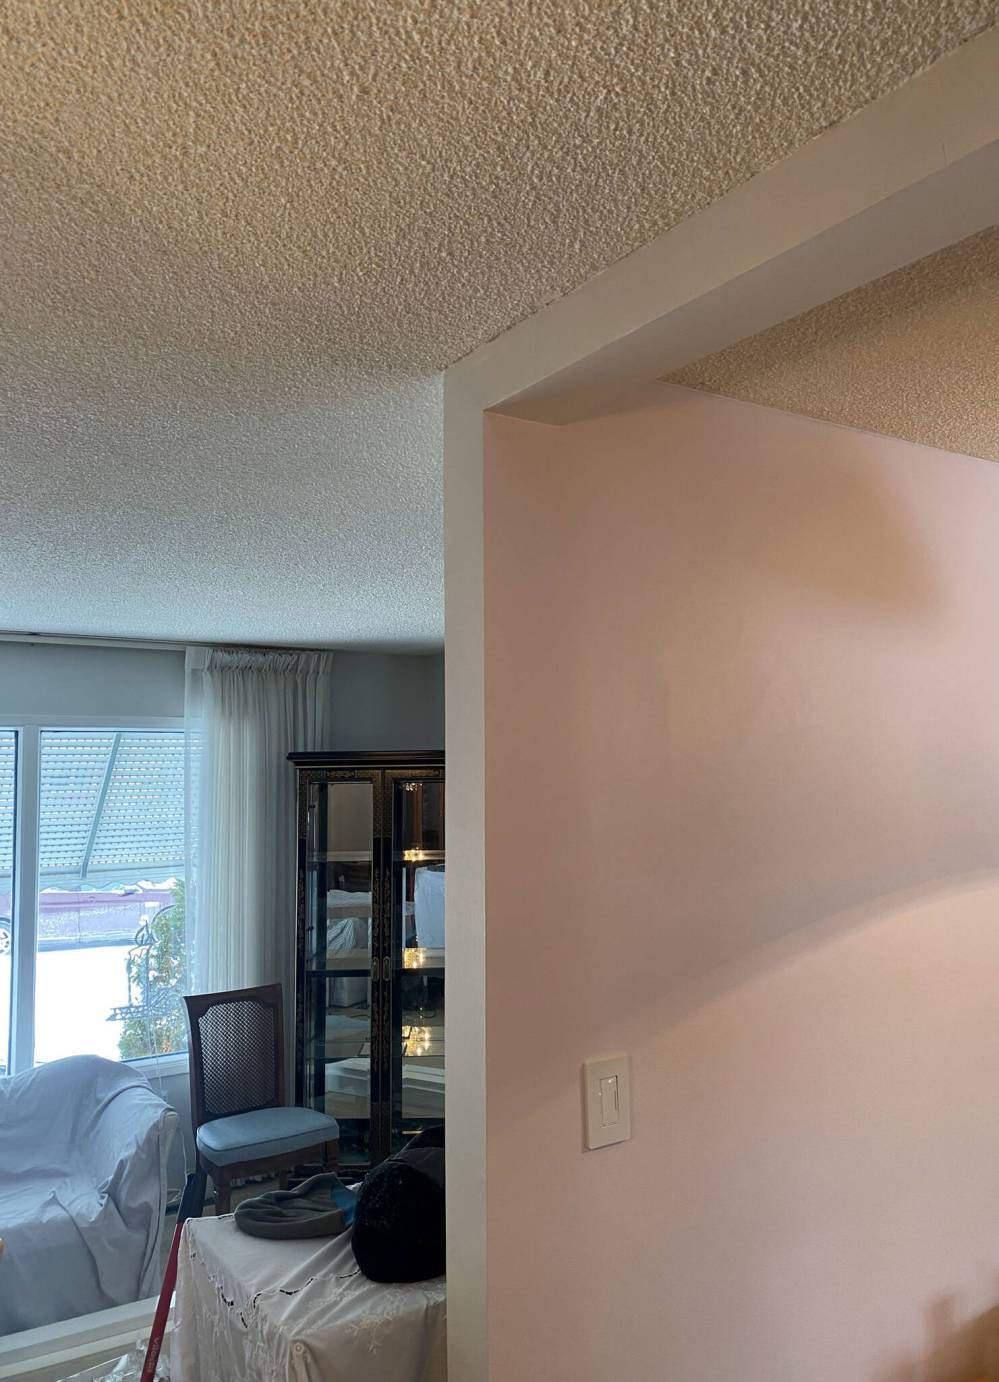
To avoid this lacklustre attempt at concealment, I suggested a slender faux beam could be introduced along the ceiling between the main wall at the living room and the opposite wall at the back stairwell. By doing so, the line of the old wall would be retained along the ceiling and conveniently negate the need to fill in the area with stipple patch.
This plan was accepted, and the wall-removal process began by extracting the drywall. Fortunately, the revealed wiring was isolated towards the ceiling. The faux beam could now also serve as a framed conduit to re-route the dining-room light-fixture wiring towards the kitchen side of the living-room wall.
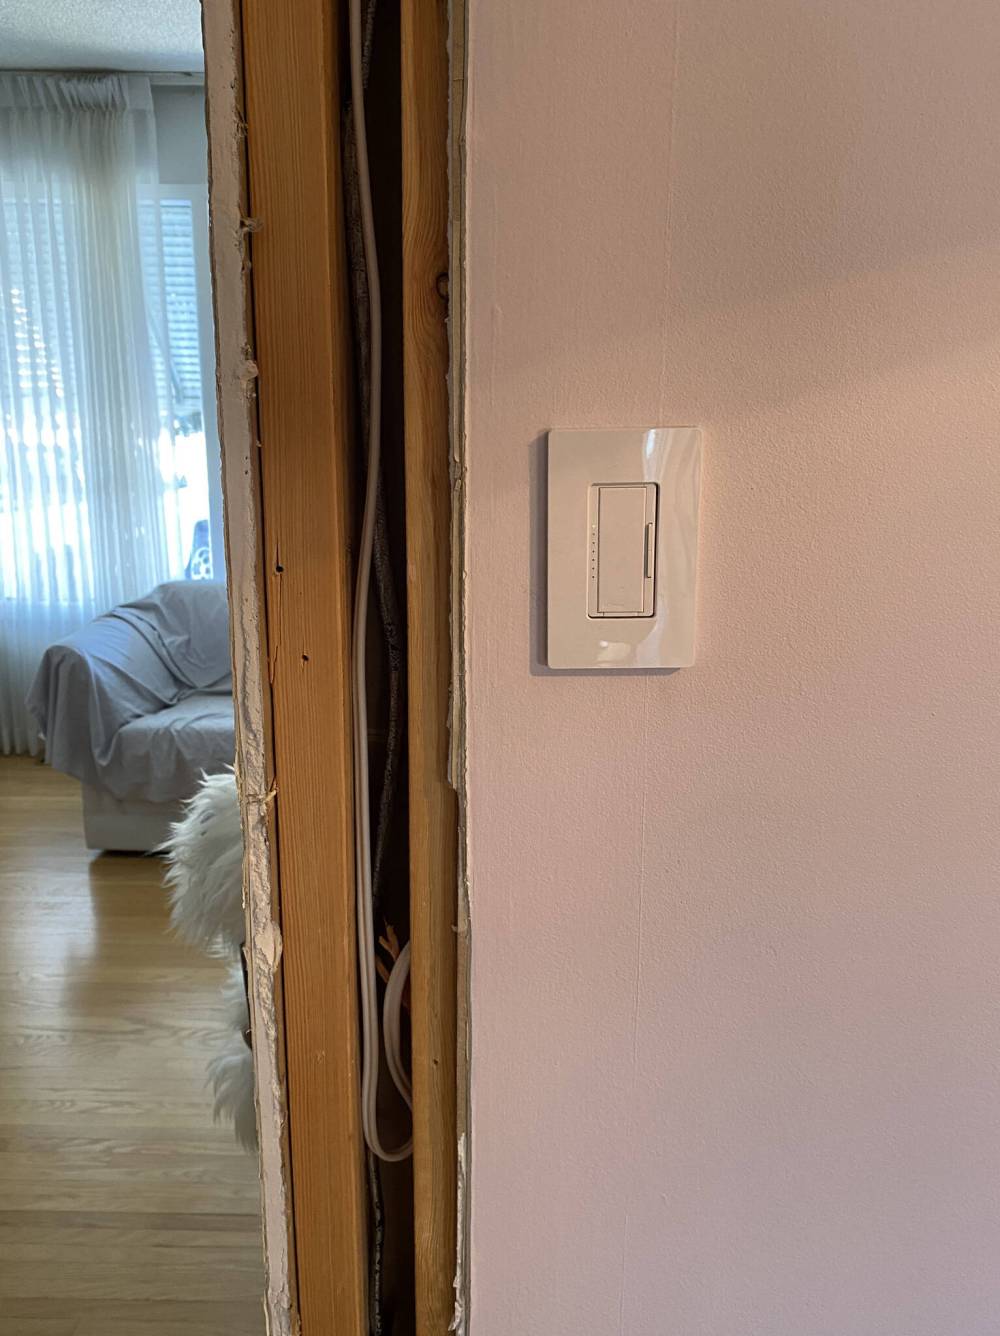
The dimmer switch for the dining-room light fixture was relocated once the wall was removed.
Once the wiring was in place and the dimmer-switch relocation was completed, the exposed framing was sheathed with drywall, taped and mudded with corner bead along all outer 90-degree edges. The surfaces were sanded and the newly drywalled surfaces were then primed and painted to match the existing colours on all walls.
With the wall gone, the sub-floor along the area where the old wall’s base plate had been fastened was filled with plywood to match the elevation of the neighbouring floors in both the kitchen and adjacent dining room.
Although it remained an eyesore for a couple of days, the homeowners truly enjoyed the openness the wall elimination provides. And as the vinyl plank was laid along this area, and the sub-floor “fix” disappeared, the space came to life, as though that L-wing never existed.
The sought-after open-concept feel in this smaller house made the living room, kitchen and dining room combination seem much bigger, which validates the decision to remove the wall. Moreover, the vinyl flooring is continuous, with no seams anywhere.
The decision to remove the wall before vinyl installation began was the only timeline that could yield favourable results. Just imagine how dissatisfied the homeowners would have been had they chosen to remove the wall after the vinyl went in. This is why it is always such a good idea to ponder impending renovations at some length.
Photos by Marc LaBossiere / Free Press
A faux beam was introduced along the ceiling between the main wall of the living room and the opposing wall at the back entry.
Once the vinyl was fully installed throughout the main floor, new bolder baseboards were also introduced along every wall. The vinyl flooring upgrade proved extremely successful, and the homeowners are ecstatic with the results.
For me, the wall removal is the most satisfying aspect of this project. Not only is the area now wide-open, but the faux beam also successfully does its job by separating the stippled ceilings, avoiding a stipple patch that surely would have been a visual regret forever. Kudos to the clients for properly thinking things through prior to commencement of this project!
RenoBoss.Inc@outlook.com
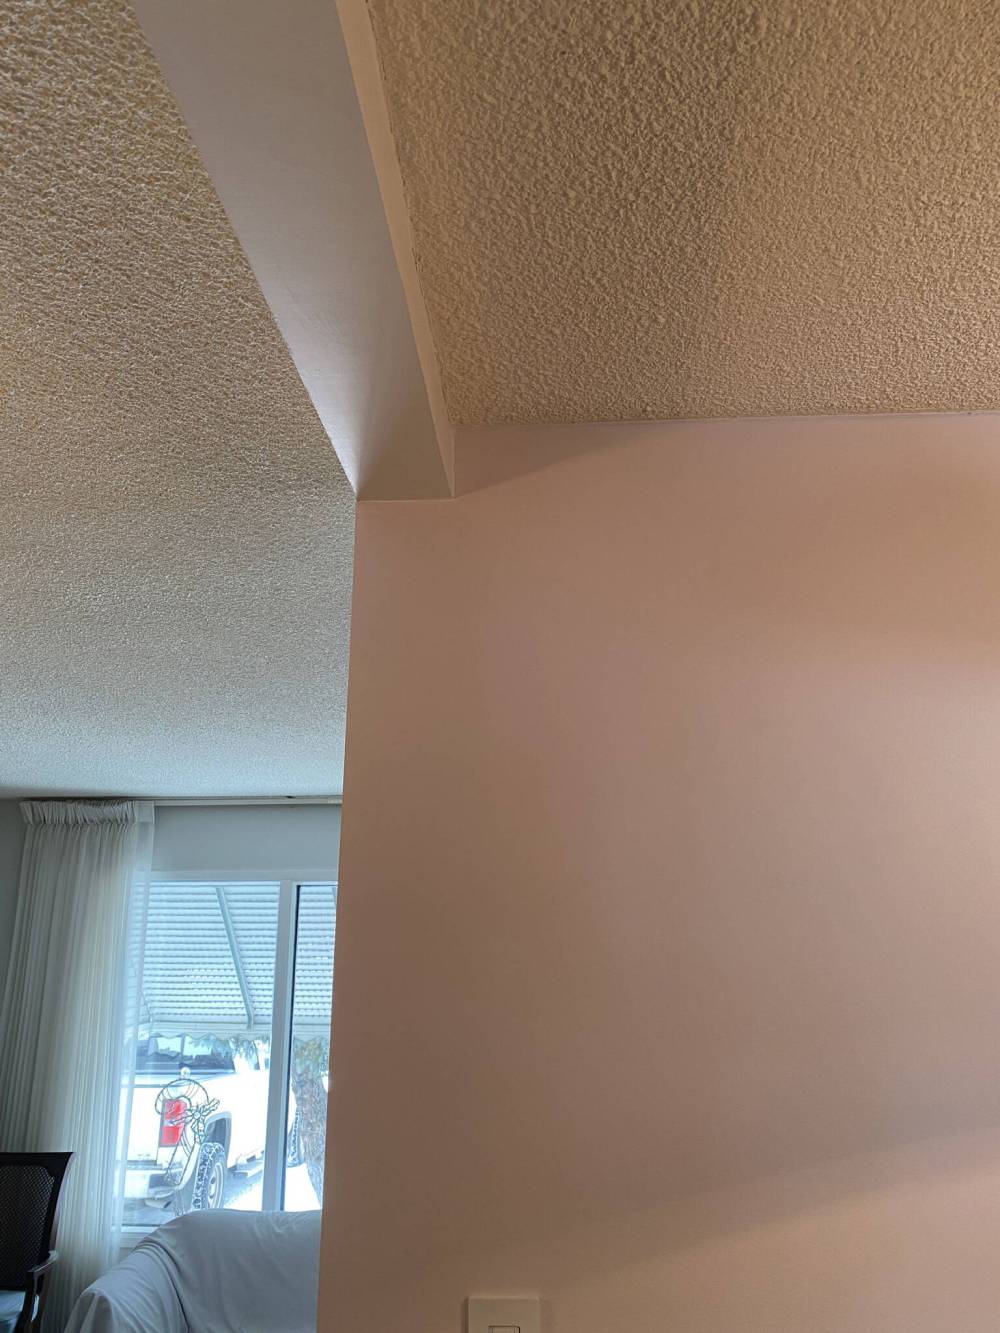
The faux beam provides a conduit for wiring and negates an unsightly attempt at matching stipple along the ceiling.
Marc LaBossiere / Free Press
The ‘L’ of the dividing wall between the dining room and kitchen is removed to create an open-concept feel.