
Your moment of baking zen A little bit of science and a lot of patience are the only magic required
Read this article for free:
or
Already have an account? Log in here »
To continue reading, please subscribe:
Monthly Digital Subscription
$0 for the first 4 weeks*
- Enjoy unlimited reading on winnipegfreepress.com
- Read the E-Edition, our digital replica newspaper
- Access News Break, our award-winning app
- Play interactive puzzles
*No charge for 4 weeks then price increases to the regular rate of $19.00 plus GST every four weeks. Offer available to new and qualified returning subscribers only. Cancel any time.
Monthly Digital Subscription
$4.75/week*
- Enjoy unlimited reading on winnipegfreepress.com
- Read the E-Edition, our digital replica newspaper
- Access News Break, our award-winning app
- Play interactive puzzles
*Billed as $19 plus GST every four weeks. Cancel any time.
To continue reading, please subscribe:
Add Free Press access to your Brandon Sun subscription for only an additional
$1 for the first 4 weeks*
*Your next subscription payment will increase by $1.00 and you will be charged $16.99 plus GST for four weeks. After four weeks, your payment will increase to $23.99 plus GST every four weeks.
Read unlimited articles for free today:
or
Already have an account? Log in here »
The most important rule of baking?
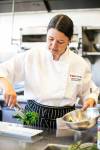
“Patience with yourself,” says Richard Warren, a pastry chef and baking instructor at Red River College Polytech.
“It’s not as easy as they make it look on TV and part of the learning is making mistakes along the way.”
Unlike cooking, where results can be manipulated on the fly, baking requires a mix of accuracy and feel that takes time to develop.
“It really is a relationship between science and intuition,” he says.
MIKAELA MACKENZIE / FREE PRESS ‘(Baking is) not as easy as they make it look on TV and part of the learning is making mistakes along the way,’ says pastry chef and RRC Polytech baking instructor Richard Warren.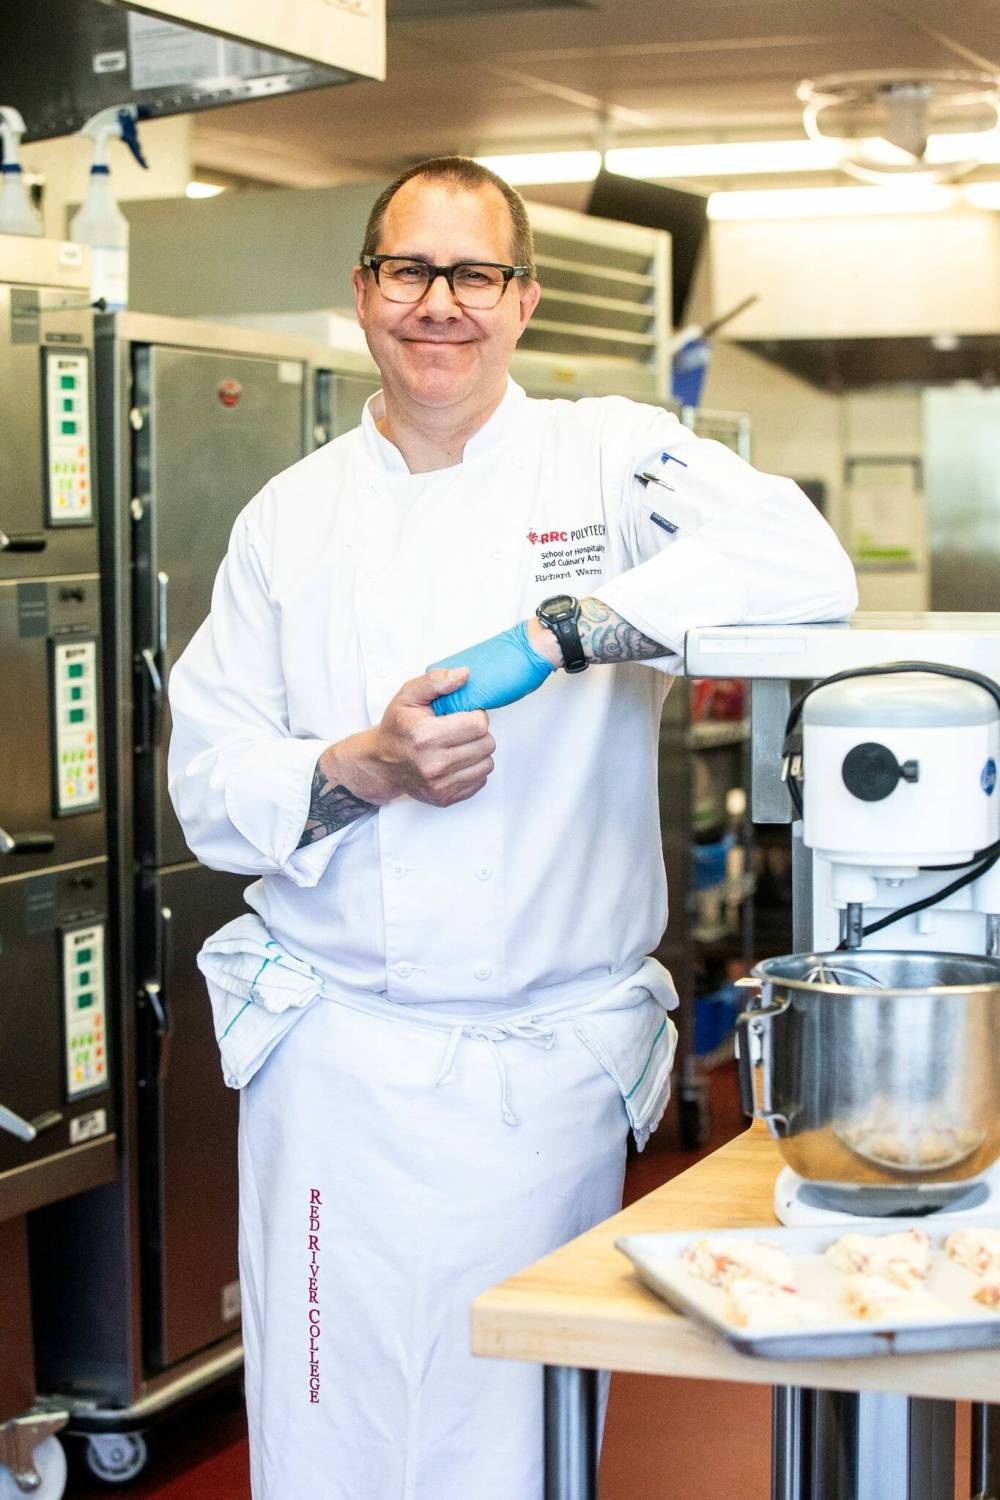
Warren describes his career path as a classic restaurant-industry tale: upon realizing he “wasn’t post-secondary material,” he got a job as a dishwasher, was promoted to prep cook and decided to enrol in culinary school. Cooking wasn’t necessarily a passion, but he enjoyed the process and the people he met in commercial kitchens.
“The people are weird and bizarre, and I can relate to that,” Warren says with a laugh.
He later moved into sweets and worked as a pastry chef at the Fort Garry Hotel before joining Red River eight years ago. Warren teaches technical baking skills while underlining the importance of building confidence through practice.
“I was once in the position of a student, where I had never made bread, I had never made a pie dough. I’m no different than you, I just have more experience doing it,” he says.
Ingredients
Most baking recipes rely on the same foundational ingredients, which trigger chemical reactions when combined correctly and at the right ratios. This delicate balance makes it difficult to substitute baking ingredients.
Flour: Provides structure and absorbs liquid. Gluten, a protein found in wheat, is activated when flour is hydrated and worked, creating elasticity and a chewy texture.
Liquid: Hydrates dry ingredients. Water and milk are common baking liquids. Eggs add hydration when raw and structure when baked.
Fat: Tenderizes. Butter, oil, lard and shortening are common baking fats. (Fun fact: shortening got its name because fat shortens long gluten strands, says Warren.)
Leavening agent: Creates lightness and lift. Chemical leaveners include baking soda and baking powder, which produce carbon dioxide. Yeast is a biological leavener that consumes sugar to produce carbon dioxide and alcohol. Mechanical leavening adds air by whipping or creaming.
Sugar: Sweetens, tenderizes and extends shelf-life. Sugar is hygroscopic, meaning it pulls moisture from the air, which helps baked goods stay soft.
Salt: Enhances flavour and texture. While it might be tempting to omit, salt, even in small quantities, is an important baking ingredient because it slows yeast production and allows for deeper flavour development.
Measuring
Beyond repetition, the easiest way to improve your baking is by measuring things accurately.
MIKAELA MACKENZIE / FREE PRESS Weighing flour is the best way to guarantee the outcome.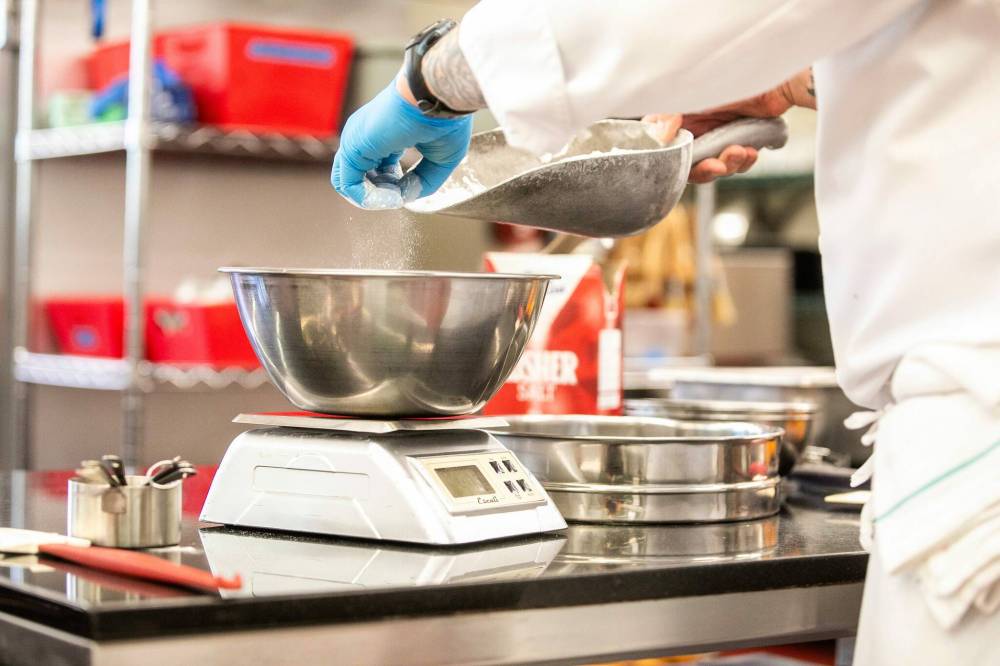
“Doing it by weight is the best. Then there’s no room for error. If all (of us) grabbed a cup of flour, I’m sure there would be a variance of probably 40 per cent,” Warren says.
Dry ingredients, such as flour, tend to settle which can make volume measurements (millilitres, cups, tablespoons and teaspoons) inaccurate. If you scoop a cup of flour directly out of the bag, for example, there’s a good chance you’ll end up with more than one cup’s worth of flour because the product has settled.
Using a scale to measure dry ingredients by weight (grams or ounces) ensures you’re doling out the same amount as called for in a recipe.
MIKAELA MACKENZIE / FREE PRESS Work butter into the flour with your hands until pea-sized pieces remain.
Liquids and small amounts of dry ingredients are typically measured by volume.
If you don’t have a scale, the best way to measure dry ingredients by volume is by spooning the product into a measuring cup and leveling it off with a knife, Warren says.
Mixing
Overzealous mixing can result in tough pastry and tight dough.
“When it comes to scones, biscuits and pie dough, the main mistake is overmixed dough. Put down the scraper and walk away,” Warren says.
After measuring, he recommends sifting dry ingredients together to reduce lumps and, therefore, the amount of mixing required. Sifting also helps evenly distribute chemical leaveners and flavourings, such as spices.
MIKAELA MACKENZIE / FREE PRESS Dry ingredients should be sifted together to remove lumps and distribute components evenly.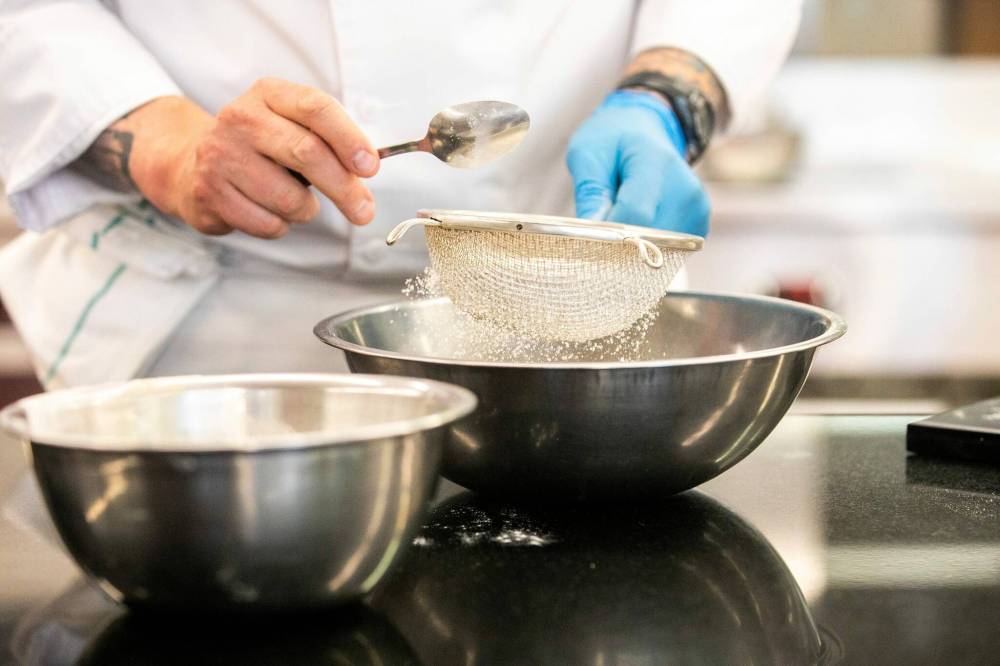
When mixing by hand, add the wet ingredients into the dry ingredients. When using a stand or electric mixer, add dry into wet for even mixing and more control.
For pastries — which have a higher fat content and lower gluten development — cold butter should be cubed and “cut in” to the flour using your hands, a pastry cutter, utensils or a food processor until pea-sized chunks remain. To avoid creating unwanted gluten, only mix and fold until the pastry just starts to hold together.
MIKAELA MACKENZIE / FREE PRESS Avoid overmixing when making scones.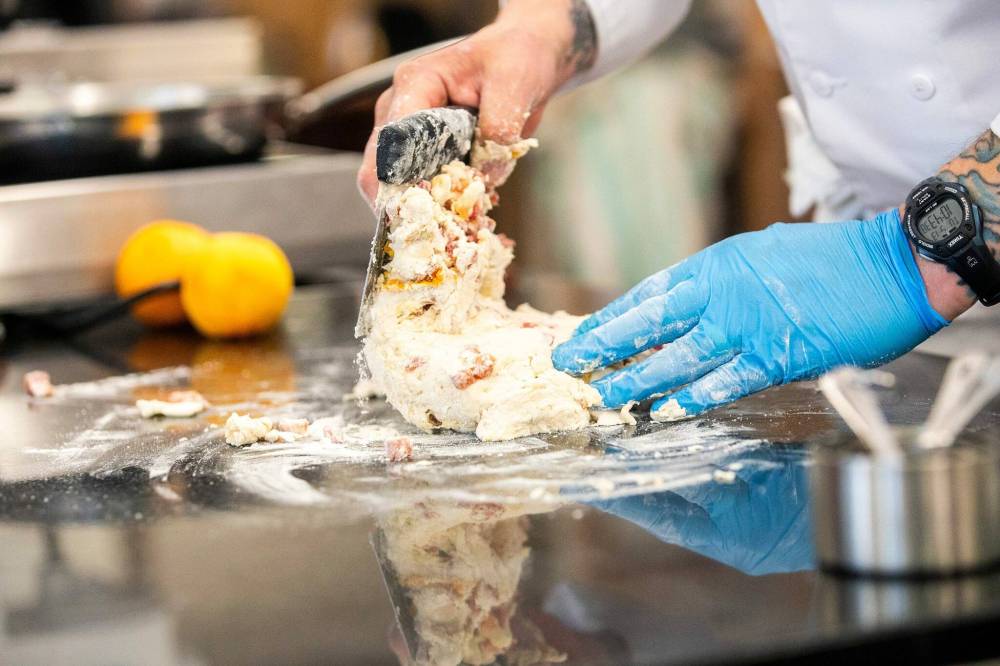
Yeasted doughs, such as breads, require kneading to incorporate air and encourage good gluten development. Dough can be kneaded at low speed in a stand mixer fitted with a dough hook or by hand.
MIKAELA MACKENZIE / FREE PRESS Once the added liquid is no longer visible, stir in dried cranberries and orange zest.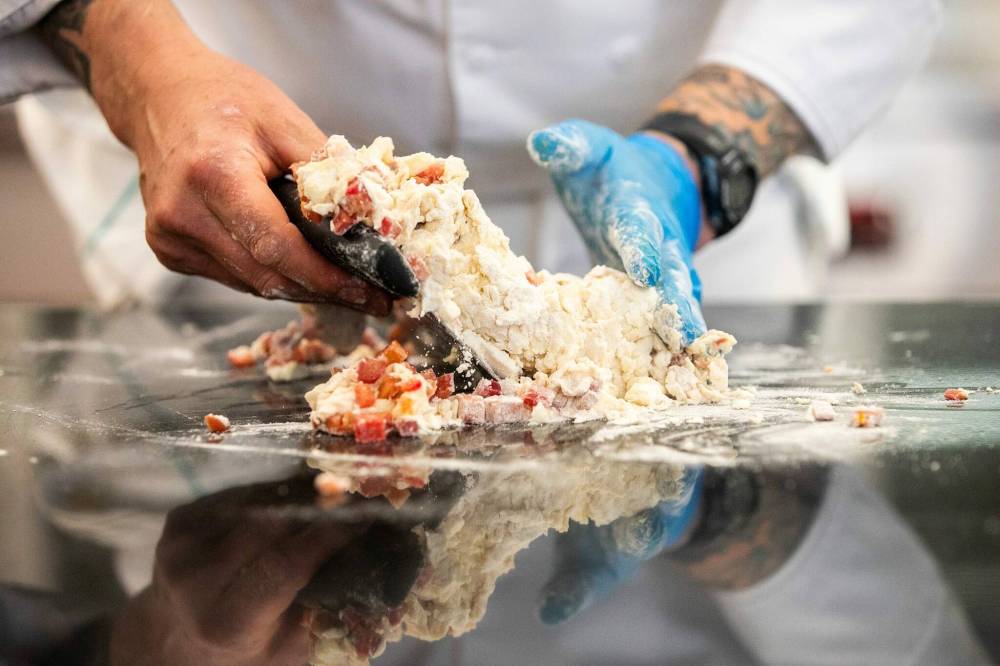
If kneading by hand, use your palms to push the dough forward and back, alternating hands. Dough is thoroughly kneaded if it springs back without sticking when pressed.
Resting and rising
Give your dough (and your hands) a break after mixing.
Resting non-yeasted dough for a short amount of time (10 or so minutes) allows the flour to properly absorb the liquid and lets the gluten strands relax, making the dough easier to work with.
MIKAELA MACKENZIE / FREE PRESS Roll out to a 3/4-inch thick round disc, about 8 to 10-inches in diameter.
Yeasted dough needs time to rise or proof, which is the visible result of yeast producing carbon dioxide. Dough can be proofed on the counter or in the fridge, typically until it has doubled in size.
Overproofing happens when dough is left to rise for too long, resulting in overextended gluten strands and a weak structure.
MIKAELA MACKENZIE / FREE PRESS Cut the dough disc into eight wedges and place on a parchment-lined sheet pan. Rest in the fridge for 20 minutes.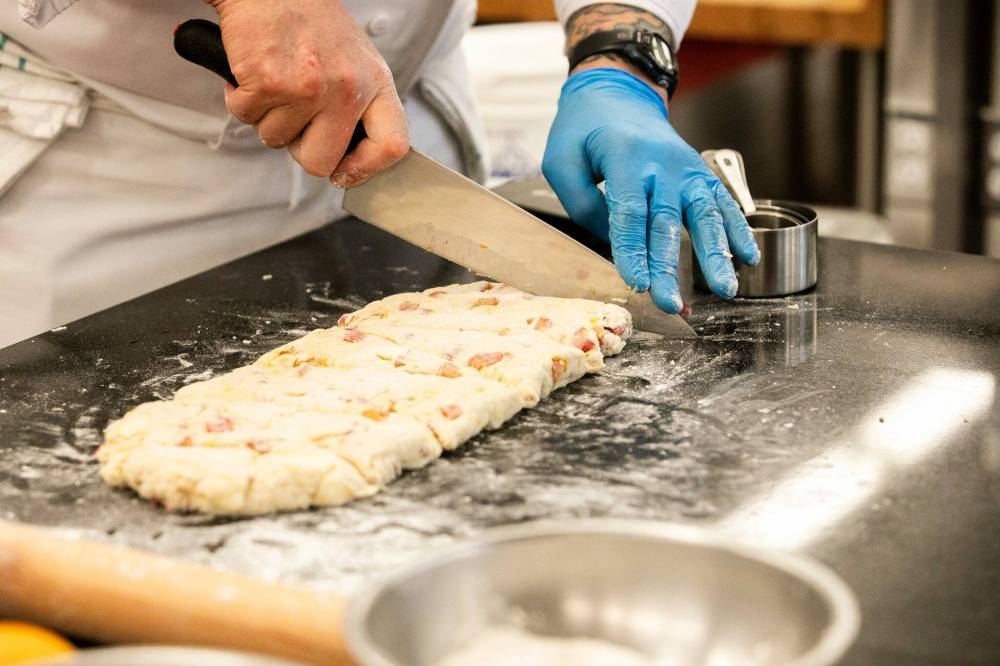
Temperature, season and altitude can all impact rise time.
“It’s a different animal than making a cookie,” Warren says of making yeasted dough. “People shy away from it because it can be quite intimidating and because it does behave very differently. Bread is a longer process, but for me, personally, it’s more rewarding.”
Again, practice and patience are key.
Baking
After all that measuring, mixing and waiting, it’s time to relinquish those precious creations to a hot oven.
Warren advises keeping a close eye on products in the oven to avoid overbaking. Pay attention to visual cues included in recipes. Batter can be tested for doneness by inserting a toothpick into the centre of the cake; if it comes out cleanly, it’s ready.
MIKAELA MACKENZIE / FREE PRESS Hot out of the oven: cranberry orange and cardamom buttermilk scones.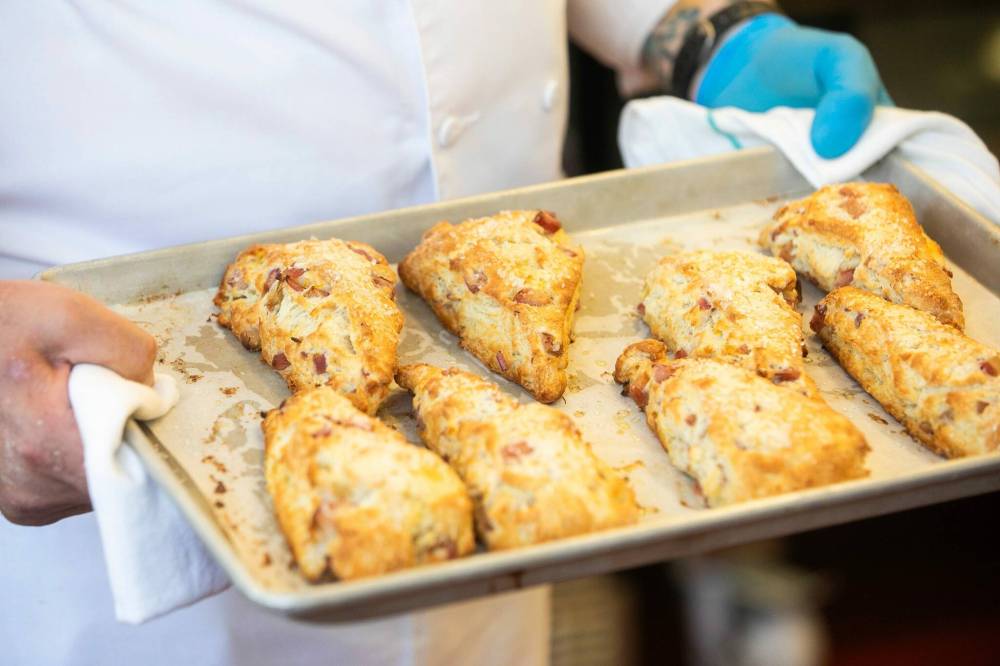
Recipe
Cranberry Orange and Cardamom Buttermilk Scones
Ingredients
450 g (3 2/3 cups) bread flour
60 g (5 tbsp) granulated sugar
5 g (1 tsp) salt
25 g (1 tbsp, plus 2.5 tsp) baking powder
2 g (1 tsp) cardamom, ground
150 g (2/3 cup) unsalted butter, cold
1 egg
235 g (1 cup) buttermilk
250 g (2 cups) dried cranberries
Zest of 1 orange
Scone glaze
30 ml (2 tbsp) whipping cream
20 g (1 tbsp) granulated Sugar
Orange flat icing
250 g (2 cups) icing sugar
60 ml (1/4 cup) juice from orange above
2 g (1 tsp) cardamom, ground
Note: This recipe was originally made with fresh rhubarb. See ingredients and directions for that version below.
Directions
Sift dry ingredients together.
With your fingers, work cold butter into the dry ingredients until it’s the size of peas or hazelnuts.
Whisk buttermilk and egg together. Make a well in the centre of the dry ingredients and add the egg and buttermilk. Mix dry ingredients together until the liquid is no longer visible. Stir in dried cranberries and orange zest.
You will see lots of unmixed flour in the bowl and that’s OK. The dry bits will get mixed in through the folding process. The dough will transform from a very shaggy to a more cohesive mixture with visible chunks of butter.
Place ingredients on the table and “fold” together until the dough is workable, about eight to 10 turns or until the dough resists gently when tugged on from side to side. Let rest for 10 minutes on the counter.
Roll out to a 3/4-inch thick round disc, about 8 to 10-inches in diameter.
Cut the dough disc into eight wedges and place on a parchment-lined sheet pan with space between each scone. Rest in the fridge for 20 minutes.
Mix sugar and whipping cream together to make glaze.
Remove scones from the fridge, brush with glaze and bake at 350 F until golden brown and baked through. Approximately 9-12 minutes.
Mix icing sugar with orange juice. Spread over warm scones and allow to dry slightly before serving or storing.
Optional rhubarb directions
250 g (2 cups) fresh rhubarb
38 g (3 tbsp) granulated sugar
5 whole green cardamom pods, cracked

Dice fresh rhubarb about 1/2-inch and crack open cardamom pods with a knife.
Place a sauté pan on medium-high heat, add rhubarb, sugar and cardamom pods. Cook for 2 to 3 minutes, until the rhubarb softens, releases some juices, but still holds its shape.
Remove from heat and place rhubarb in the fridge to cool down. Substitute cooked, cooled rhubarb with cranberries in the recipe above.
This is the final class of our Homemade Cooking School Series. Visit winnipegfreepress.com/homemade to find previous classes and more Free Press cooking content.
eva.wasney@winnipegfreepress.com

Eva Wasney has been a reporter with the Free Press Arts & Life department since 2019. Read more about Eva.
Every piece of reporting Eva produces is reviewed by an editing team before it is posted online or published in print — part of the Free Press‘s tradition, since 1872, of producing reliable independent journalism. Read more about Free Press’s history and mandate, and learn how our newsroom operates.
Our newsroom depends on a growing audience of readers to power our journalism. If you are not a paid reader, please consider becoming a subscriber.
Our newsroom depends on its audience of readers to power our journalism. Thank you for your support.
Related Articles
From finding a butcher to that final pinch of salt, RRC Polytech chef Jordan Carlson shares best practices on meat cookery


History
Updated on Tuesday, November 18, 2025 6:49 PM CST: Adds photo