Sweet science
It's not difficult to turn your kitchen into a kid-approved candy-manufacturing plant
Advertisement
Read this article for free:
or
Already have an account? Log in here »
To continue reading, please subscribe:
Digital Subscription
One year of digital access for only $1.44 a week*
- Enjoy unlimited reading on winnipegfreepress.com
- Read the E-Edition, our digital replica newspaper
- Access News Break, our award-winning app
- Play interactive puzzles
*Billed as $5.77 plus GST every four weeks. After 52 weeks, price increases to the regular rate of $19.95 plus GST every four weeks. Offer available to new and qualified returning subscribers only. Cancel any time.
To continue reading, please subscribe:
Add Free Press access to your Brandon Sun subscription for only an additional
$1 for the first 4 weeks*
- Enjoy unlimited reading on winnipegfreepress.com
- Read the E-Edition, our digital replica newspaper
- Access News Break, our award-winning app
- Play interactive puzzles
*Your next Brandon Sun subscription payment will increase by $1.00 and you will be charged $17.95 plus GST for four weeks. After four weeks, your payment will increase to $24.95 plus GST every four weeks.
Read unlimited articles for free today:
or
Already have an account? Log in here »
Hey there, time traveller!
This article was published 21/10/2009 (6102 days ago), so information in it may no longer be current.
Candy-making is a science, and if you’re crazy about sweets, the weeks leading up to Halloween just might bring out the mad scientist in you.
If you’re equipped with the right manual, that is.
Field Guide to Candy (Quirk Books, $19.95) by San Francisco pastry chef and food writer Anita Chu, is the pocket-sized catalyst that can drive you forward in your quest to know all you can about sweets: the history of where they came from, how to identify them, and more importantly, how to create them in your own kitchen.
But how does a former Berkeley student with a background in engineering end up writing about candy? What started out as a hobby became a passion, and the need to know more led her to school.
"I decided to go to a cooking school called Tante Marie’s Cooking School, in San Francisco, and I took the professional pastry course there and got my certificate," says Chu. "And then I decided I really enjoyed it, so I took on a full-time job at a bakery in Oakland called the Bittersweet Chocolate Café."
Life in the bakery was very different from the office job she had held down before school. "The hours were quite different and it was quite physical, but it was one of the best years of my life," she says.
The owners of the café imported chocolate from around the world. "I tried different chocolate bars from everywhere," she says. "It was so much fun to experiment with all that different chocolate."
That opportunity to explore the world of chocolate served her in good stead. Chu had already written Field Guide to Cookies when the publisher approached her about writing her new book. And while she had done some candy-making at school, researching this book was another education all on its own.
"What I learned is that there is a real science to it. You can follow certain principles and when you really understand them, you will be able to predict results," she says. "A lot of candies have a lot of similar techniques in making them. And once you figure them out, you can apply them and make a lot of different candies."
Along with the science of candy, Chu learned something about popular brand-name candy as well, and that led to the question: Can I do this at home? Like any good scientist, Chu did find a few limits to what could be done. She discovered that historically, early manufacturers had also taken a scientific approach.
"A lot of them developed very specialized equipment, so there was lot of innovation back then. It was neat to look into the ingenuity and the engineering that went into these.
"My editor would ask me to make certain candies. Can you make jelly beans? No, I don’t think I can make this at home. Can you make M&Ms? No, I don’t think I have that special machine that puts on the candy shell!"
If you want to experiment with making candy, Chu says the one tool you should invest in is a candy thermometer. She also says to be fearless. Be relentless in your scientific pursuit and don’t give up, especially when learning techniques such as tempering chocolate.
"Don’t be afraid to keep experimenting in the kitchen," she says. "Some of the things do take a little bit of practice, but you do them a couple of times and you get used to them."
Your inner mad scientist doesn’t need academic credentials — just an understanding of the basics about sugar and chocolate.
"I try to simplify the science down to the essentials. You don’t need a chemistry degree to do it," says Chu. "If you just get it to the right temperature, it will work. One of the things we want to do with this book is show people that anybody can make candy at home."
You can order Field Guide to Candy at http://irreference.com/field-guide-to-candy/. Visit Anita Chu at her blog at http://dessertfirst.typepad.com.
Here are three recipes from Field Guide to Candy, used with permission of Quirk Books. The photos are by Tucker & Hossler.
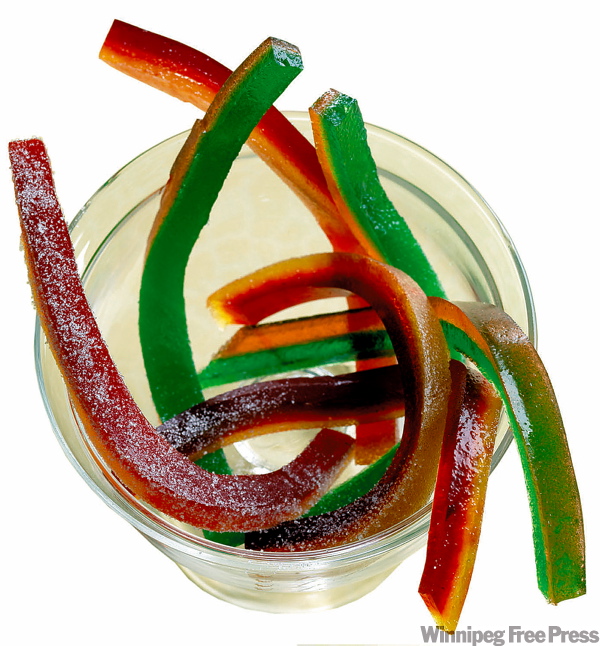
Gummy worms
175 ml (12 tbsp) unflavored gelatin, divided in two
125 ml (1/2 cup) sugar, divided in two
Few drops cherry flavouring, or other flavouring
Few drops food colouring
1. Set aside a 5-by-9-inch loaf pan.
2. Combine 85 ml (6 tbsp) gelatin, 60 ml (1/4 cup) sugar, and 75 ml (1/3 cup) water in a saucepan.
3. Cook over medium heat until the mixture comes to a boil and the gelatin and sugar have dissolved.
4. Stir in flavouring and food colouring.
5. Pour mixture into the pan. Refrigerate until firm.
6. Repeat the process with a different flavour and colouring. Pour the mixture on top of the first layer of gelatin and refrigerate until firm.
7. Use a sharp knife to cut into thin, multicoloured gummy worms. Yield: About 20 gummy worms.
Storage: Store in an airtight container for up to 1 week.
Variation: Sour gummy worms — Roll worms in sherbet powder for tangy, sour gummy snacks.
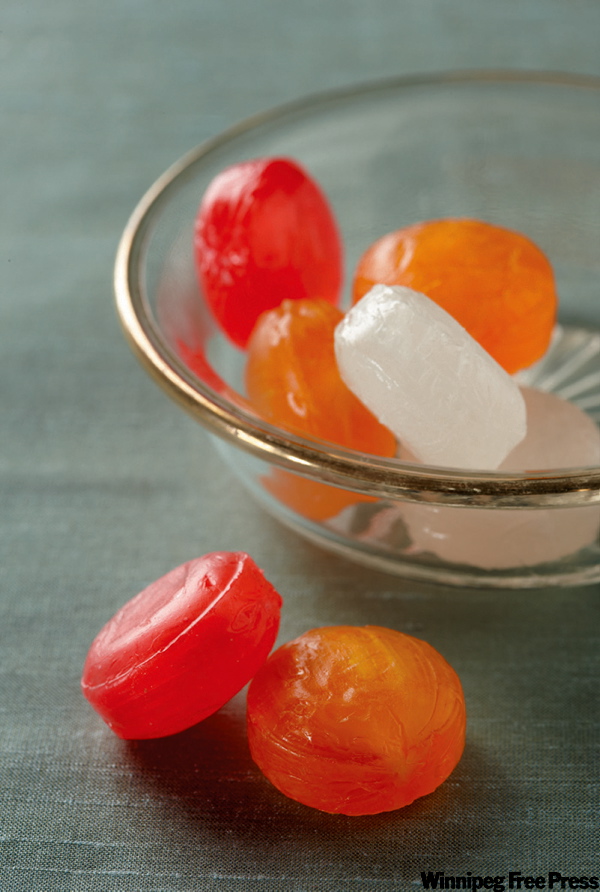
Hard candy
750 ml (3 cups) sugar
250 ml (1 cup) light corn syrup
2 ml (1/2 tsp) peppermint extract or other flavouring extract
Food colouring, if desired
1. Coat a marble slab or baking sheet with cooking spray. Lightly spray a pair of kitchen shears.
2. Combine sugar, corn syrup, and 50 ml (1/4 cup) water in a saucepan. Bring to a boil over medium heat and continue cooking to 150C (300F), hard crack stage, without stirring.
3. Remove from heat and stir in peppermint extract and food coloring.
4. Pour candy onto the marble slab or baking sheet. Let it cool for 5 minutes, using a metal spatula to flip it so that it cools evenly.
5. When the candy has cooled enough to handle but is still hot, pull it with your hands, stretching and gathering until it becomes opaque and satiny.
6. Pull the candy into a long rope about 1.25-cm (1/2-inch) thick. Cut candy into bite-size pieces using the shears. Place pieces on a cool baking sheet to cool.
7. When the pieces have fully cooled, wrap in cellophane.
Yield: About 60 candies
Storage: Store in an airtight container in a cool, dry place for up to 2 months.
Chocolate-dipped potato chips
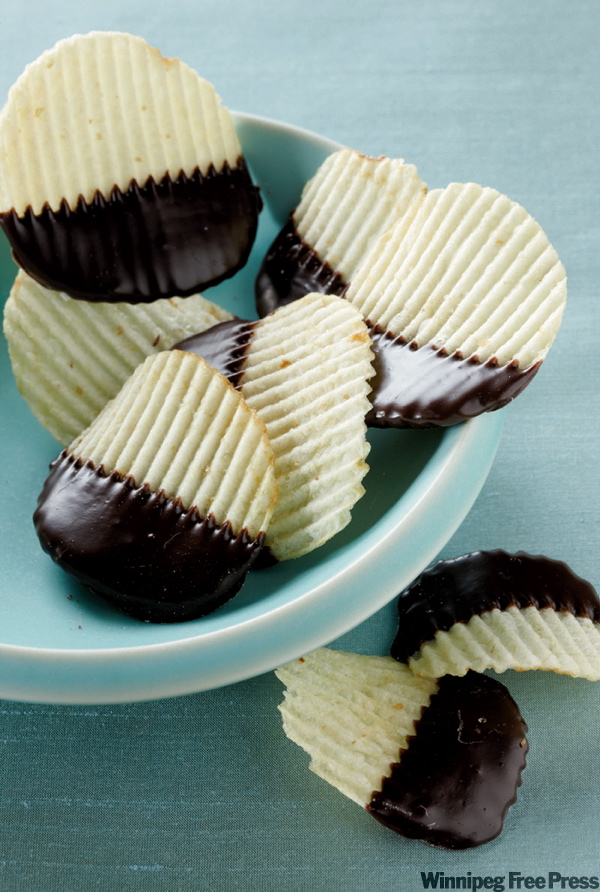
750 ml (3 cups) potato chips
500 g (16 oz) semisweet or coating chocolate
1. Line a baking sheet with parchment or wax paper.
2. Melt and temper the chocolate (see below), or simply melt the coating chocolate.
3. Dip chips in the chocolate.
4. Let excess chocolate run off before placing dipped chips on the baking sheet.
5. Let chocolate set before serving or dipping in a contrasting chocolate, drizzling with more chocolate, or serving.
Yield: About 40 chips
Storage: Store at room temperature for up to 3 days.
Watch your temper!
How to temper chocolate
1. Finely chop 760g to 1 kg (11/2 to 2 lbs) of chocolate. Smaller amounts make it difficult to control the temperature changes.
2. Place two-thirds of the chocolate in a double boiler or metal bowl set over a saucepan of simmering water. Make sure the bottom of the bowl does not touch the water. Place a candy thermometer or digital thermometer in chocolate and stir frequently with a rubber spatula.

3. Do not let the temperature of the chocolate exceed 120F for dark chocolate or 105F for milk or white chocolate. When the chocolate has fully melted, remove the bowl from heat. Wipe the bottom of the bowl to get rid of any condensation.
4. Stir in the remaining third of the chocolate a little at a time. Let it melt before adding more.
5. Let the chocolate cool to about 82F. If it is warmer, keep stirring and let it cool some more. If it is cooler, begin reheating in the next step.
6. Once the chocolate is 82F, place it back over simmering water. For dark chocolate, reheat to 88F to 91F. For milk or white chocolate, reheat to 85F to 87F. Remove the bowl from heat once you have reached the right temperature.
7. Spread a small spoonful of chocolate on a piece of wax paper. If it looks dull or streaky, re-temper the chocolate, starting with step 2. If it dries quickly with a glossy finish and no streaks, the chocolate is in temper. Use before it cools and sets.