

Reinstalling above-ground pool a tricky job
Advertisement
Read this article for free:
or
Already have an account? Log in here »
To continue reading, please subscribe:
Monthly Digital Subscription
$0 for the first 4 weeks*
- Enjoy unlimited reading on winnipegfreepress.com
- Read the E-Edition, our digital replica newspaper
- Access News Break, our award-winning app
- Play interactive puzzles
*No charge for 4 weeks then price increases to the regular rate of $19.95 plus GST every four weeks. Offer available to new and qualified returning subscribers only. Cancel any time.
Monthly Digital Subscription
$4.99/week*
- Enjoy unlimited reading on winnipegfreepress.com
- Read the E-Edition, our digital replica newspaper
- Access News Break, our award-winning app
- Play interactive puzzles
*Billed as $19.95 plus GST every four weeks. Cancel any time.
To continue reading, please subscribe:
Add Free Press access to your Brandon Sun subscription for only an additional
$1 for the first 4 weeks*
*Your next subscription payment will increase by $1.00 and you will be charged $16.99 plus GST for four weeks. After four weeks, your payment will increase to $23.99 plus GST every four weeks.
Read unlimited articles for free today:
or
Already have an account? Log in here »
Hey there, time traveller!
This article was published 19/08/2017 (3065 days ago), so information in it may no longer be current.
Once the harshness of winter has become a distant memory and the warmth of spring has come, it’s difficult to contain the anticipation for hot summer days. At Boss Ranch, this invariably means two things: lots of yard work and getting a jump on prepping the above-ground pool. This year was no different. It didn’t take long for the water temperature of my pool to increase under the July sun — many an afternoon would be spent poolside, with a refreshing escape from the heat only a few steps away.
After a long hard day of deck building with my girlfriend, Carole, sometime in mid-July, we came home with the full intention of swimming until dusk. Unfortunately for us, the pool had other plans. The metal pool wall had rusted at the return and the wall finally let go, opening up like a zipper. The blue liner barely held due to the pressure of the water and looked like a balloon ready to pop. After a controlled drain of the pool, I promptly began researching and inquiring about replacement parts, and the length of time it would take to ship them here. Carole and I wanted to salvage as much of the summer as possible.
A couple of weeks ago, I wrote about the lengthy process of oiling my decks, due to this unforeseen poolside downtime. I am happy to report that following the August long weekend, poolside fun at Boss Ranch has returned. It’s difficult to explain how the pool was fixed, without first discussing how it initially was installed. So, bear with me.
In 2009, it had come to my attention a local couple was selling their 15- by 30-foot oval, above-ground pool. The price was right and in an afternoon, their pool was disassembled and packed into the box of my pickup. The pool came with the required basics: the pool structure itself, metal pool wall, pump, filter and a few other extras. It always is necessary to replace the liner when putting up an above-ground pool, because it would be impossible to line up existing cutouts in the liner.
The location for the pool on my property was established, based on a deck design I had rendered previously (the decks at the back of the house would be built after the above-ground pool was in place). Getting the pool up the first time was tedious and time-consuming — but overall, not all that difficult. Within a couple of days, the pump was sucking water into the skimmer, and pumping it out of the return, as it was supposed to.
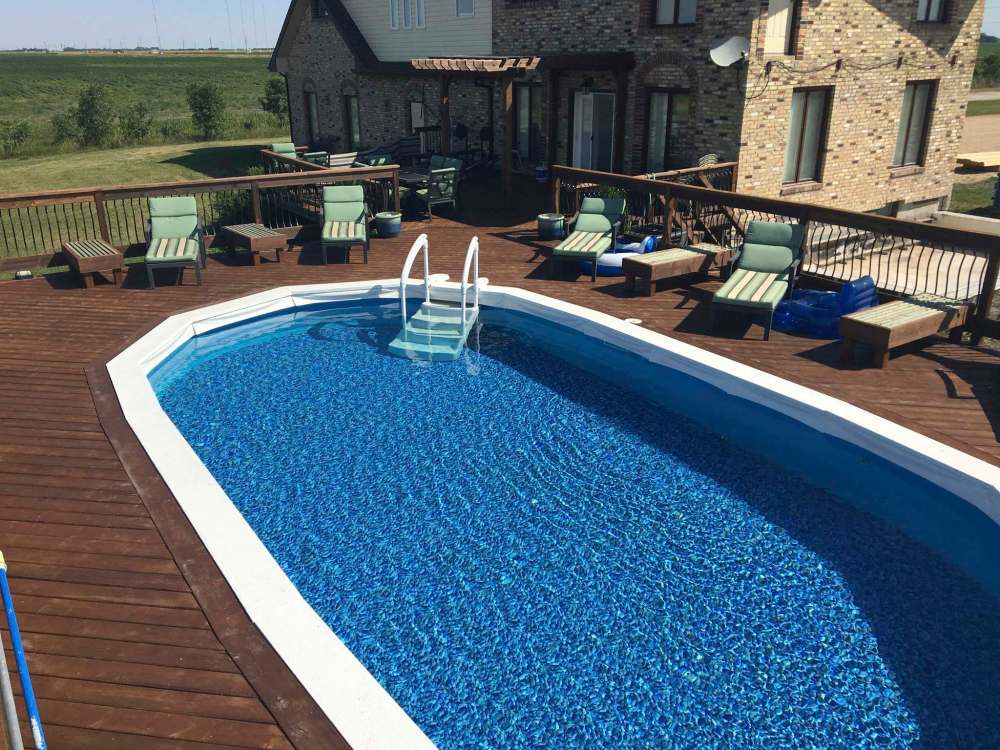
I had always envisioned building the decks slightly higher than the top cap of the above-ground pool structure, so that pool edges, flush with the deck, would serve to border the pool. To achieve this, I designed custom steel supports, fabricated with 3/8ths steel. These hangers, 48 in all, mount to a pictured-framed joisting system which precisely envelops the oval of my pool, allowing for 14 custom pool edges made from mitred two-by-12 spruce boards, coated in white Stone Affects paint, to rest flush with the top-decking of the pool deck. The design truly makes my above-ground look and feel like an in-ground pool. We enjoyed it every summer for eight years, nearly maintenance-free.
With the metal pool wall failure last month, a few reinstallation issues arose. Because the pool was erected before the deck was built around it, much of the deck frame-work (including the 48 custom pool edge hangers) would render the new metal pool wall installation slightly more challenging. But first, the old pool wall and liner had to go. The custom pool edge caps were removed (which I do every winter anyway), and then the top caps of the actual pool structure were removed, one by one. This revealed the top edge of the wall, where long nylon clips held the liner along the perimeter. I was able to shimmy the clips off under the steel hangers. I numbered each piece as it was removed, to facilitate reinstallation. With the clips off, the liner — which had been draped over the top of the pool wall — was removed completely. To hasten the old wall removal, it was cut into several sections, using a reciprocating saw with a high-grade steel blade. The remaining elements of the pool’s main structure would be salvaged for reuse.
Luckily, the timeline worked in our favour. We had intended to oil the decks the weekend before the August long weekend (which we did), in the hope we could erect the new pool wall over that three-day period, provided the parts arrived in time. Charles Blomme of Oasis Leisure Centre, a tremendous help during the pool parts-finding ordeal, contacted me on the Tuesday before the August long weekend to say my parts had arrived and were ready for pick-up. So, we were a go for reinstallation, as planned.
Erecting a wall for an above-ground pool is a weather-dependent process — it can’t be achieved on a windy day. We were fortunate all weekend as there was just a slight breeze in the air. The wall was unravelled and the skimmer cut-out was located.
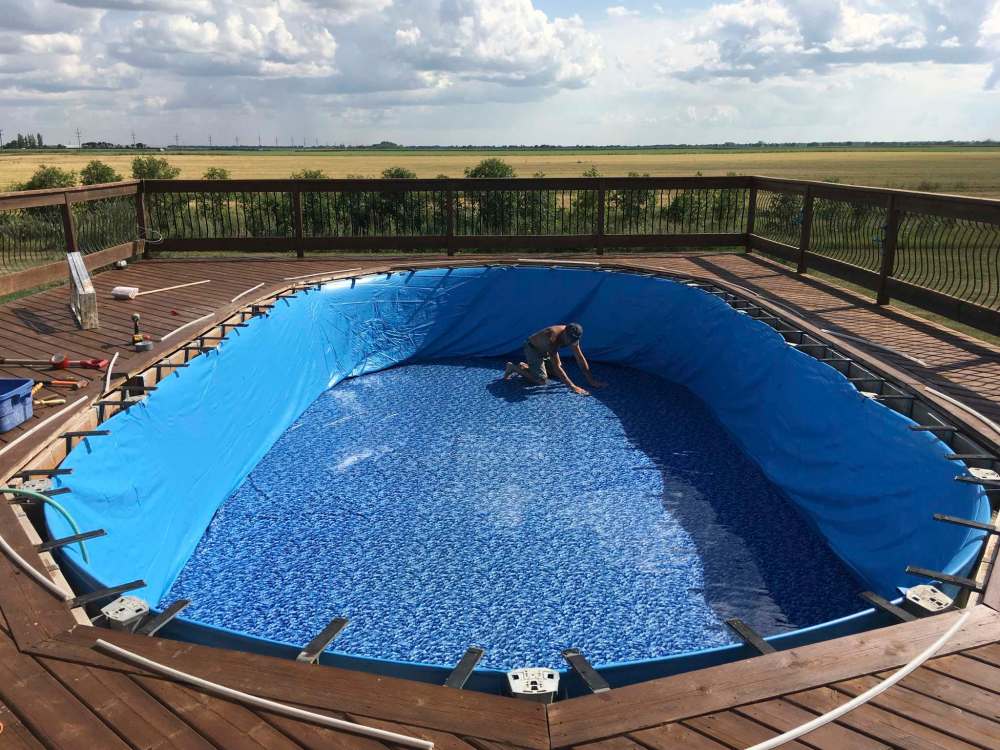
It was crucial that the skimmer location of the new wall match the position of the old wall, because the top decking had a cut-out for skimmer access. Once lined up, the wall was put into place slowly, along the perimeter of the 15- by 30-foot oval footprint of my pool area — roughly 125 feet of wall length. Each of the existing pool posts has a retaining clip at the top end and these were used to hold the wall in placed temporarily. Next, came the liner. It is very important to clear all loose stones and large grains of sand away from the base where the pool liner floor would rest, in order to minimize the potential for punctures, or a liner breach of any sort. Pool cove, an angled Styrofoam edge, was installed along the base of the entire metal wall perimeter to provide a slope from pool wall to floor.
Once the liner was aligned with the base of the pool wall, filling the pool began slowly, as I worked out any creases of the liner floor as the pool filled up. With about two inches of water in the pool, the liner was draped up and over the metal pool wall, securing it in place with the nylon clips. At the two-foot mark, I stopped the filling process briefly to cut the four holes required for the pool lights, which were recycled from the old pool. The lights were installed using gaskets and silicone. Filling the pool resumed, until the three-foot level. The skimmer and return were then installed, again with gaskets and silicone. When dealing with a liner, it’s always best to fill the pool just below where you need to cut. Because the water compresses the liner against and up the wall as it fills, this ensures the most accurate cuts.
The water continued to fill the pool until the level reached just below the top of the skimmer. During that time (roughly 36 hours in total), the pool liner walls were made taught, by pulling up gently on the liner and again using the nylon clips at the top of the metal pool wall to secure the liner as I went. The main clips at the top of each post were fastened tightly, and the top caps of the pool structure were positioned by carefully wedging each of them between the top of the metal wall, and the bottom of my custom pool edge supports, and then secured to the top of each post, forming a rigid top perimeter.
With the pool structure completely reinstalled, my white custom pool edges were set back into place and the pool stairs were placed into position and secured from below the deck. It then only took a few hours to install the new 1.5 HP pump, new sand filter and chlorinator. Once the pump was primed, the system was engaged and the water began to flow. Although I lost all sensation in my lower limbs, standing in the 10 C water during the reinstallation process, I knew that my solar heating system would get the pool water back up to acceptable temperatures in no time. And within a few days, the water was once again crystal-clear and a balmy 25 C.
The upside of all this? Knowing it actually is possible to fully dismantle my above-ground pool and reinstall it successfully, despite the many custom features that surround it. Oh… and once again being able to enjoy a cool, soothing swim on a hot sunny day — can’t forget to mention that!
BossEnterprise@outlook.com