

Decorative ceiling becomes focal point
Traditional materials match home's feel
Advertisement
Read this article for free:
or
Already have an account? Log in here »
To continue reading, please subscribe:
Monthly Digital Subscription
$0 for the first 4 weeks*
- Enjoy unlimited reading on winnipegfreepress.com
- Read the E-Edition, our digital replica newspaper
- Access News Break, our award-winning app
- Play interactive puzzles
*No charge for 4 weeks then price increases to the regular rate of $19.00 plus GST every four weeks. Offer available to new and qualified returning subscribers only. Cancel any time.
Monthly Digital Subscription
$4.75/week*
- Enjoy unlimited reading on winnipegfreepress.com
- Read the E-Edition, our digital replica newspaper
- Access News Break, our award-winning app
- Play interactive puzzles
*Billed as $19 plus GST every four weeks. Cancel any time.
To continue reading, please subscribe:
Add Free Press access to your Brandon Sun subscription for only an additional
$1 for the first 4 weeks*
*Your next subscription payment will increase by $1.00 and you will be charged $16.99 plus GST for four weeks. After four weeks, your payment will increase to $23.99 plus GST every four weeks.
Read unlimited articles for free today:
or
Already have an account? Log in here »
Hey there, time traveller!
This article was published 17/02/2018 (2846 days ago), so information in it may no longer be current.
Not a day goes by without an opportunity to acquire new knowledge. As a contractor, a client’s intended project sometimes offers up something new — either a variation to accustomed tasks or an entirely new approach altogether.
Recently, a decorative ceiling layout accomplished for my client Anthony Wlock had inspired me to revisit and ultimately modify design plans for my own decorative ceiling, which has become the highlight in the step-down dining room of the recently built two-storey addition on the south side of my house.
I had originally envisioned a random array of ceiling pot-lighting of various sizes — a starry night sky had been my inspiration. I quickly realized the house and its existing esthetics required a less contemporary approach — the flow from the existing space into the new dining area is better suited for traditional features, like those found throughout my home. As such, crown mouldings were essential to the “revised” plan. After having completed the Wlock ceiling, it dawned on me that a decorative ceiling, such as this, may also suit my aspirations.
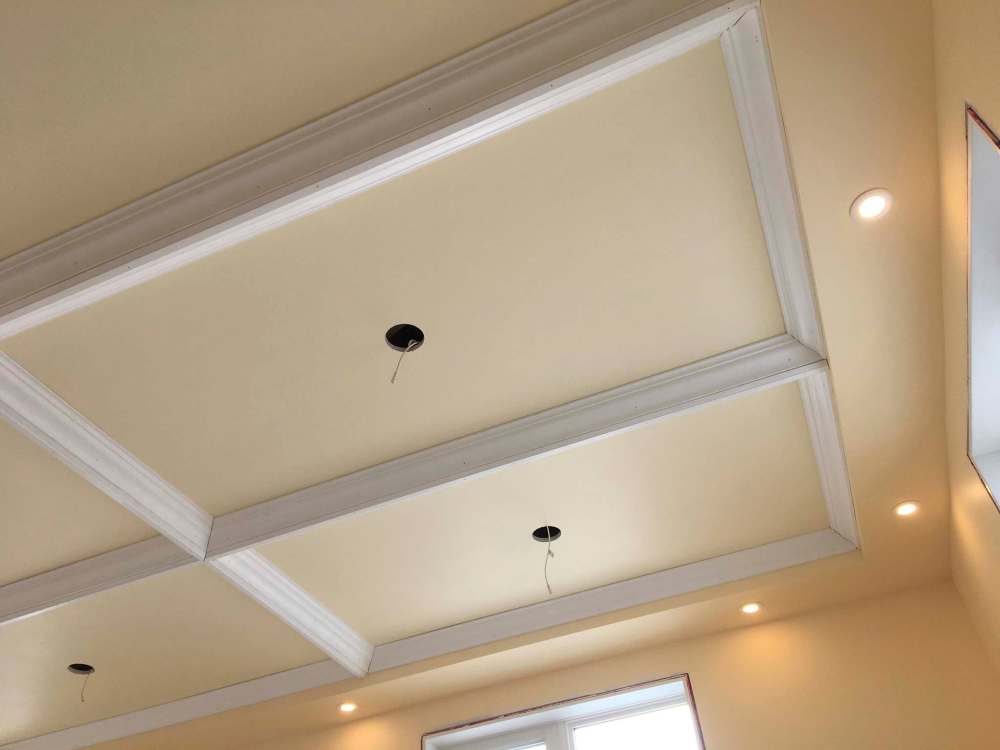
The sketching stage began and soon the final design was revealed: nine equal quadrants set within a boxed area along the perimeter, much like the Wlock ceiling, proved to be the most concise layout for the given 14-by-24-foot ceiling surface. And although the boxed perimeter would contain 14 evenly distributed three-inch LED pot lights, the main ceiling would also provide supplemental lighting — each of the nine quadrants would boast a four-inch LED pot light, centred within each respective quadrant and set within a rectangular ceiling medallion of similar proportions to the quadrant’s dimensions. It was an exciting prospect. I definitely had my work cut out for me.
Once the boxing was framed and drywalled, three-inch holes were cut on the undersides of the boxing in pre-determined locations for the intended 14 three-inch LED pot lights.
The intersecting quadrant beams were then carefully secured to the ceiling joists, at equal intervals. With the support beams in place, ceiling drywall was affixed within each quadrant — a four-inch hole was cut at the centre of each quadrant to provide electrical tie-in access for the four-inch LEDs. The taping, mudding and corner bead stage was then completed in a traditional manner, a series of five thin coats of mud. Unlike the process adopted for the Wlock ceiling, whereby the entire ceiling had been completed prior to painting it all one colour, my multi-coloured design steered me into painting the boxing and the walls, as well as the drywall within each of the quadrants, before adding the crown moulding. By doing so, I would eliminate having to tape off and edge every quadrant section, as well as the underside of the moulding adjacent to the walls.
The crown moulding installation stage requires precise measurements.
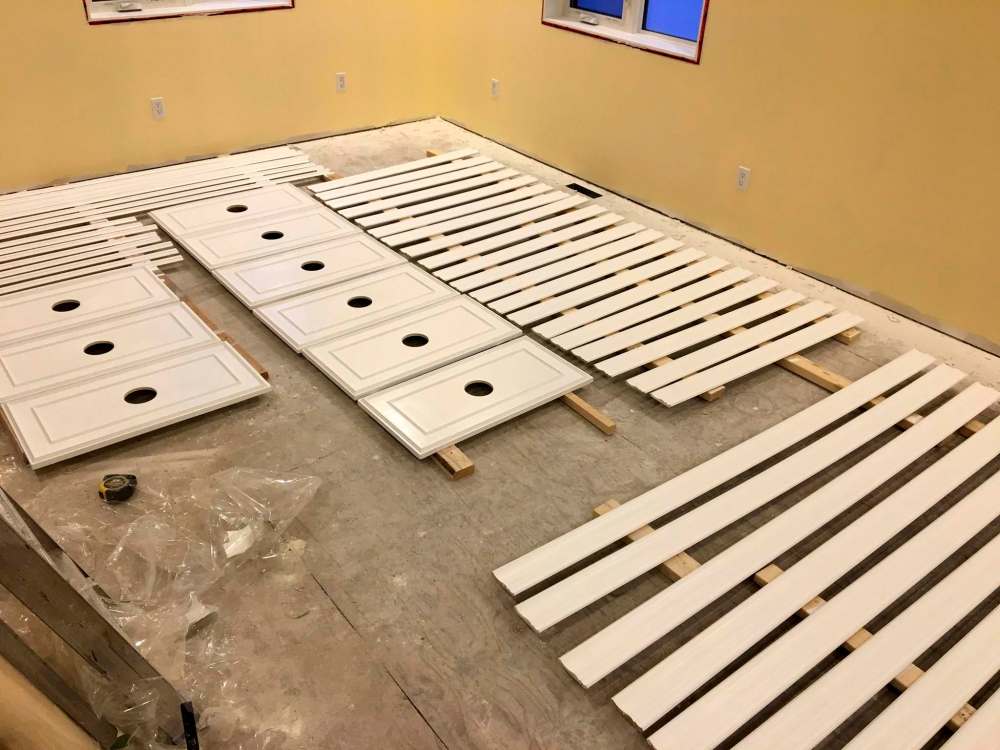
Rather than burden myself with a never-ending ritual of climbing a ladder, measurements for every piece of moulding was marked on every beam in big, black writing easily seen from floor-level. The first step was to pre-cut the right-sides of the crown moulding, at a 35.3-degree miter with a 30-degree bevel for an intended 45-degree horizontal cut, when crown moulding corners meet at 90-degrees.
Once all 36 pieces were right-side ready, the systematic left-side cuts were achieved by carefully measuring each piece according to the pre-determined measurements already marked on the beams. One-by-one, each of the sections of moulding were fastened to the ceiling and beam using Brad nails and my air-nailer until all nine quadrants were adorned with crown moulding. The undersides of the beams were then finished with other decorative moulding, which ties the quadrants together forming esthetically intersecting beams.
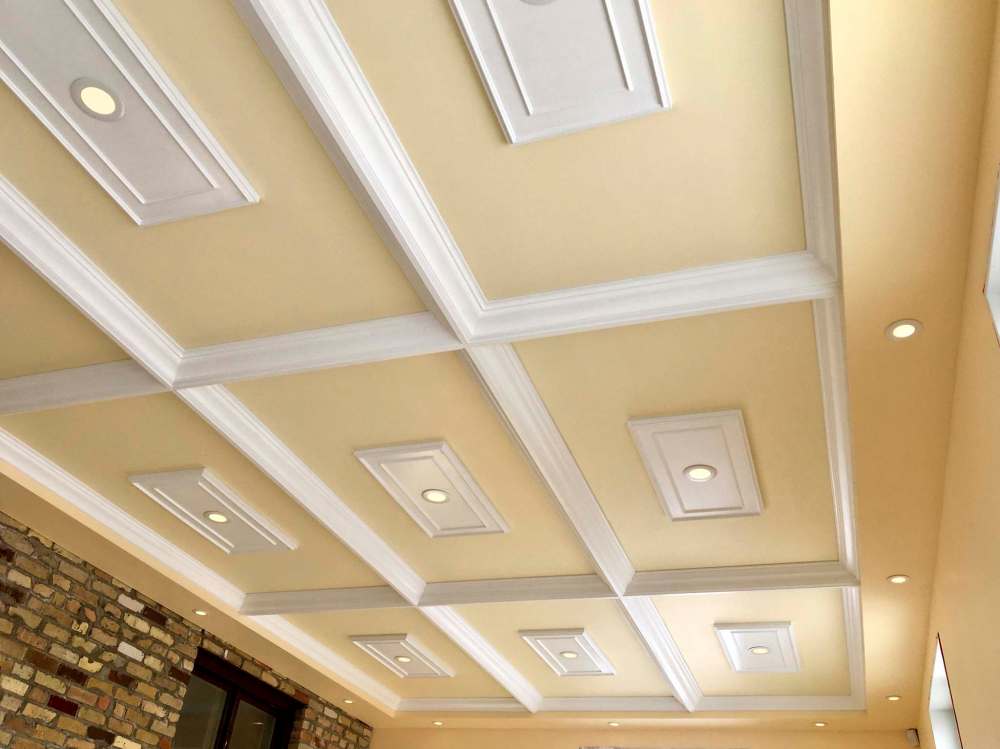
The medallions proved a bit more challenging. Although they already had a precut hole in the centre, the hole diameter did not accommodate the four-inch LED pot lights. As such, it was necessary to temporarily secure each medallion and drill out the proper-sized hole with a hole saw.
Permanently securing the medallions to the ceiling also presented an array of obstacles — in that they are being fastened to a ceiling, gravity would work against the process. And, accurately centring each medallion while working upside-down is as difficult as it sounds! I elected to secure the medallions using a quick-setting bonding agent (a fast-drying silicone-esque substance), along with a pattern of Brad nails. The ceiling was carefully pre-marked along a consistent edge in all quadrants. Once the bonding agent was the applied to the backside of a medallion, and with a clamp in hand, the medallion was slowly lifted into place by firmly pressing the medallion in all corners to ensure contact had been made with the ceiling along the entire perimeter of the medallion. The clamp was set inside the lighting hole of both the medallion and the ceiling, which always nearly lined up perfectly.
With clamp in place, six Brad nails were shot at an angle along the inner-flat side of the medallion to eliminate movement of the medallion as the bonding agent set. Within a few hours, all medallions were fastened to the ceiling.
The final step proved to be the most taxing — every visible joint where crown moulding corners met, when moulding or a medallion was adjacent to the pre-painted wall or ceiling drywall surface, every tiny nail hole as well as the underside moulding of the beams was carefully caulked. This process took well over six hours… and it was worth every minute! A final coat of white trim paint was applied over the caulked locations, no longer revealing an array of moulding sections and cross beams, but an entity unto itself.
The ceiling as a whole had come to life…
Once the paint had cured, the 23 LED pot lights were again set in place, and the lighting was engaged for the big reveal. I took a deep breath — this had been an intense project with so many unknowns.
Luckily, hard work had produced results greater than I had hoped. The perimeter-box LED lighting and each of three rows of ceiling quadrant LED lighting are individually controlled by fader switches, located within the dining room space, and at each of both entrances into the step-down dining area.
This should make it easy to set the mood for our first dinner party under this decorative ceiling, which was built using a combination of techniques, and acquired knowledge through a variety of experiences… I truly love my job!
BossEnterprise@outlook.com