Opt for versatile flooring
Whether it's ceramic, stone or vinyl ...
Advertisement
Read this article for free:
or
Already have an account? Log in here »
To continue reading, please subscribe:
Monthly Digital Subscription
$1 per week for 24 weeks*
- Enjoy unlimited reading on winnipegfreepress.com
- Read the E-Edition, our digital replica newspaper
- Access News Break, our award-winning app
- Play interactive puzzles
*Billed as $4.00 plus GST every four weeks. After 24 weeks, price increases to the regular rate of $19.95 plus GST every four weeks. Offer available to new and qualified returning subscribers only. Cancel any time.
Monthly Digital Subscription
$4.99/week*
- Enjoy unlimited reading on winnipegfreepress.com
- Read the E-Edition, our digital replica newspaper
- Access News Break, our award-winning app
- Play interactive puzzles
*Billed as $19.95 plus GST every four weeks. Cancel any time.
To continue reading, please subscribe:
Add Free Press access to your Brandon Sun subscription for only an additional
$1 for the first 4 weeks*
*Your next subscription payment will increase by $1.00 and you will be charged $16.99 plus GST for four weeks. After four weeks, your payment will increase to $23.99 plus GST every four weeks.
Read unlimited articles for free today:
or
Already have an account? Log in here »
Hey there, time traveller!
This article was published 24/11/2018 (2702 days ago), so information in it may no longer be current.
Some of my first DIY projects included tiling the kitchen backsplash and shower-stall walls of my first house, and the front entrance landing, too.
Short of choosing different tile colours and patterns, these initial tiling experiences revolved around ceramic tile and manual tools used to score the tile when cuts were required.
Nowadays, of course, my wet saw facilitates the cutting process, and a ceramic tile alternative, which has become more popular within the past few years, has made tiling even easier.

My current home has a plethora of tiling: some ceramic tile and a truckload of actual slate stone (I bought in bulk, at a great discount). Whether stone or ceramic, the process is quite similar; the sub-surface must be rigid and properly prepped, a strong bonding thinset is used to adhere the tile to the surface area and grout is applied to fill the gaps between tiles. Over time, any inconsistencies in rigidity (especially on tiled floors) will reveal grout and even full tile adhesion failures, which, on occasion, must be addressed.
Furthermore, ceramic or stone tile in kitchen flooring applications are not forgiving when glassware or dishes are dropped accidentally — the floor always wins.
During a kitchen remodel two years ago, my client Lynn Jarvis-Almonte had me prep the shell of her kitchen redesign before the cupboards and countertops would be installed. The old kitchen was gutted, a few services were rerouted, and the walls were prepped and painted just prior to installing the new flooring. Jarvis-Almonte chose a vinyl tile, which was the right choice for the space. The vinyl tiling process is much like the ceramic tiling process. The result, however, yields a much more forgiving surface. Unlike ceramics or stone, a vinyl tile’s surface has some give to it, which nearly eliminates the havoc which ensues from dropping a glass on a rigid kitchen floor. Furthermore, cutting vinyl tile can be easily achieved with a utility knife; I used my circular saw, which hastened the process.
To secure the vinyl tile to the sub-floor, a floor glue specific to vinyl was first trowelled onto the sub-floor and allowed to set for a short while, before a thin layer of the glue was trowelled onto the back of each vinyl tile and set into position on the floor. The process continued until the area was completed, and allowed to set without being disturbed until the next day. For this application, tiles were also cut to form baseboards around the entire perimeter. Once all tiles were rigid, grout was applied throughout. It is important to note that when installing vinyl tiling, both the glue and grout MUST be specific to vinyl tile — because vinyl tile can flex, the glue and grout must also be able to flex. Standard grout will fall apart, flake and chip away due to the slight compression of vinyl tiling.
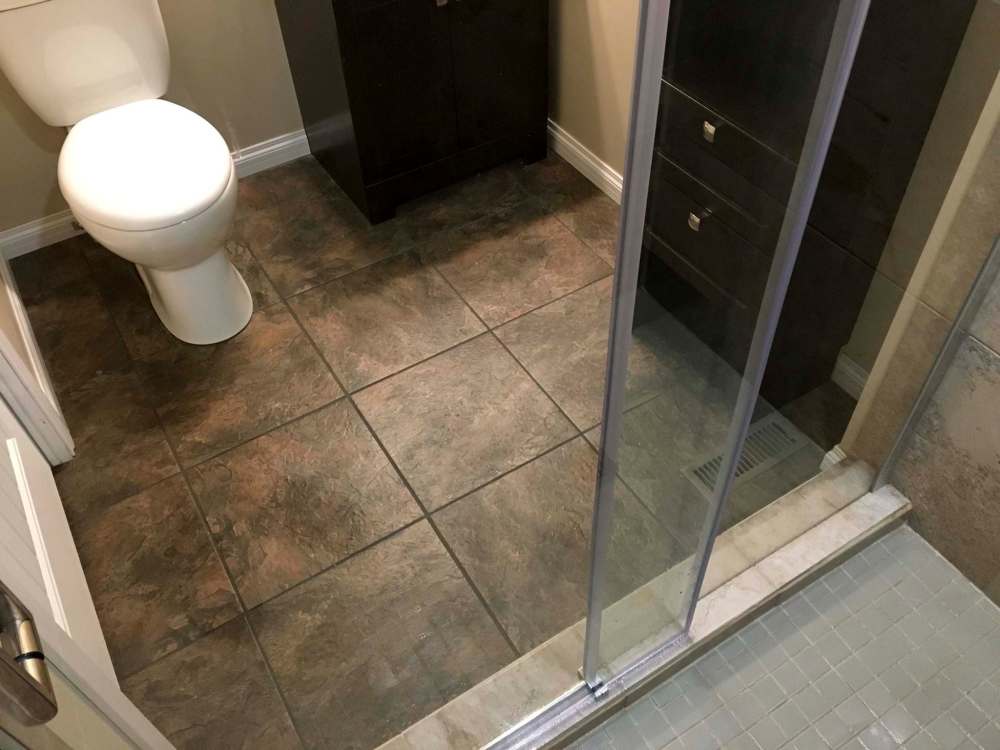
For another client, vinyl tiling was used in both the ensuite and main floor bathrooms of her home. Anne Hebert upgraded her two bathrooms last year. One of the bathrooms already had a vinyl tile that she loved, so it was installed in the other bathroom as well. For these applications, vinyl tiling was a great choice. The thin profile of the vinyl tile allowed the transition from bathroom flooring to the hallway and master bedroom respectively to remain almost perfectly level, whereas a ceramic tile would have introduced a slight rise in flooring elevation. Hebert loved her main bathroom floor tile, and introducing the same vinyl tiling to her ensuite made the most sense.

The colour and style options of vinyl tiling are endless. And, to my surprise, the square-footage cost of vinyl tiling can be very similar to that of ceramic tiles, dependent of course on tile selection, which can fluctuate drastically with any type of flooring, even when comparing one ceramic tile to the next.
Whether you choose ceramic tile, stone or vinyl, the installation process is quite similar, and fairly straight-forward. Your flooring is an extension of your style — it’s an aspect of your home you’ll notice every single day. So, how do you choose what type of tile to use? My best advice, find something you like and just go with it.
bossenterprise@outlook.com