No need to start with a clean slate
Matching vinyl helps solve challenge around expanding seating at dining-room table
Advertisement
Read this article for free:
or
Already have an account? Log in here »
To continue reading, please subscribe:
Monthly Digital Subscription
$1 per week for 24 weeks*
- Enjoy unlimited reading on winnipegfreepress.com
- Read the E-Edition, our digital replica newspaper
- Access News Break, our award-winning app
- Play interactive puzzles
*Billed as $4.00 plus GST every four weeks. After 24 weeks, price increases to the regular rate of $19.00 plus GST every four weeks. Offer available to new and qualified returning subscribers only. Cancel any time.
Monthly Digital Subscription
$4.75/week*
- Enjoy unlimited reading on winnipegfreepress.com
- Read the E-Edition, our digital replica newspaper
- Access News Break, our award-winning app
- Play interactive puzzles
*Billed as $19 plus GST every four weeks. Cancel any time.
To continue reading, please subscribe:
Add Free Press access to your Brandon Sun subscription for only an additional
$1 for the first 4 weeks*
*Your next subscription payment will increase by $1.00 and you will be charged $16.99 plus GST for four weeks. After four weeks, your payment will increase to $23.99 plus GST every four weeks.
Read unlimited articles for free today:
or
Already have an account? Log in here »
Hey there, time traveller!
This article was published 08/12/2018 (2505 days ago), so information in it may no longer be current.
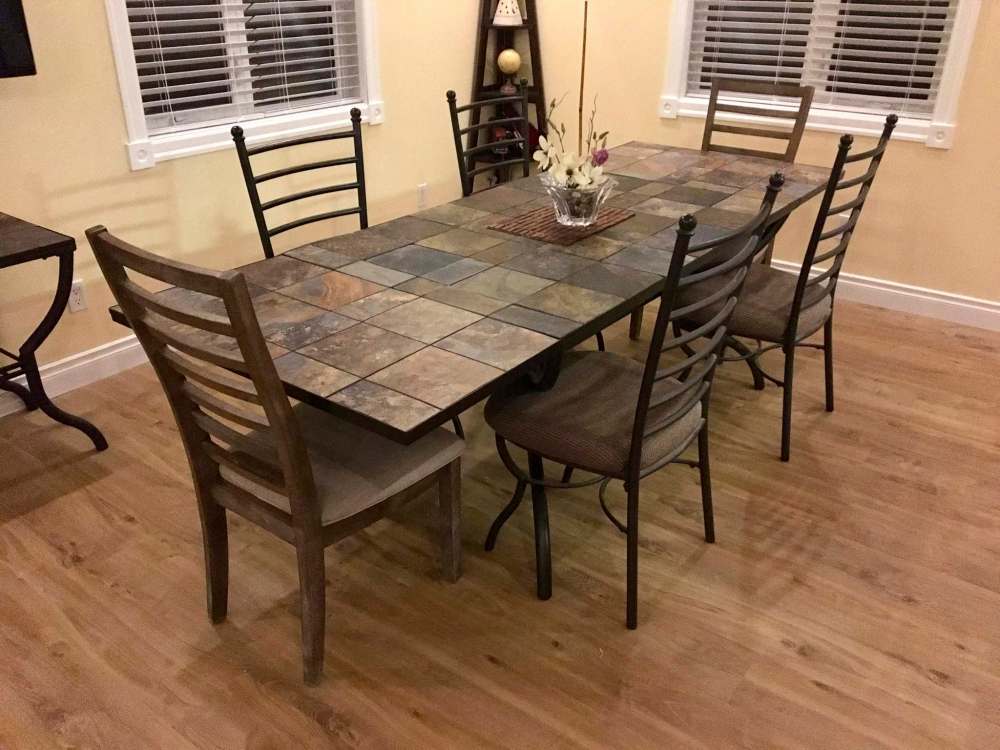
Once my new step-down dining room was completed, my intentions were always to increase the size of the dining-room table. In keeping with the theme throughout the house, I had hoped to purchase a larger version of my existing table, as well as acquire a few extra matching dining chairs while I was at it. To my dismay, that dining set had been discontinued a while back. What to do, what to do?
Rustic best describes my interior motif — plenty of natural materials and earth tones can be found throughout. My dining-room table and four chairs had been purchased 14 years earlier, during the first month after moving in. The table is made of dark metal frame, with topside slate stone set in a pattern of eight-by-eight, four-by-eight and four-by-four tile inserts. Matching end tables and a coffee table are also found in the living room, and a sofa table rests below the wall-mount fireplace adjacent the dining-room table in the step-down dining room. Although I entertained the possibility of replacing the dining set, this notion was quickly dismissed — I was torn at the idea of breaking the slate stone tabletop trend. The tables called Antigo were originally purchased at Ashley Furniture. And although the sofa table was available and recently purchased, I could not track down any other matching dining elements that would allow me to expand the seating capacity without introducing different chairs, and setting up a temporary fold-out table.
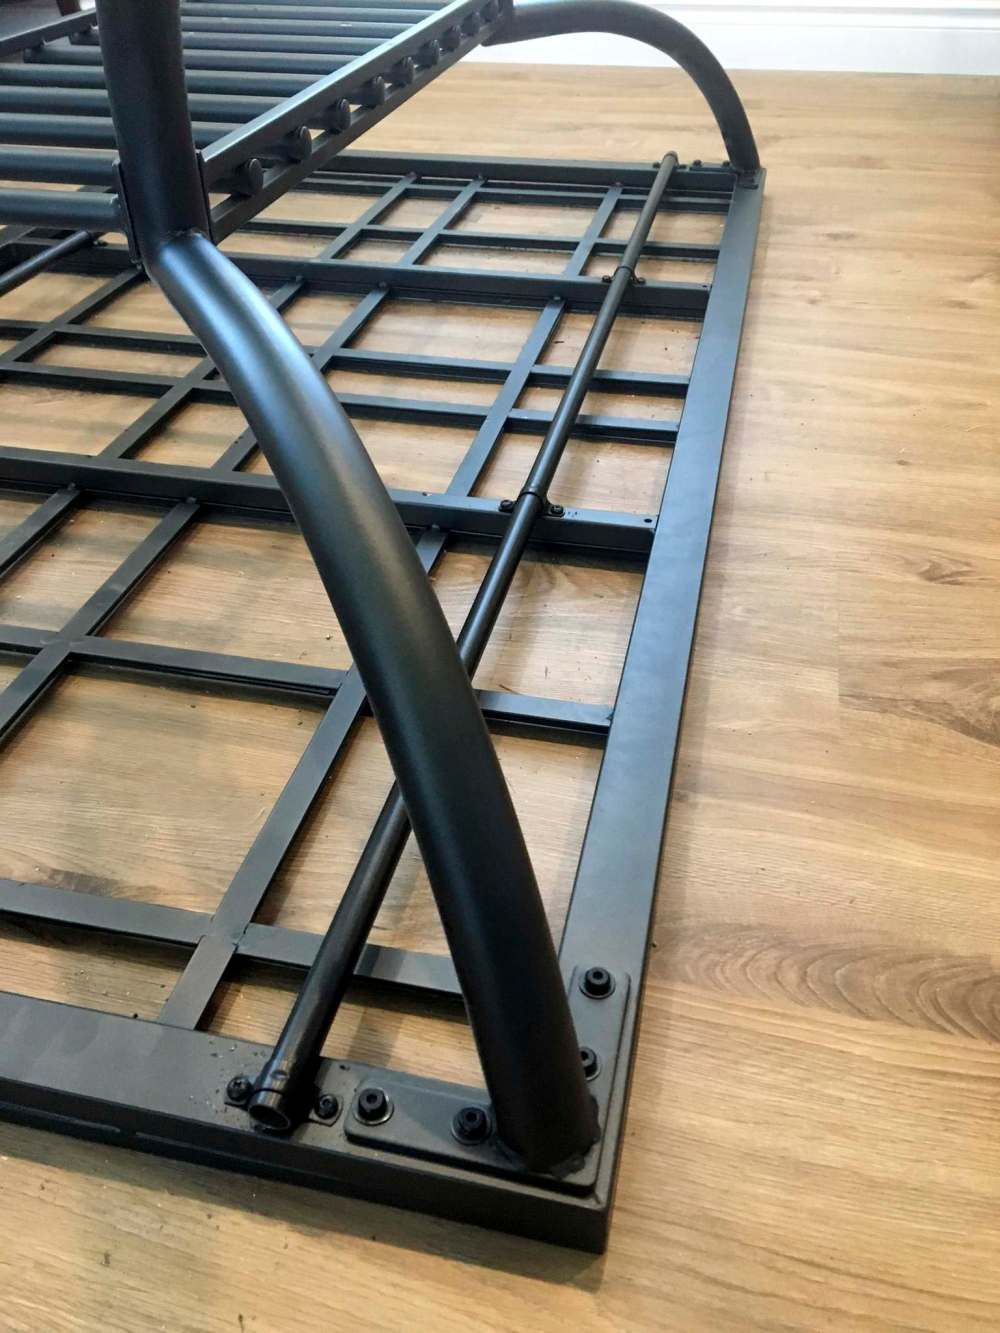
That got me thinking — would it be possible to create removable and somewhat matching table leaves that could be added to either end of my existing table? It would, of course, need to be lightweight, yet sturdy enough to handle the topside weight. How could I achieve this? Well, I first sketched out a few possibilities. Although I had not yet finalized the design of the leaves themselves, I did quickly determine the mode of leaf suspension — two metal conduits with an inside diameter of a half-inch, cut the same length as the table, would be sprayed to match the existing table metal colour. They were then mounted to the underside of the table with metal conduit brackets sprayed to match. This would create the support for the leaves. The same conduit would be then cut to fit below either side of each leaf, sprayed to match, and a long threaded half-inch metal dowel would then fit within the dowel on both the leaves and the underside of the table (making it moveable and removable).
To build the leaves themselves, I wanted to mimic both the side edge of the existing table as well as the topside slate tile configuration. The existing metal table was constructed with a half-inch deep L-channel to support the tile, and three-quarter-inch lower framing. To copy this profile, I cut and fashioned a framework using one-by-eight pine (which is actually three-quarter by seven and a quarter), which mimics the lower side of the existing table, and half-inch aluminum L-channel to create a similar tile-retention system for the top of each leaf. The aluminum was mitred accordingly, and fastened to the low wooden framework with flathead screws. Once the leaves were completed, the side edges and undersides were spray-painted to match the existing table, and the dowel and conduit system was tested to ensure the leaves could be inserted and removed easily.
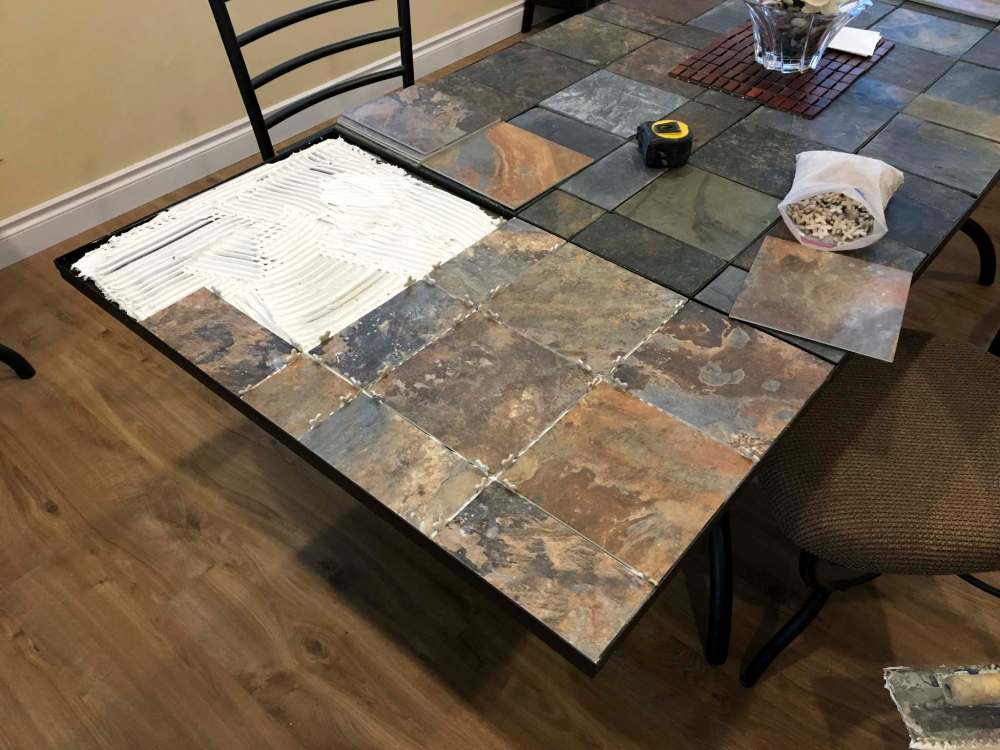
The hardest part of the project was the topside tiles — actual slate would be too heavy. So, I kept my eyes open for a vinyl alternative. It wasn’t until an impromptu visit to the Tile Warehouse on Archibald Street that I was able to track down a vinyl tile alternative that closely matched my existing slate tiles. An order for one box was placed, and within a week I had a box of 14, 16-by-16-inch vinyl tiles. To keep the topside pattern consistent, the leaves had been built to the 36-inch width of the existing table, 20 inches deep, allowing for the double eight-by-eight-inch tile and single four-by-eight-inch tile layout to continue. The required number of the appropriately sized vinyl tiles were cut to size using my table saw, until I could complete the layout on both table-end leaves. Once the exact layout was determined, the tiles were set using a vinyl thinset. The following day, charcoal grout was used to fill in the eight-inch grout lines. Minor levelling adjustments using shims below each leaf completed the process. I stood back and gazed at the table for a while — it’s remarkable at how well the vinyl tile matches the existing slate. And in some lighting, it’s even hard to tell the table hasn’t always been that length. Two wooden ladder-back chairs from Wayfair complete the newly extended dining table.
Although it may have been easier to just buy a new table and chairs, it probably would have been much costlier. All said and done, the materials for the two custom leaves, and the cost of the two ladder-back chairs barely surpassed the $400 mark — a far cry from the $1,000 or so for a new long table and six chairs. And, completing this project maintains the topside slate-table theme of the house, which was my initial intention. Can’t wait to have the whole family over— it’ll be the first time we can accommodate everyone for a meal, in the same room.
bossenterprise@outlook.com