

Bathroom reno hides unsightly pipes
Advertisement
Read this article for free:
or
Already have an account? Log in here »
To continue reading, please subscribe:

Digital Subscription
One year of digital access for only $205*
- Enjoy unlimited reading on winnipegfreepress.com
- Read the E-Edition, our digital replica newspaper
- Access News Break, our award-winning app
- Play interactive puzzles
*First annual payment billed as $205.00 + GST for one year. This annual subscription will automatically renew at $233.00 + GST every 52 weeks (10% off the regular annual price of $259.35). Offer available to new and qualified returning subscribers only. Cancel any time.
To continue reading, please subscribe:
Add Free Press access to your Brandon Sun subscription for only an additional
$1 for the first 4 weeks*
- Enjoy unlimited reading on winnipegfreepress.com
- Read the E-Edition, our digital replica newspaper
- Access News Break, our award-winning app
- Play interactive puzzles
*Your next Brandon Sun subscription payment will increase by $1.00 and you will be charged $17.95 plus GST for four weeks. After four weeks, your payment will increase to $24.95 plus GST every four weeks.
Read unlimited articles for free today:
or
Already have an account? Log in here »
Hey there, time traveller!
This article was published 19/10/2019 (2523 days ago), so information in it may no longer be current.
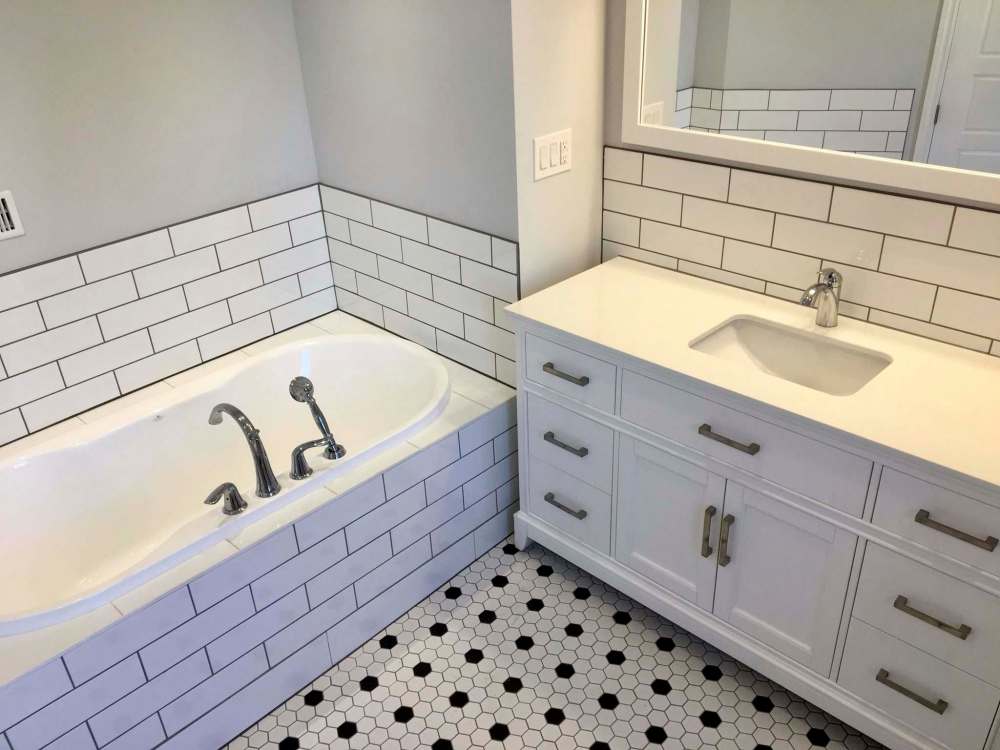
The concealment of unsightly plumbing is sometimes required during a bathroom renovation, especially when existing pipes cannot be conveniently relocated or rerouted. While on site at a six-piece bathroom remodel and expansion this past winter, much pre-planning gave way to some amazing results.
The plan was straightforward enough — completely gut and renovate the existing 5×11-foot, three-piece bathroom that included a water-closet, vanity and tub area to exclude the tub and introduce a walk-in shower, and expand the bathroom space into the adjacent room where a new and larger tub would occupy the far corner beside a double-sink and vanity with the stackable washer-dryer along the opposing wall.
Oddly enough, in retrospect, it proved to be the expanded area that presented fewer obstacles — installing new plumbing is often easier than adapting to the old.
This bathroom is situated on the second floor of a three-storey dwelling. The plumbing runs up along the back wall, from the bathroom on the main floor, directly below.
To complicate the process, the plumbing then continues to a bar sink on the third floor, slightly offset towards the interior of the house — it is this aspect that created the challenge. The water feeds and drainage pipes were not set within the exterior wall. As such, a shallow mini-protrusion wall was created (poorly, I might add) in an attempt to “box-in” the visible pipes.
Furthermore, the offset of the sink above caused the pipes to run horizontally below the existing ceiling before turning upward towards the sink location. A creative solution was sorely needed.
The vertically exposed pipes run alongside the water-closet, on the opposite side of the dividing wall to the adjacent room expansion. By framing in a new mini-wall, these pipes could easily be hidden.
However, the overall design of the space would suffer unless the wall could be constructed in such a way that it appears to be part of the design, and not just a box required to hide some pipes.
How could this be done strategically?
Well, by making the wall deeper, of course. Let me explain.
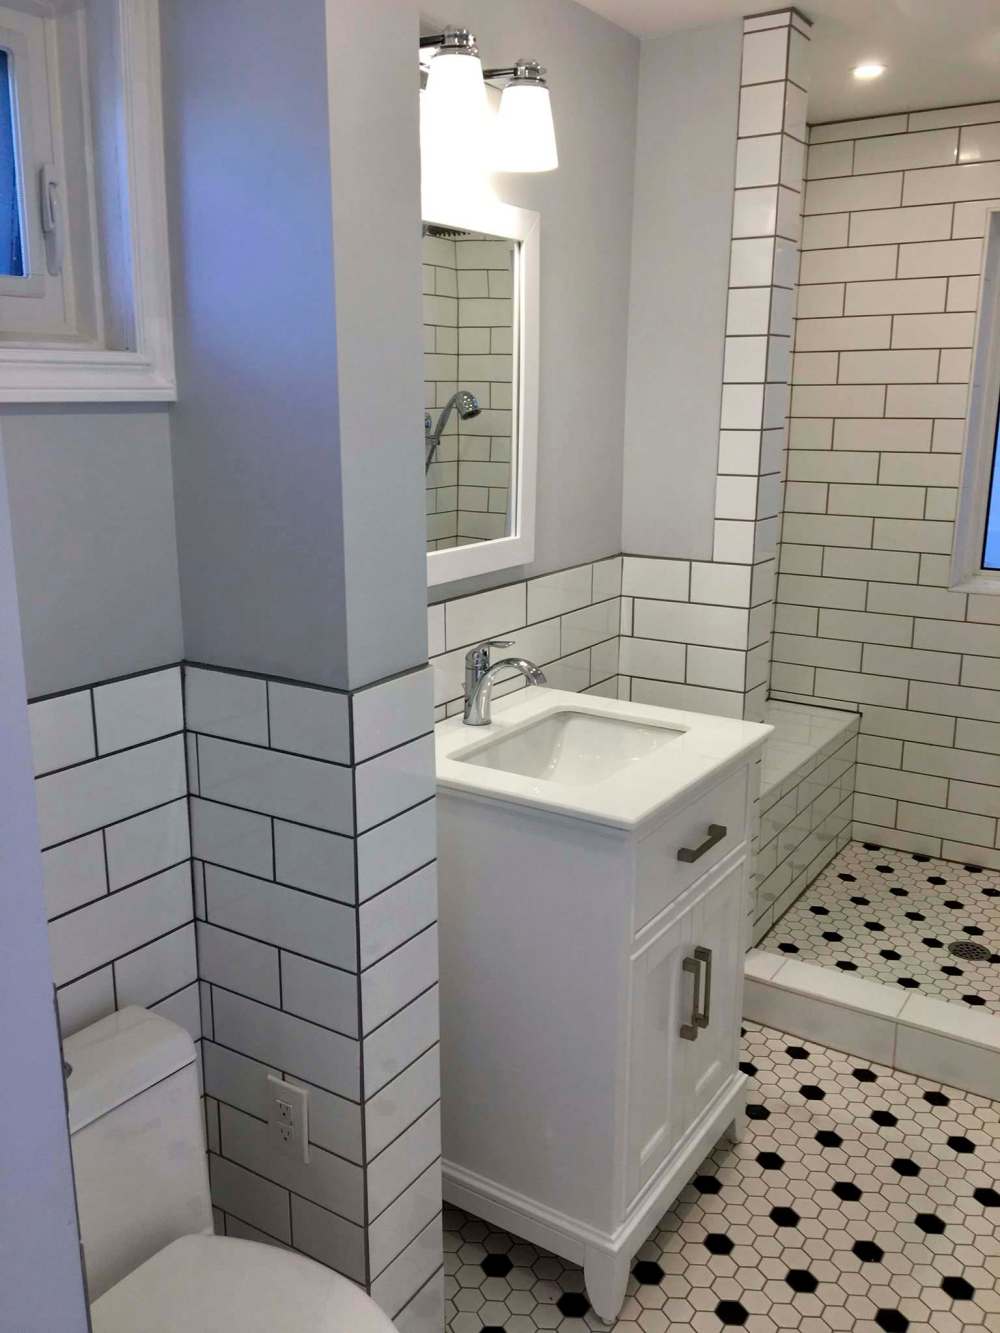
The walk-in shower required a bench, and to frame-in the bench, a shallow wall was created that allowed the bench to appear inset, minimizing the shower entry by roughly 12 inches. So, instead of simply just boxing in the pipes near the water closet, a mini-wall of similar depth was constructed to mimic the depth of the walk-in shower bench wall. The small vanity was then placed between these two mini-walls, creating three esthetically quarantined regions of the three-piece bathroom, seemingly all part of a sound and intentional design.
The exposed pipes along the ceiling were another matter entirely.
Any modifications to the plumbing that continued to the third floor had to continue to cater to the sink above, and there wasn’t much room to play with.
It was not possible to raise the pipes up and into the ceiling cavity, so the water feeds and drainage pipes were modified to run as close to the existing third-floor joists as possible. Because we decided to retain a divider wall between the existing bathroom space and the expansion area next to it, the ceiling of the old bathroom space received ceiling strapping throughout, just low enough to conceal the exposed pipes.
A custom barn-style sliding door separates the two areas — unless you were to look up and carefully analyze the ceiling heights on either side of the divider wall, the discrepancy is virtually undetectable. And, of course, that’s the point.
When entering the newly remodelled bathroom and expansion, the entire 150 square feet of this six-piece design is concise — a well-organized and extremely functional use of space.
Sometimes, doing a little more than what is required to hide unsightly attributes is well worth the effort. Not only is the main goal achieved, the manner in which it’s tackled often deflects attention so well that the concealment becomes secondary to the improvement made to the overall aesthetics.
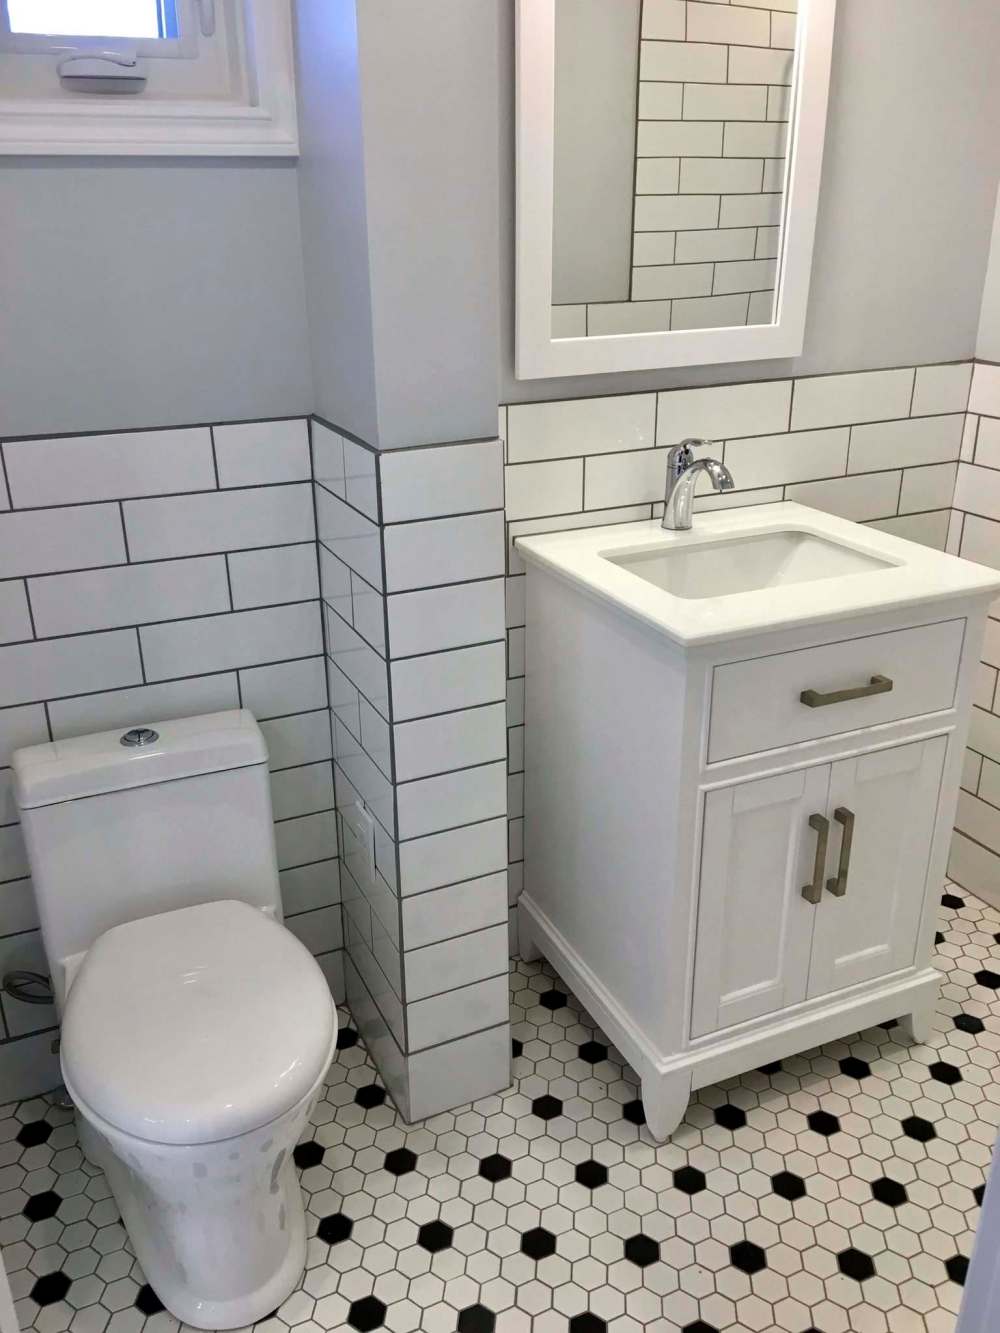
In this instance, the paired mini-walls of equal depth appear to have been created simply to separate the bathroom amenities, much like a similar wall in the adjacent space created to quarantine the washer-dryer from the double vanity.
I suppose the key to concealment is ‘hiding’ the fact that concealment was even necessary.
bossenterprise@outlook.com