

Pergolas are popular and practical
Trendy backyard features can differ in size and appearance
Advertisement
Read this article for free:
or
Already have an account? Log in here »
To continue reading, please subscribe:

Digital Subscription
One year of digital access for only $205*
- Enjoy unlimited reading on winnipegfreepress.com
- Read the E-Edition, our digital replica newspaper
- Access News Break, our award-winning app
- Play interactive puzzles
*First annual payment billed as $205.00 + GST for one year. This annual subscription will automatically renew at $233.00 + GST every 52 weeks (10% off the regular annual price of $259.35). Offer available to new and qualified returning subscribers only. Cancel any time.
To continue reading, please subscribe:
Add Free Press access to your Brandon Sun subscription for only an additional
$1 for the first 4 weeks*
- Enjoy unlimited reading on winnipegfreepress.com
- Read the E-Edition, our digital replica newspaper
- Access News Break, our award-winning app
- Play interactive puzzles
*Your next Brandon Sun subscription payment will increase by $1.00 and you will be charged $17.95 plus GST for four weeks. After four weeks, your payment will increase to $24.95 plus GST every four weeks.
Read unlimited articles for free today:
or
Already have an account? Log in here »
Hey there, time traveller!
This article was published 27/06/2020 (2214 days ago), so information in it may no longer be current.
About a year and a half into writing this weekly column, a concern began to grow about how I could sustain an interesting read regarding a recent deck or pergola build, when there are only so many ways to describe the same building process?
My editor, in gracious fashion, reminded me not everyone reads the column each week, and that although most decks and pergolas are built in much the same fashion, the included photos speak louder than the explanatory words.
Andrew Jasnikowski and Michelle Soustek Bremner had stumbled upon a social media post of mine regarding a pergola I had built on my property nearly a decade ago. Having completed their own backyard oasis a few years prior, they had decided that a four-post pergola may enhance their outdoor experience. Following the standard quoting process my services were solicited to erect such a structure in their backyard.
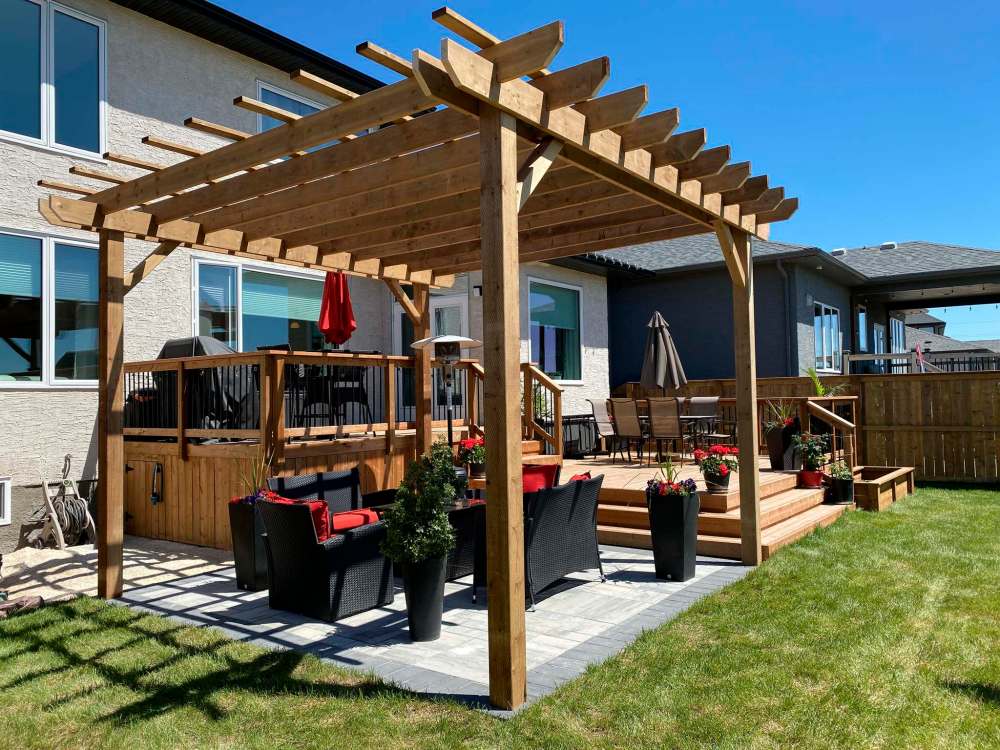
“We wanted a design feature in our backyard that provided a bit of shade but still gave us the feeling of being in the open,” said Jasnikowski. Based on the existing patio, the pergola post perimeter would have a maximum square area of roughly 12×12 feet, with beam and vein overhangs pushing the canopy close to 16×16 feet.
Although pergolas can differ in overall size and appearance, they do maintain several common elements, including four or more posts, parallel beams upon which the main veins rest, perpendicular veins typically atop the main veins, and 45-degree bracing near the canopy to lessen sway. Although there are design features that change or enhance the look, such as jigged vein ends, these imposing yard features must first and foremost be structurally sound. The way the beams are fastened to the posts, and the veins to the beams, is of the utmost importance. When creating and designing a pergola from raw material such as treated lumber, measurements and accuracy can make or break the build. Measuring thrice is imperative before any cutting begins.
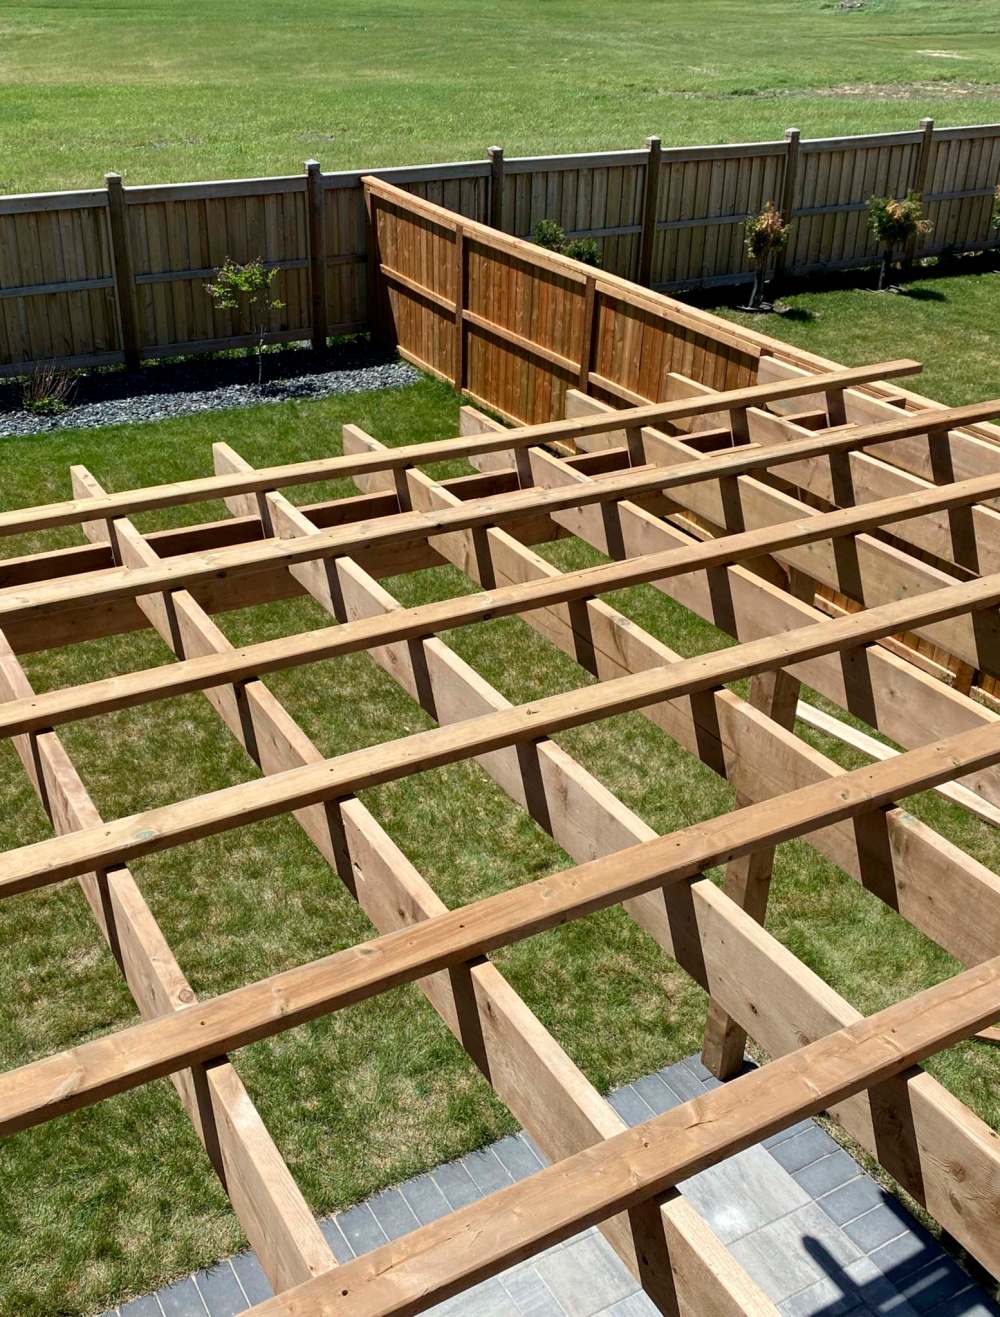
For a standard four-post pergola, 6×6 posts are used at each corner. The main tandem beams made from 2×8 boards at 16 feet, are affixed to each set of posts, notched at every impending vein location, before the pair of posts is hoisted into a vertical position. Once erect, the set of posts is supported temporarily in position, allowing for slight adjustments to level and square. “It was quite incredible that you would be able to lift a structure of that size normally, by yourself,” Jasnikowski said as he watched the process unfold. The second set of posts is then lifted, and stabilized in much the same manner, and the gap between the opposing posts and beams are secured temporarily to adjust the gap between them.
The 2×8 veins, pre-notched at either end to accommodate the pair of tandem beams, are then dropped from the top one-by-one, fitting like a puzzle along the beams. With slight urging from a heavy mallet, the entire structure begins to exhibit rigidity well before the 45-degree braces are added near the canopy. Once all the veins have been secured with three-and-a-half inch screws at every heel joint, the posts are again checked for level before the 4×4 corner angle-braces are installed. The top perpendicular vein, 16-foot 2x4s are fastened laying down to the top of the 2×8 veins, at similar intervals to create a pattern of squares.
“This is better than expected, it completes the look of our backyard beautifully,” Jasnikowski said while admiring the finsihed job. I couldn’t agree more, and I wish them many years of memories below the open canopy.
BossEnterprise@outlook.com