Flooring revolution
Vinyl plank offers endless variety of colour and style options
Advertisement
Read this article for free:
or
Already have an account? Log in here »
To continue reading, please subscribe:
Monthly Digital Subscription
$1 per week for 24 weeks*
- Enjoy unlimited reading on winnipegfreepress.com
- Read the E-Edition, our digital replica newspaper
- Access News Break, our award-winning app
- Play interactive puzzles
*Billed as $4.00 plus GST every four weeks. After 24 weeks, price increases to the regular rate of $19.00 plus GST every four weeks. Offer available to new and qualified returning subscribers only. Cancel any time.
Monthly Digital Subscription
$4.75/week*
- Enjoy unlimited reading on winnipegfreepress.com
- Read the E-Edition, our digital replica newspaper
- Access News Break, our award-winning app
- Play interactive puzzles
*Billed as $19 plus GST every four weeks. Cancel any time.
To continue reading, please subscribe:
Add Free Press access to your Brandon Sun subscription for only an additional
$1 for the first 4 weeks*
*Your next subscription payment will increase by $1.00 and you will be charged $16.99 plus GST for four weeks. After four weeks, your payment will increase to $23.99 plus GST every four weeks.
Read unlimited articles for free today:
or
Already have an account? Log in here »
Hey there, time traveller!
This article was published 23/04/2022 (1273 days ago), so information in it may no longer be current.
If there’s a reasonably priced flooring solution considered to be viable for any room lately, it would likely be vinyl plank with pad. Since first introduced as an alternative to standard wood-based laminates, vinyl has surpassed the older style laminate options in both durability, and popularity. And best of all, it is completely waterproof once properly installed.
In just the past few months, all my major flooring projects involved vinyl plank with pad (meaning the underlayment is pre-mounted to the underside of each vinyl board). Whether replacing old flooring on the main or upper floors, or introducing new flooring to the basement, vinyl plank provides an endless array of colour and style options. And with the pad pre-mounted along the underside, the separate step of setting underlayment throughout the area is eliminated, thereby hastening the flooring installation process. With the area prepped down to the sub-floor, it’s simply a matter of establishing a start point, confirming square, and laying the first board in the far corner, working towards to opposite corner one row at a time. Single rooms are the easiest to achieve. When completing an entire floor plan with multiple rooms however, planning tends to become more strategic.
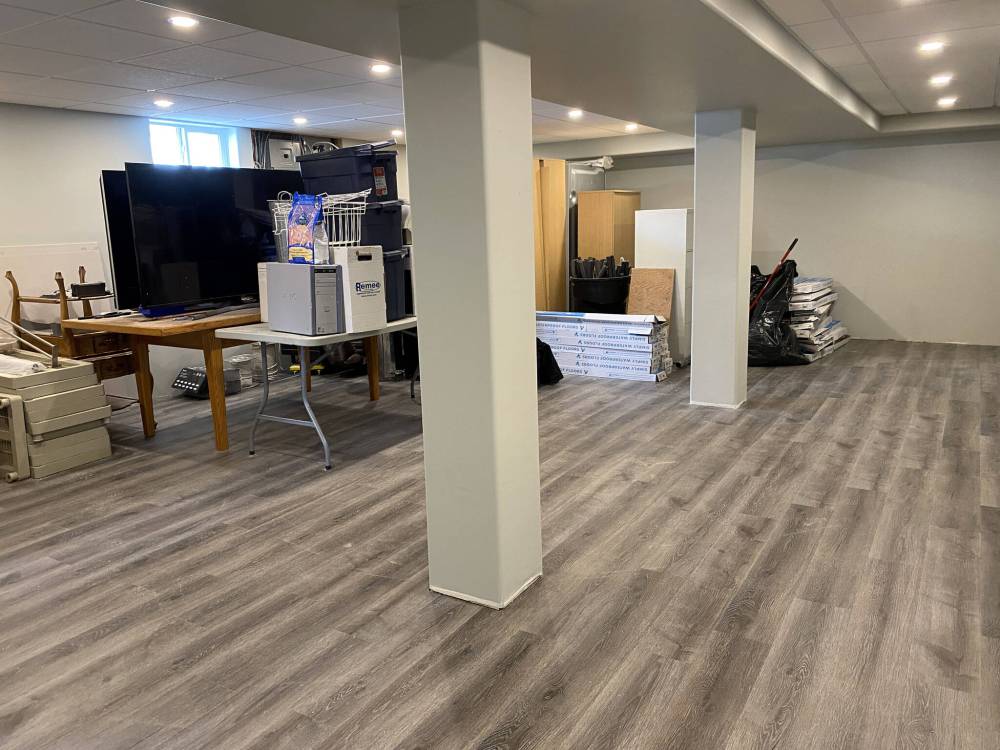
At a recent jobsite, the basement had been first prepped with air-gap sub-flooring panels throughout. During the first phase of the vinyl plank installation process, all but two rooms (the laundry room and hallway closet) to receive the vinyl treatment will have been completed, even though the plan is to have the entire lower level adorned with contiguous vinyl plank, without the use of transitions from room to room. The bathroom (to be tiled atop heated flooring) and laundry room have yet to incur the planned pre-plumbing upgrades which involve busting concrete to reconfigure the drains and locations to suit the new placement of the various bathroom and laundry room amenities. As such, it was necessary to halt the flooring into the laundry room in such a way that vinyl plank installation could eventually continue once the re-routing of underground plumbing has been achieved. Within the hallway closet, the flooring is also halted until framing and drywall are completed, also dependent upon the underground reconfiguration, which may intrude upon the closet area temporarily.
To introduce the nearly 1,000 square-feet of uninterrupted vinyl plank of Phase 1, several aspects must first be established: orientation, centring, and stagger. Generally, the orientation of a large area of flooring flows parallel with the long of the room. Because the flooring is contiguous from room to room, the largest area (in this case, main rec-room and adjacent “hallway”) serves to set orientation. Although centring can easily be achieved in a single room, a seamless floor from room to room offers no real ability to guarantee the centring of one room to the next. As such, back-measuring from the start wall to verify plank width versus overall room width can provide an idea of plank layout before the project begins. This is usually a good idea to eliminate the potential for “slivers” of vinyl along the opposing wall. However, depending on individual room dimensions, there may be no way to avoid this – shifting the start row to negate a sliver along the opposing wall in one room may create a sliver in another. The stagger involves the amount of offset when setting the next row of vinyl plank. Although it proves efficient to simply use the cut-off from the last board of the previous row to start the next row, there should never be less than eight inches of difference between the short seams. In some cases, having the stagger pre-established comes in handy, but tends to create more waste.
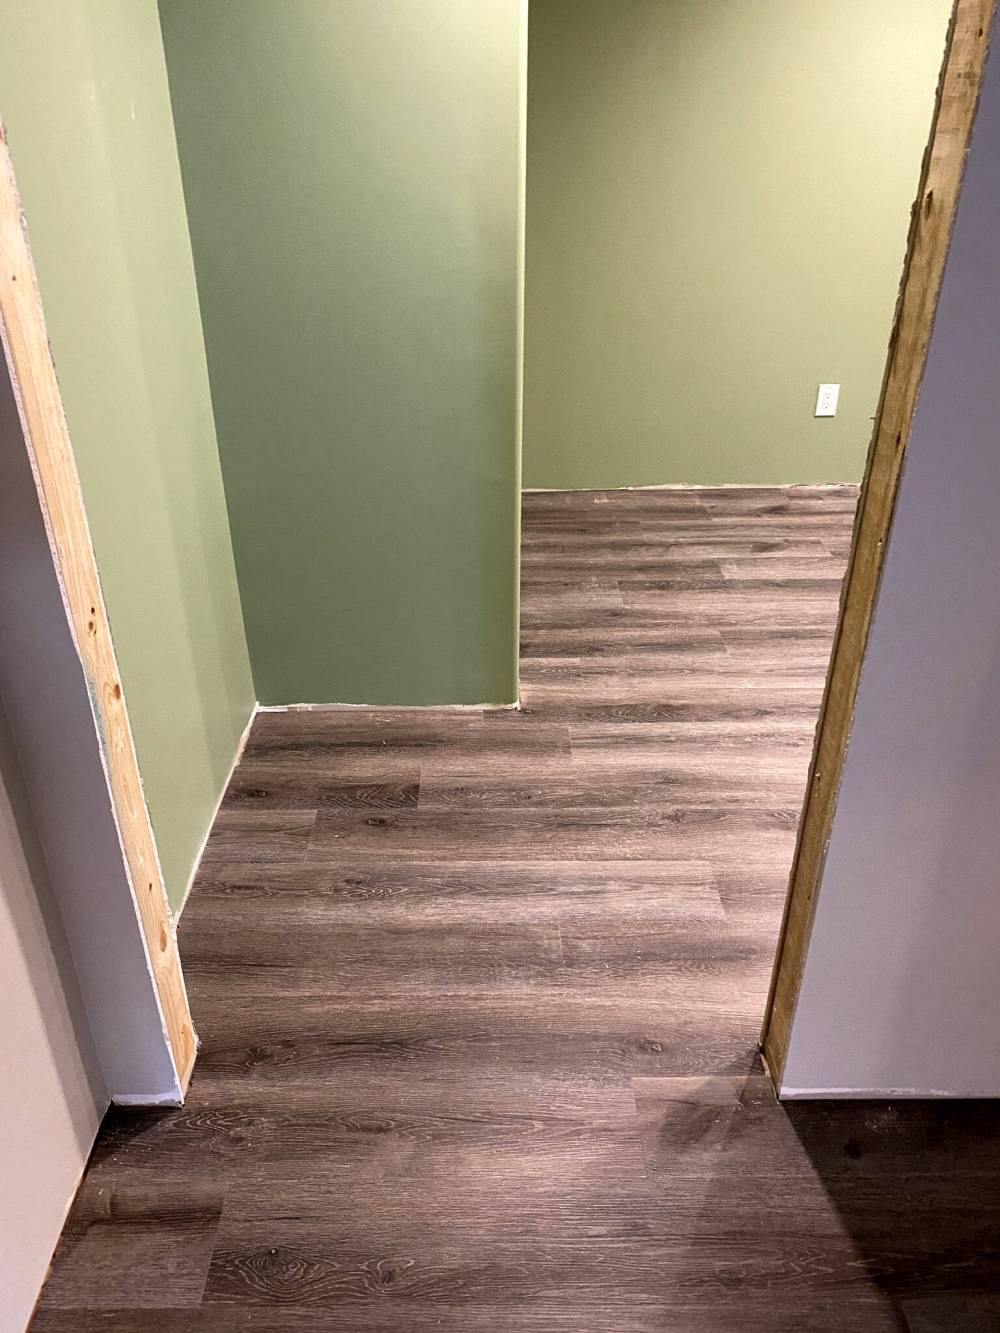
For this basement project, the vinyl start point was set within the far bedroom, at the far side of the rec-room. Once the back-measuring had been achieved and a chalk line established (to preserve square early on), all rows within the bedroom were completed until the rough opening of the doorway. Once a full row could clear the doorway, the rows within the rec-room were set back working backwards until all planking was laid to the other end of the area. With these rows now completed, the continuation of vinyl within the bedroom was completed, and the rows of vinyl crept towards the “hallway” wall along the opposite side of the rec-room. By carefully staggering the rows that protrude into the laundry room, enough vinyl was introduced so that the stagger of rows pass the rough opening just enough to ensure the completion of the hallway side of the rec-room area.
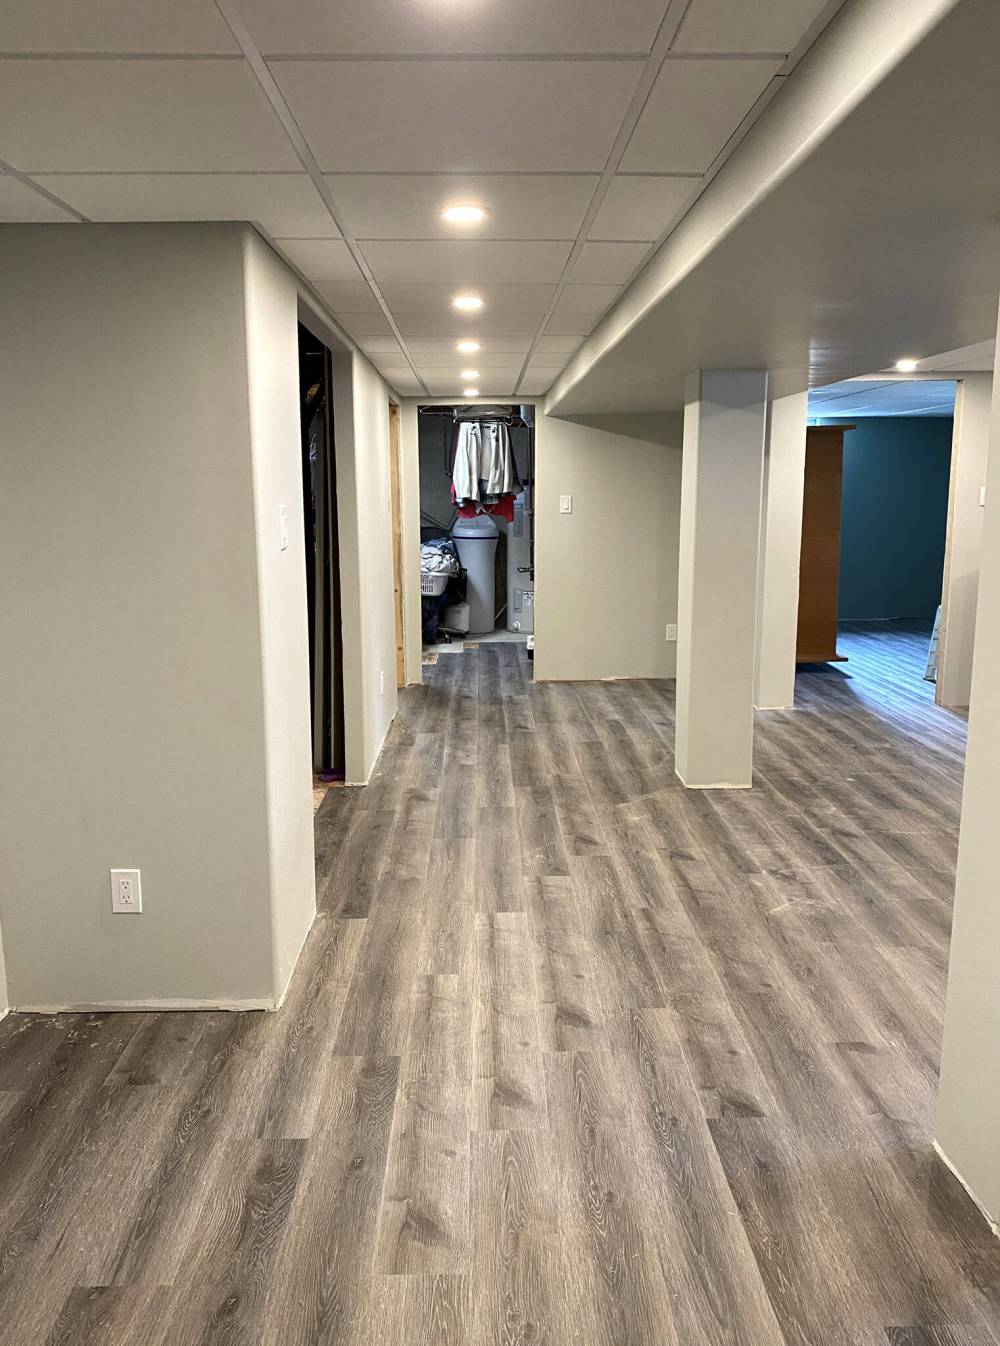
This process continued row by row around the inset jog of the wall adjacent the stairwell, then past the end of the stairwell and subsequently into the second bedroom at the opposite corner of the basement. Because of the floor plan of the second bedroom, a few rows of flooring were installed working backwards, allowing the final rows to continue until the last row (which coincidentally nearly matched the exact width of a plank) was laid into place. Scrap remnants were temporarily placed along the stagger at the entrance of the laundry room to protect the edges of the permanently positioned plank, to ensure the vinyl was healthy for the completion of the laundry floor during the next phase of vinyl plank installation. And for now, the baseboards and casings are put on hold until the doors and jambs, as well as bi-folds arrive, as they must be hung prior to trim installation.
The process of laying vinyl plank with pad can be physically demanding — lots of ups and downs, very hard on the knees. However, once the pre-measurements have been taken and the rhythm of the process is found, the activity does move rather quickly, especially in large areas whereby full boards are required in large quantities — it’s the measuring and cutting that takes the most time. Luckily, vinyl plank is easily cut using either a hand-held skill-saw, or miter saw. To my clients’ surprise, the 1,000 square-feet of Phase 1 was completed in just two full days. Truth be told, I was kind of surprised at how fast it went myself — now onto Phase 2.
RenoBoss.Inc@outlook.com