

Don’t let subfloor repair bring you down
Dips and bumps now on the level
Advertisement
Read this article for free:
or
Already have an account? Log in here »
To continue reading, please subscribe:
Monthly Digital Subscription
$0 for the first 4 weeks*
- Enjoy unlimited reading on winnipegfreepress.com
- Read the E-Edition, our digital replica newspaper
- Access News Break, our award-winning app
- Play interactive puzzles
*No charge for 4 weeks then price increases to the regular rate of $19.95 plus GST every four weeks. Offer available to new and qualified returning subscribers only. Cancel any time.
Monthly Digital Subscription
$4.99/week*
- Enjoy unlimited reading on winnipegfreepress.com
- Read the E-Edition, our digital replica newspaper
- Access News Break, our award-winning app
- Play interactive puzzles
*Billed as $19.95 plus GST every four weeks. Cancel any time.
To continue reading, please subscribe:
Add Free Press access to your Brandon Sun subscription for only an additional
$1 for the first 4 weeks*
*Your next subscription payment will increase by $1.00 and you will be charged $16.99 plus GST for four weeks. After four weeks, your payment will increase to $23.99 plus GST every four weeks.
Read unlimited articles for free today:
or
Already have an account? Log in here »
Hey there, time traveller!
This article was published 18/02/2023 (1058 days ago), so information in it may no longer be current.
When prepping a subfloor for the installation of new flooring, the best-case scenario simply involves the removal of the old flooring. In most cases however, further steps are required to ensure the integrity and rigidity upon which the new flooring will be laid. At a current jobsite, the removal of the old linoleum in the kitchen and wood laminate throughout the living room presented an elevation discrepancy. To meet the already built-up kitchen subfloor, five-sixteenth pro-board would rectify the issue, or so I thought.
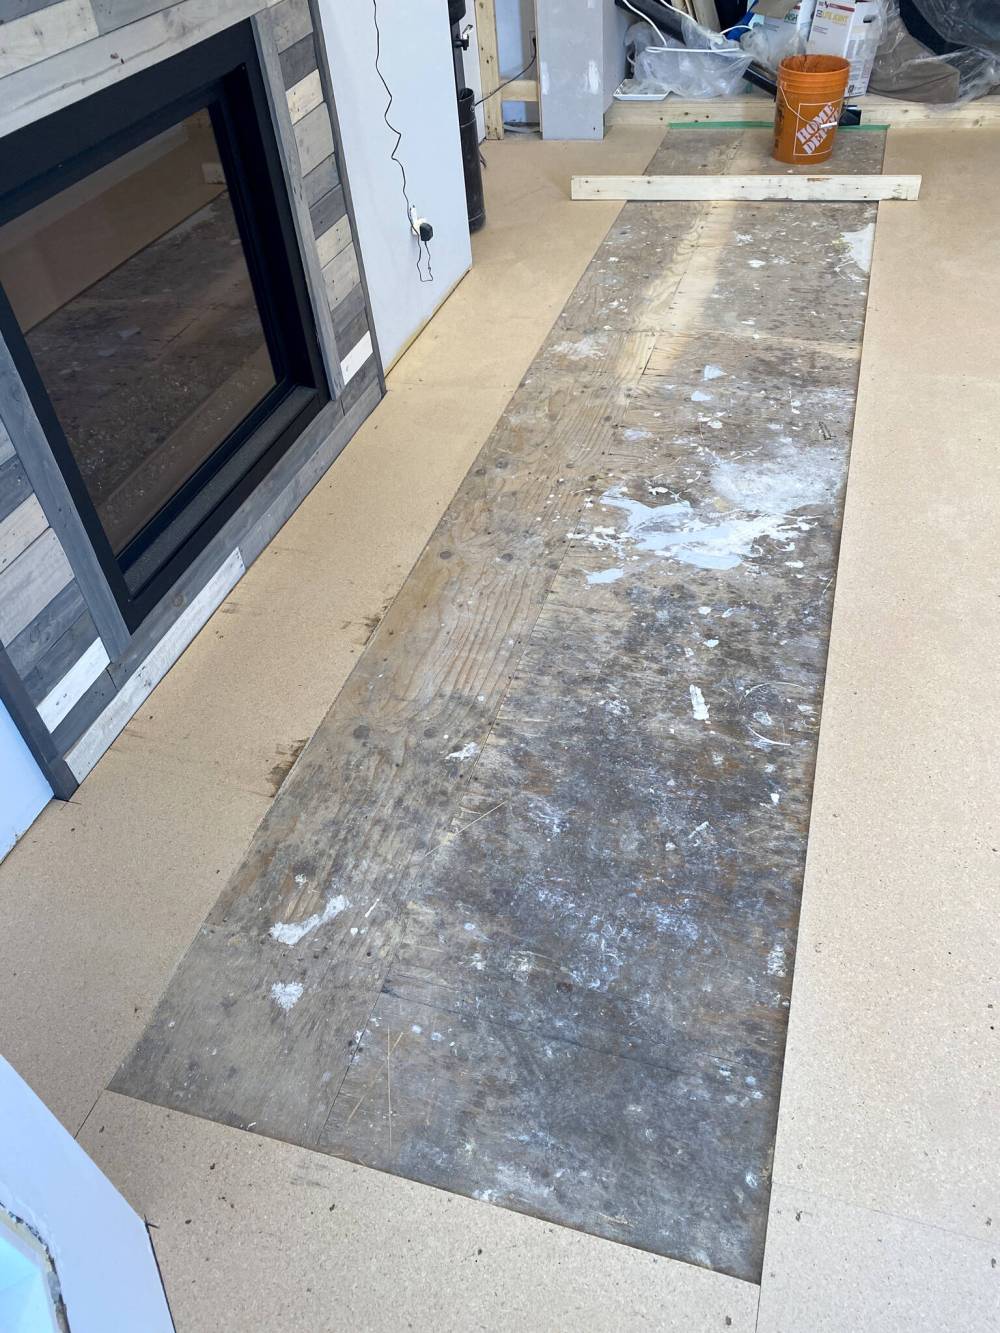
Pro-board is merely a type of particle board used primarily for secondary sheathing, which in this instance would raise the overall elevation of the living room area by five-sixteenths of an inch, rendering a smooth transition into the kitchen area. Before the pro-board could laid and fastened to the main three-quarter-inch plywood subfloor, the old laminate was systematically removed plank by plank, and discarded. The underlayment was also peeled away, and any remaining staples were either pulled or hammered flush.
Centred within the surrounding wooden laminate in the middle of the living room, between the placement of the couches, was an area of permanent carpeting. It was odd, in that the desire would normally entail consistent laminate throughout — if carpet was desired between couches, why not choose an area rug? No matter, the carpet was removed along with the remaining planks of laminate. It wasn’t until the area was bare that an unexpected issue presented itself. The carpet had held a secret, one that would complicate the installation of the pro-board.
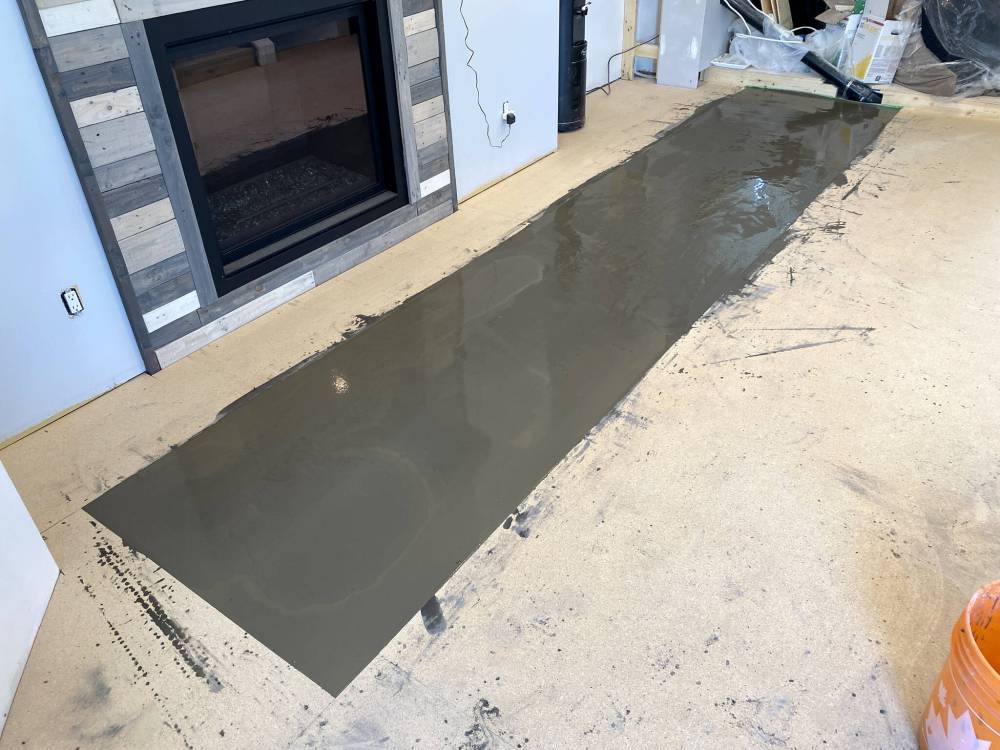
Photos by Marc LaBossiere / Winnipeg Free Press
Self-levelling compound is used to eliminate a hump along one seam of the adjacent plywood subfloor.
Roughly four feet from the exterior wall, a hump was clearly visible along the visible plywood, one that had seemingly been there for a long while. Either the house had shifted slightly (unlikely), or a joist a wider height along the main floor support system caused a minute elevation discrepancy along the entire span. Prior to the old laminate installation, an attempt to sand down the hump was visible, albeit unsuccessful. The protrusion lies along the seam of plywood boards, and was assessed to be roughly a quarter-inch in height. Sheathing over this issue would simply recreate the hump at a slightly higher elevation. And because the new flooring would be vinyl laminate, the discrepancy would be extremely noticeable. What could be done?
Although I entertained further sanding down the area, too much of the plywood subfloor would need to be removed to level out the hump. As such, a new plan came to mind. On either side of the bumpy seam, a small piece of the five-sixteenths pro board was strategically place to determine at what point the slope began on both sides of the seam. By doing this, the maximum placement of pro-board that could be installed atop the plywood subfloor and remain level could be determined, leaving a gap along the rise of the seam. Addressing the hump would now require a different, “self-levelling” approach.
Self-leveling compound is used to level out shallow dips and humps in a subfloor, prior to installing a finished floor covering. Because self-leveling underlayment is very thin, it can be troweled out to make these small adjustments. The leveler compound is mixed with water to a workable consistency, and can be poured in several batches along the area. A trowel (in this case a 2×4) is used to level the pour and work the leveler into all areas so that the leveling compound meets but does not exceed the elevation of the five-sixteenths pro-board on both sides of the hump. After the final pour, the entire area left open along the raised seam is filled with leveler, and the hump is once again “hidden” from view. With this approach however, the issue is also truly remedied — the vinyl flooring can now be laid in normal fashion along throughout the area, because the secondary subfloor is now at a very consistent elevation. No more hump!
Ironically, surprises are not much of a surprise to me anymore — it’s simply a matter of addressing the hurdles that present themselves as they come. There was absolutely no way the effort and expense of new vinyl flooring was warranted without first tackling the hump along the seam of the plywood subfloor. And even though it made the job of secondary subfloor installation slightly more complicated, the extra effort will have been well worth it. The hump will soon become a distant memory, like it was never there in the first place.
RenoBoss.Inc@outlook.com
The area being levelled is left unsheathed by pro-board, as the compound is mixed with water and poured in a series of batches.
A typical secondary subfloor installation involves securing pro-board to the plywood subfloor throughout.