

Drilling is not always thrilling
Making holes in tile can be a tricky task
Advertisement
Read this article for free:
or
Already have an account? Log in here »
To continue reading, please subscribe:
Monthly Digital Subscription
$0 for the first 4 weeks*
- Enjoy unlimited reading on winnipegfreepress.com
- Read the E-Edition, our digital replica newspaper
- Access News Break, our award-winning app
- Play interactive puzzles
*No charge for 4 weeks then price increases to the regular rate of $19.00 plus GST every four weeks. Offer available to new and qualified returning subscribers only. Cancel any time.
Monthly Digital Subscription
$4.75/week*
- Enjoy unlimited reading on winnipegfreepress.com
- Read the E-Edition, our digital replica newspaper
- Access News Break, our award-winning app
- Play interactive puzzles
*Billed as $19 plus GST every four weeks. Cancel any time.
To continue reading, please subscribe:
Add Free Press access to your Brandon Sun subscription for only an additional
$1 for the first 4 weeks*
*Your next subscription payment will increase by $1.00 and you will be charged $16.99 plus GST for four weeks. After four weeks, your payment will increase to $23.99 plus GST every four weeks.
Read unlimited articles for free today:
or
Already have an account? Log in here »
Hey there, time traveller!
This article was published 30/12/2023 (693 days ago), so information in it may no longer be current.
Installing tile in a bathroom tub or shower stall always presents a series of challenges. Once the layout is chosen and the tiling begins, constant vigilance is required to ensure the tile maintains level and plumb, and often existing wall framing idiosyncrasies involve slight shifts in tile cuts at every corner. Furthermore, once all the tile has been mounted negotiating the shower faucet, head , and tub spout, and the grouting process has been completed, there is one final step that can quickly derail the entire process — drilling through tile.
When contemplating the prospect of tiling, the need to drill through tile is often overlooked. Although tile is manipulated during the installation process to accommodate water features and controls, certain amenities such as permanent shower caddies, grab bars, and glass shower enclosures are only addressed after the tiling and subsequent grouting has been achieved. As such, it is then necessary to drill through tile on finished surfaces to mount these items. And drilling through tile is an anxiety inducing activity — if the drilling doesn’t go well, a tile may crack, and this will set the project back by at least a day or two.
To increase the chances of success, it then becomes crucial to choose the appropriate tile type (and size for that matter) from the onset during the design process. Certain tile such as ceramics have a much softer core that allows easier tile manipulation, while cutting as well as drilling. Glass tile and natural stone can present a bigger challenge, as these materials may crumble and create shards due to their brittle nature. In my experience, however, it is porcelain tile that always presents a near unsurmountable obstacle — porcelain tile does not like being drilled ,and often shatters.
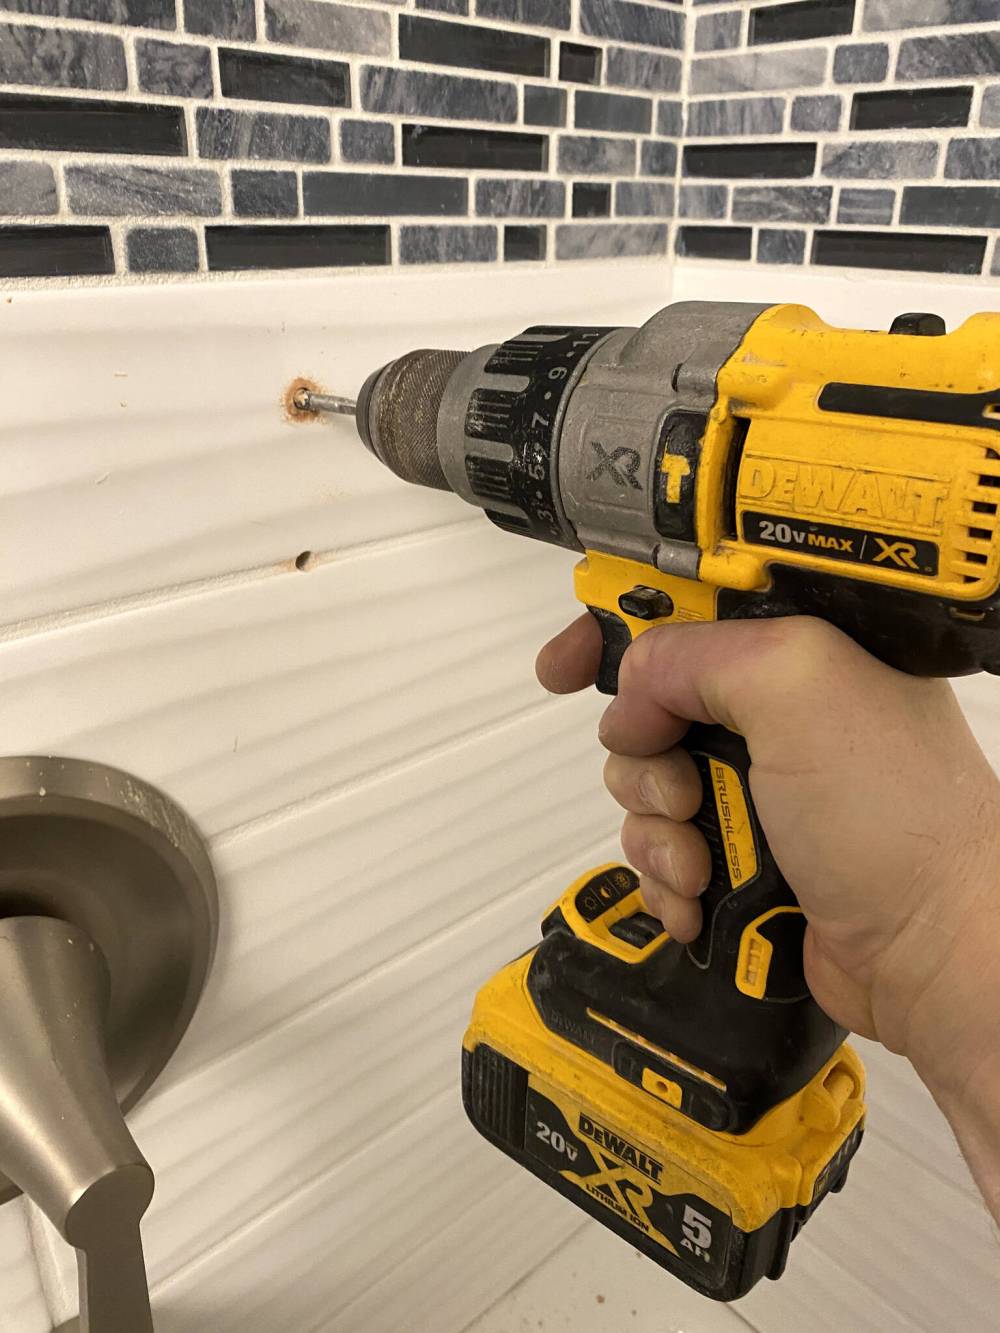
Marc LaBossiere / Winnipeg Free Press
A diamond-tip masonry bit and light pressure, with water to periodically cool the bit, is the trick when drilling tile.
Although cutting any tile or natural stone is facilitated by using a wet saw, drilling through tiled surfaces is not as straight-forward. Even with diamond-tip masonry bits, a great deal of patience is required to drill holes through tile. If the process is attempted too quickly, the tile will crack and as such, must then be replaced. Moreover, “where” a hole is required may also alter success rates. That is why a larger tile is sometimes best, minimizing the chance that a hole may be needed very near a tile edge which increases the probability the tile will crack.
It is first necessary to establish and mark the locations for the holes that must be drilled. The size of drill bit is usually determined by the nylon wall anchor that will be inserted into the hole, based on the screw size. With the proper-sized bit in the drill, the hole is initiated by swaying the bit slightly side-to-side to break through the tile’s tough outer coating. Once the hole location is set, light and constant pressure is be applied until the bit slowly makes its way through the tile core. Every few seconds, I like to dip the bit in water to both lower the temperature of the bit, and provide mild lubrication to the tile. Slowly but surely, the hole depth increases until the bit breaks through the backside of the tile. It is a nerve-wracking experience, with much at stake. And the volume of holes dictated by the mounting requirements of each and all the surface-mount amenities may be considerable, thereby proportionately increasing the odds of cracking a tile along the way.
Most barn-style glass sliding doors require six holes to mount the upper rod, whereas each grab bar may need four to sometimes six. Corner shower caddies each require four holes to mount. As such, a tub and shower stall with four caddies, a couple of grab bars and a sliding glass door will necessitate up to 30 holes (or more). A daunting prospect, especially when considering all the time spent completing the tiling and grouting stages — there is much at stake! No matter the pressure, the process can usually be achieved effectively when using a careful and focused approach — every jobsite presents its own circumstances and challenges.
With the proper tools and a boatload of patience, drilling holes through tile has become less overwhelming throughout the years. Although I still feel some anxiety while anticipating the impending process, past jobs and the experience they provide have now alleviated much of that dread — with a sharp, new masonry bit in hand, and a cup of water by my side, drilling tile is an expected facet while finishing most bathroom projects. And although I literally still hold my breath in an effort to heighten focus during each and every drilling attempt, the triumph of the last hole on any given project, no matter the number of holes, is always cause for celebration, and allows me to finally breathe easy again — until the next tile hole-drilling project presents itself.
RenoBoss.Inc@outlook.com
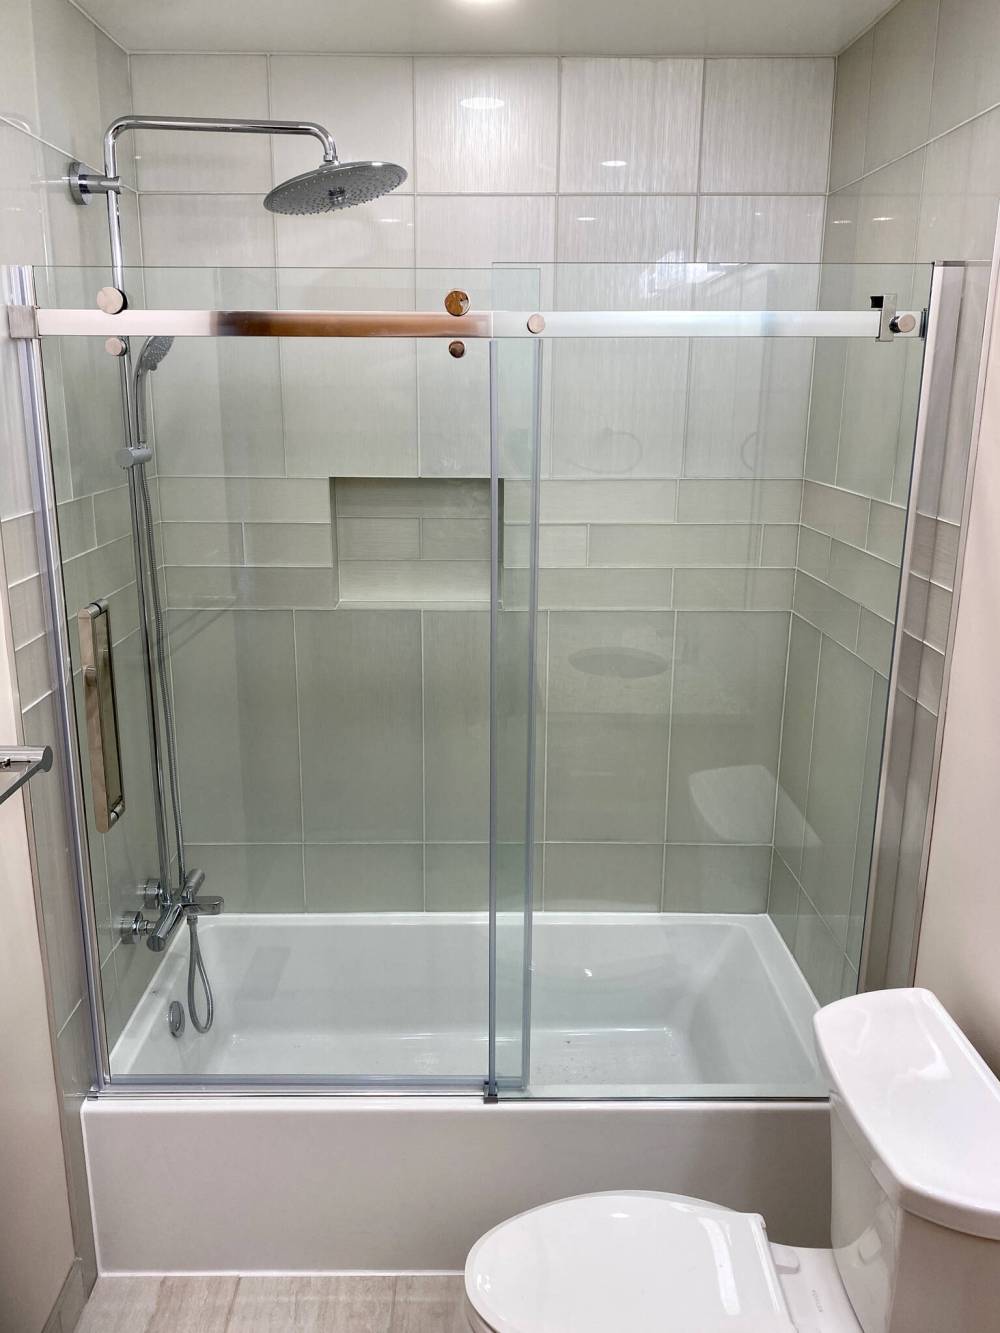
The anxiety prior to drilling the holes required within this tub and shower stall was extreme.
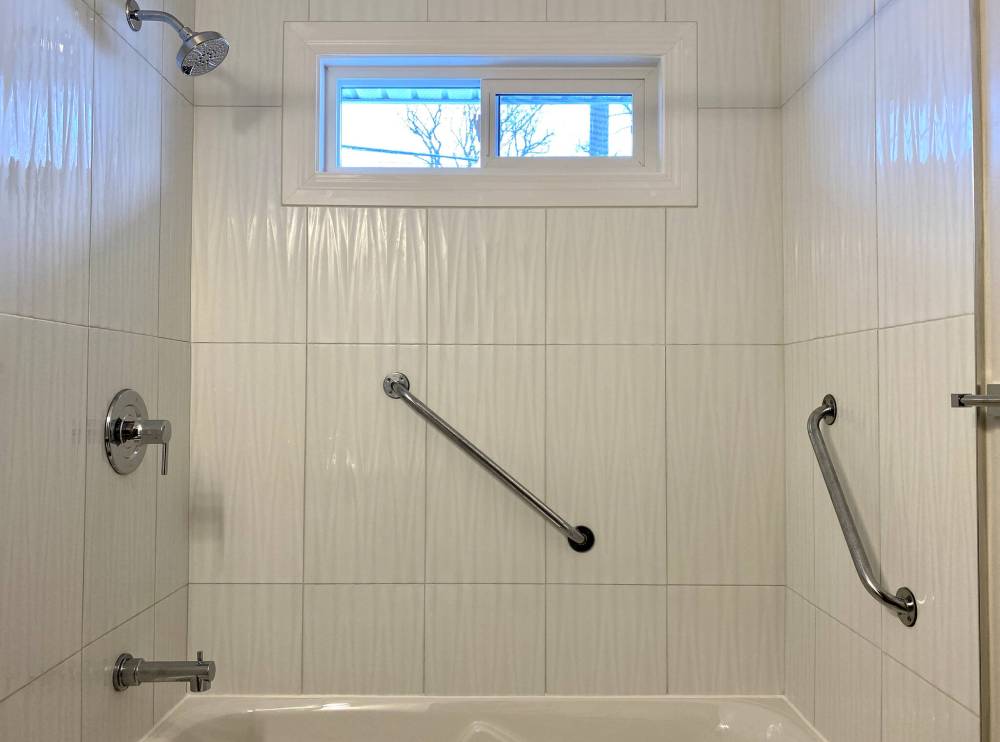
The number of holes to be drilled through tile is dictated by the amenities to mount.