

Sprucing up an old deck
Advertisement
Read this article for free:
or
Already have an account? Log in here »
To continue reading, please subscribe:
Monthly Digital Subscription
$0 for the first 4 weeks*
- Enjoy unlimited reading on winnipegfreepress.com
- Read the E-Edition, our digital replica newspaper
- Access News Break, our award-winning app
- Play interactive puzzles
*No charge for 4 weeks then price increases to the regular rate of $19.95 plus GST every four weeks. Offer available to new and qualified returning subscribers only. Cancel any time.
Monthly Digital Subscription
$4.99/week*
- Enjoy unlimited reading on winnipegfreepress.com
- Read the E-Edition, our digital replica newspaper
- Access News Break, our award-winning app
- Play interactive puzzles
*Billed as $19.95 plus GST every four weeks. Cancel any time.
To continue reading, please subscribe:
Add Free Press access to your Brandon Sun subscription for only an additional
$1 for the first 4 weeks*
*Your next subscription payment will increase by $1.00 and you will be charged $16.99 plus GST for four weeks. After four weeks, your payment will increase to $23.99 plus GST every four weeks.
Read unlimited articles for free today:
or
Already have an account? Log in here »
Hey there, time traveller!
This article was published 17/08/2024 (510 days ago), so information in it may no longer be current.
When the homeowners have grown accustomed to, and have no desire to change the size or design of an existing deck that has begun to show signs of wear and tear, the easiest and most cost-effective solution involves replacing the decorative exterior while retaining the existing framework and support.
In most instances, the inner boards of a lumber deck (joists and beams) will fare better through the years due to the outer sheathing that takes the brunt of the weathering. Well, that’s the theory, anyway.
At a recent rear deck facelift, the aforementioned notion held true, for the most part. Then old cedar decking had seen better days — it was spongy and rotten in several areas. After removing the old railings and subsequently prying away the old cedar tops, the treated lumber joists remained in relatively good condition. There were a few areas however, that had begun to rot. As such, these sections of joists were replaced with new timber. A larger issue became apparent while tending to those fixes — one end of the triple-laminated beam indicated a rotten middle board, with the top of the outer boards. To address this, the boards were removed in a staggered fashion that completely eliminated the areas of rot. New 2×10 boards were then laminated together to reform the required length of beam that supports the joists on that far side.
PHOTOS by Marc LaBossiere / Winnipeg Free Press An old rectangular deck was stripped down to the joists, and retopped with treated lumber.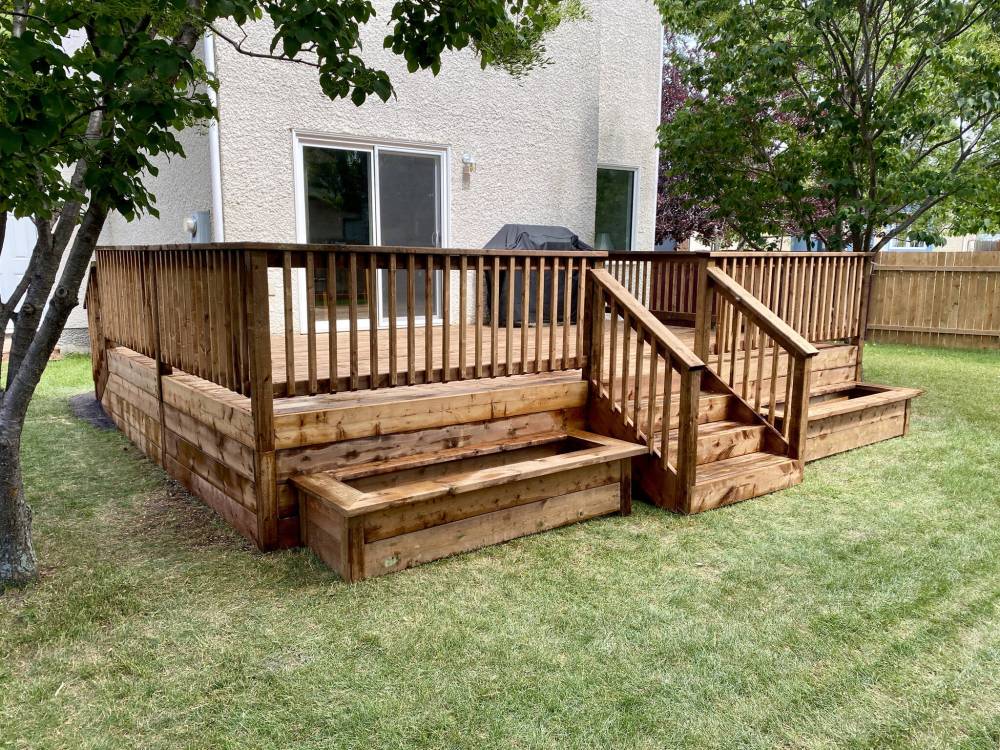
With the main structure once again sound, new staircases were fabricated on site by cutting custom stringers. The stairs at the back access would not change in width. However, a new four-foot staircase was introduced along the front side of the rectangular deck to provide easy access to the big of the yard. To fulfil the homeowners’ request, two planter boxes would also be introduced, one on either side of the centred staircase.
With the newly cut stair stringers in position and fully secured to the deck framework, the stair tops were completed using the same 2×6 treated lumber that would subsequently line the main top area of the deck. Once completed, 4×4 posts were cut to length and pre-notched before being mounted in the required areas to serve as the main supports for the lumber railings along the perimeter of the entire deck, and down along the sides of each staircase. Once the 2×4 upper and lower horizontal supports were fastened within the sections between the posts, a 2×6 cap was then added to complete the railings framework. Matching planter boxes are built on either side of the newly introduced centre staircase.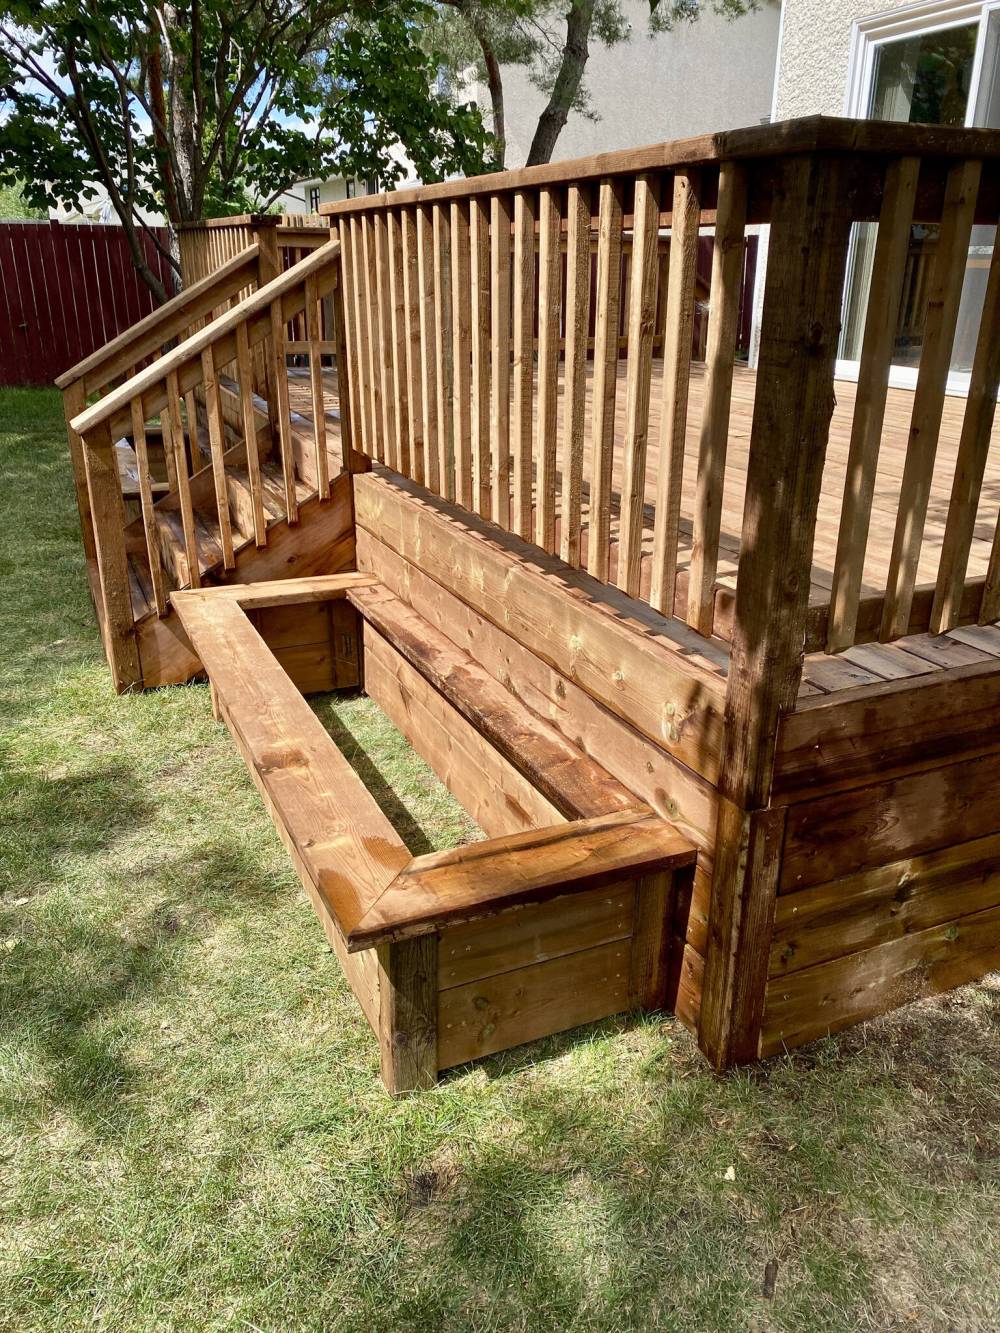
At this point, 2×8 fascia was mounted along the outer visible perimeter of the entire deck, between every post. Then, 2x8s were set horizontally below the fascia to serve as a deck skirt, that continues in rows to ground-level. To meet the angle of the stairs, a decorative 2×12 outer stringer was fastened between the railing posts, before the 2×8 horizontal skirting was placed below. With the skirting in place, the 2×2 wooden balusters were then mounted to the upper and lower horizontal 2x4s of the railings framework, and four-inch intervals. The deck was now completed.
The introduction of planter boxes should be functional but must maintain a similar esthetic to the deck. Furthermore, it wasn’t a great idea to load the planter box with soil directly against the newly skirted deck, should the homeowners ever wish to remove the planters. As such, the design incorporates an inner wall that keeps the soil away from the deck. The planter boxes consist of 2×8 horizontal boards that mimic the look and elevation of the skirting, with the 4×4 corner posts to match the railings design of the deck. With the main framework of the planter boxes in place, the protruded top-side of the boxes are capped with 2x8s mitered at the corner, with a 2×6 run along the skirted wall. The planter boxes design provides ample space for seasonal planting, without overpowering the intended look of the deck. All in all, this project was completed, start to finish in just over three days.
Over the course of several months, the approach to building these impending planter boxes had changed and evolved many times. The final design seems to check all the boxes. Moreover, by keeping the elevation of the planters to midway up the deck, the newly introduced front staircase remains the focal point of the newly sheathed deck. Most importantly, the money saved by putting new icing on and old cake is very palpable, which makes this deck project all that more gratifying for the homeowners.
RenoBoss.Inc@outlook.com