

Take it step by step for stairway success
Advertisement
Read this article for free:
or
Already have an account? Log in here »
To continue reading, please subscribe:
Monthly Digital Subscription
$0 for the first 4 weeks*
- Enjoy unlimited reading on winnipegfreepress.com
- Read the E-Edition, our digital replica newspaper
- Access News Break, our award-winning app
- Play interactive puzzles
*No charge for 4 weeks then price increases to the regular rate of $19.95 plus GST every four weeks. Offer available to new and qualified returning subscribers only. Cancel any time.
Monthly Digital Subscription
$4.99/week*
- Enjoy unlimited reading on winnipegfreepress.com
- Read the E-Edition, our digital replica newspaper
- Access News Break, our award-winning app
- Play interactive puzzles
*Billed as $19.95 plus GST every four weeks. Cancel any time.
To continue reading, please subscribe:
Add Free Press access to your Brandon Sun subscription for only an additional
$1 for the first 4 weeks*
*Your next subscription payment will increase by $1.00 and you will be charged $16.99 plus GST for four weeks. After four weeks, your payment will increase to $23.99 plus GST every four weeks.
Read unlimited articles for free today:
or
Already have an account? Log in here »
Hey there, time traveller!
This article was published 05/04/2025 (277 days ago), so information in it may no longer be current.
Once new vinyl-plank flooring has been installed on all levels of a residence, some homeowners decide they want to extend the look onto the staircases between floors as well.
This can be a tricky task, and careful attention to prep work is key to ensure the best outcome. In my experience, the forgotten steps are the ones that can cause the most grief later on.
At a recent job site, the staircase to be re-floored was made up of seven stairs leading up to a landing, then a 180-degree turn and another six stairs bringing you to the second-floor. All existing stairs and the landing were carpeted. As such, the carpet and the underlayment were completely removed, along with the tack strips on the back of every stair run and along the walls of the landing.
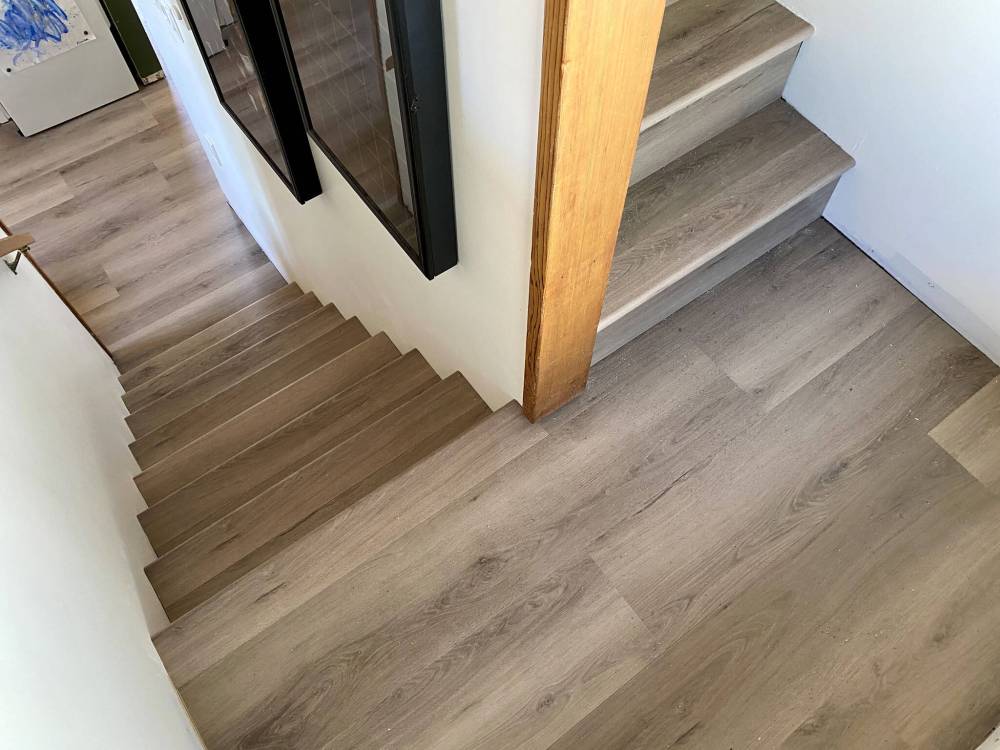
MARC LABOSSIERE / FREE PRESS
Vinyl-plank flooring and nosing are installed along the staircase to match the newly installed vinyl throughout the rest of the house.
The plethora of staples that held the underlayment in place were then scraped off using a flat spade and pliers (for the stubborn ones).
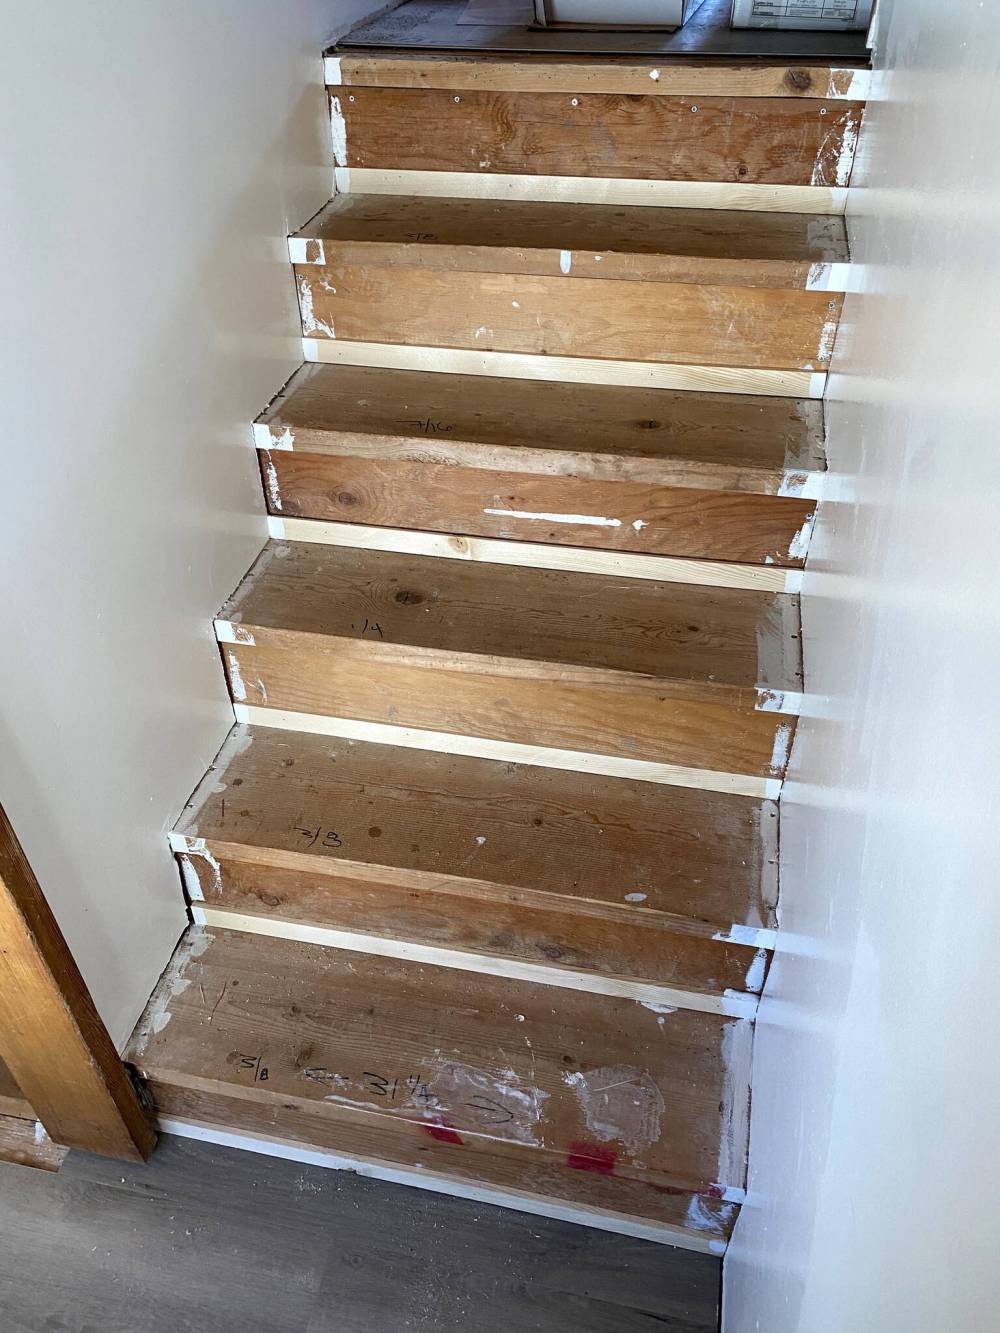
Once the stairs were completely free of topside fasteners, shims were added along the bottom of every rise to create a plumb and level surface upon which the vinyl rise could be added later. This was required because the existing stair construction had a stair-top protrusion which served as a stair nose, which had to be eliminated for clean installation of the vinyl planks.
Shims were ripped using a table saw to meet the exact protrusion depth of each rough nose (as they were not all consistent). The shims were then secured into place using a brad nailer. Once the shims were in position, the vinyl-plank flooring installation could begin.
However, it was important to take a moment for paint touch-ups, as the walls had been painted with the carpet in place on the stairs. Once the carpeting was removed, it became apparent the paint line would show once the vinyl was installed. As such, the walls were painted down to the bare stairs, to eliminate this issue.
The particular brand of vinyl that was installed features a “click” nosing. Unlike top-side nosings which are installed last (after all rises and runs are mounted) at the front edge of the stair tread, which also covers the top edge of the rise, click nosings are installed successively for each stair, to ensure a consistent look. In other words, every stair is fully completed before starting the next.
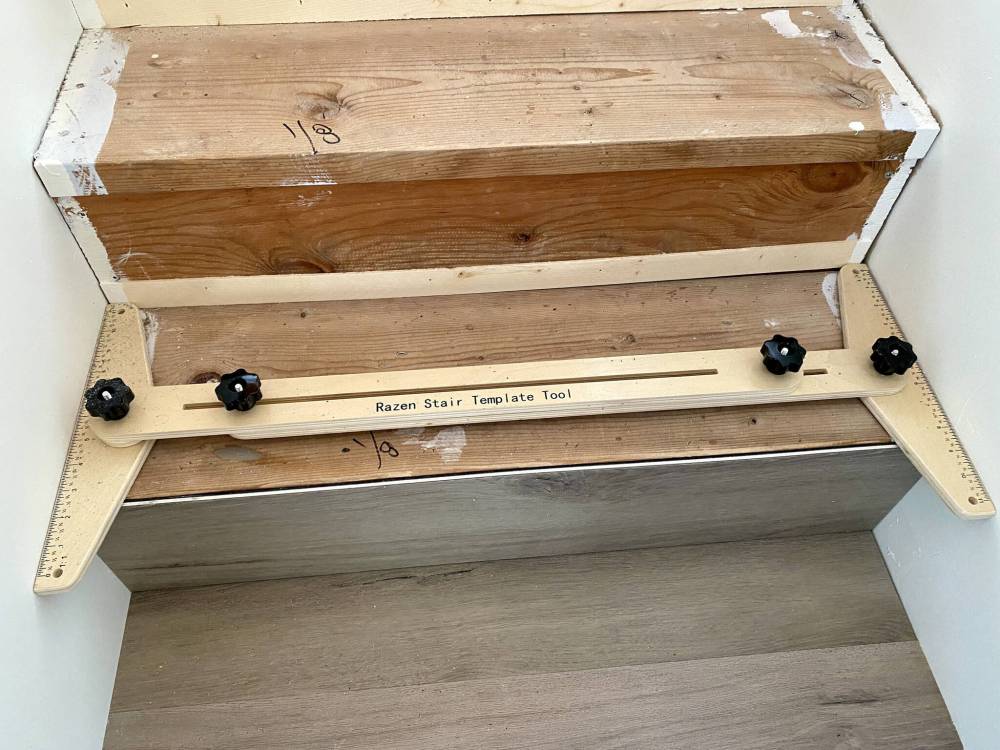
MARC LABOSSIERE / FREE PRESS
A stair template tool is used to account for any wall imperfections or plumb idiosyncrasies.
To begin the process, the rise of the lowest stair at the main floor was measured for width and height (with the help of a stair template tool, which factors in any idiosyncrasies of wall-plumb imperfections), and then mounted using high-bond construction adhesive. Once in position, the top of the rise is also tacked in using the brad nailer.
The run of the stair proved somewhat trickier to deal with. With this brand of vinyl flooring, the stair nosings must meet a standard vinyl plank on the proper side to ensure it clicks into place with the slight tap of a mallet. Moreover, the backside of the nosing is four inches from the nose protrusion, which essentially means the vinyl plank behind it must be inset by that depth to allow the nosing to properly sit atop the outer edge of the stair-top.
With the standard vinyl-plank flooring ripped to the proper width, and cut to the exact length (as scribed by the stair template tool), the nosing was also cut to the proper width and then tapped into the groove of the plank. Then the entire tread was secured to the stair-top using construction adhesive.
Once the first stair was completed, the others followed suit in much the same fashion. The back end of every stair run was greeted with an overlap — the bottom side of the next rise — which creates a very cohesive and clean appearance.
As the last full stair before the landing was completed, the rise was again set into position. Because the vinyl plank was already installed on the landing (as well as on the second floor for that matter), it was crucial to ensure orientation of the vinyl planks was correct and installed in such a manner as to allow for the four-inch backset required for the stair nosing to click into position with the proper protrusion. Luckily, this had been achieved from the get-go.
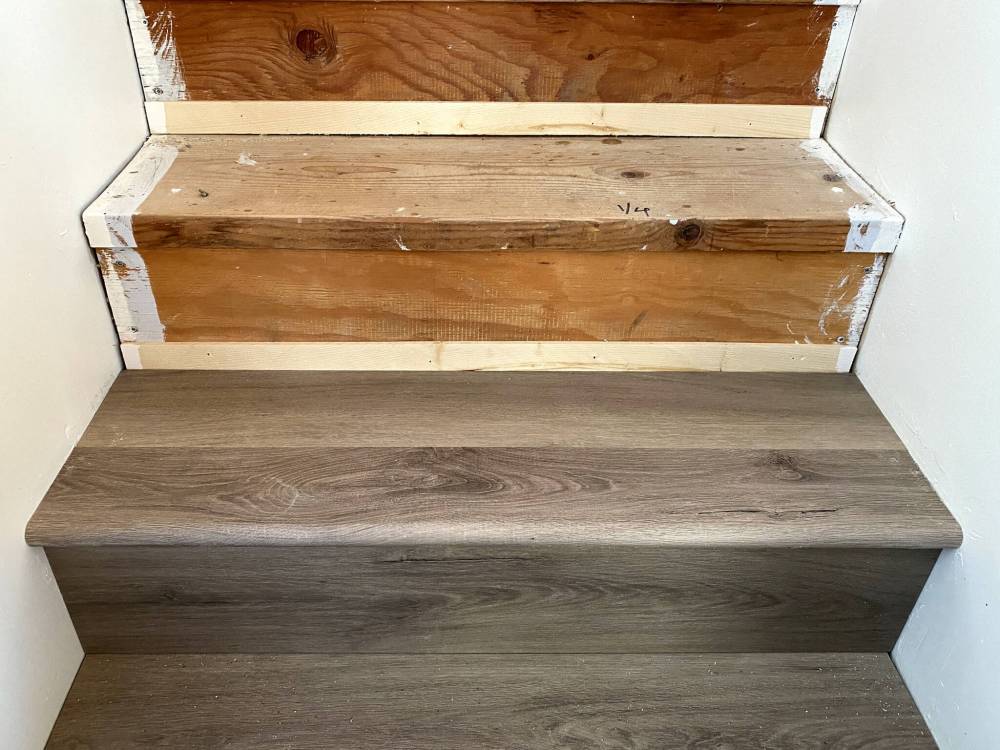
MARC LABOSSIERE / FREE PRESS
Shims are placed at the bottom of every rise to meet the protrusion of the existing lumber nosing, creating a plumb and level surface for the vinyl rise.
After the nosing was installed at the landing, the remaining six stairs to the second floor were completed following the same procedures, as was the final nosing at the second-floor edge.
Understanding how these stair nosings click in and confirming proper installation and orientation were essential to ensure a successful outcome for this project. Had the orientation of the standard vinyl planks been reversed at either the landing or the second floor, or had the backset been an incorrect depth, the nosing click installation would have failed. That’s why a dry-run installation — well ahead of time — should be the very first step when tackling this type of job, to make sure you avoid any project-disrupting gaffes.
Come to think of it, employing this sort of thoughtful approach to any job greatly increases the likelihood of a successful outcome and also helps minimize unneeded stress.
RenoBoss.Inc@outlook.com
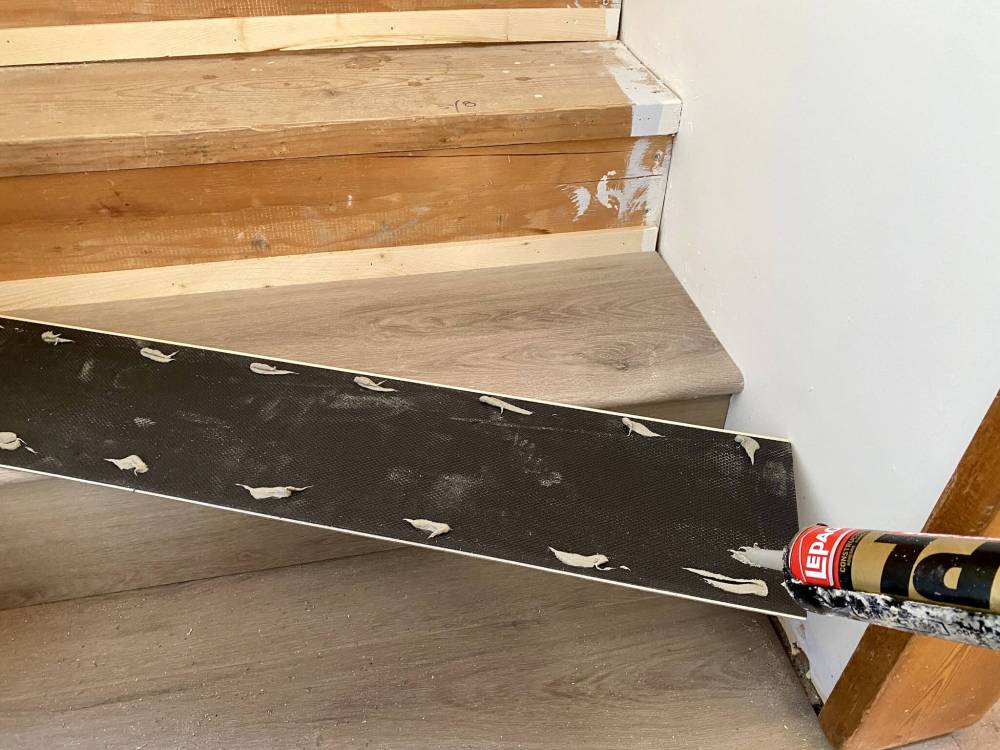
MARC LABOSSIERE / FREE PRESS
The rise is mounted using construction adhesive, applied along the areas of the lumber nosing and shim.
MARC LABOSSIERE / FREE PRESS
Shims are placed at the bottom of every rise (left) to meet the protrusion of the existing nosing, creating a plumb and level surface for the vinyl rise. The walls (right) of the stairway were painted to the rough stair rise and run, to ensure a cohesive look once the vinyl flooring was installed.