

Updating style can fit just about any budget
Advertisement
Read this article for free:
or
Already have an account? Log in here »
To continue reading, please subscribe:
Monthly Digital Subscription
$0 for the first 4 weeks*
- Enjoy unlimited reading on winnipegfreepress.com
- Read the E-Edition, our digital replica newspaper
- Access News Break, our award-winning app
- Play interactive puzzles
*No charge for 4 weeks then price increases to the regular rate of $19.95 plus GST every four weeks. Offer available to new and qualified returning subscribers only. Cancel any time.
Monthly Digital Subscription
$4.99/week*
- Enjoy unlimited reading on winnipegfreepress.com
- Read the E-Edition, our digital replica newspaper
- Access News Break, our award-winning app
- Play interactive puzzles
*Billed as $19.95 plus GST every four weeks. Cancel any time.
To continue reading, please subscribe:
Add Free Press access to your Brandon Sun subscription for only an additional
$1 for the first 4 weeks*
*Your next subscription payment will increase by $1.00 and you will be charged $16.99 plus GST for four weeks. After four weeks, your payment will increase to $23.99 plus GST every four weeks.
Read unlimited articles for free today:
or
Already have an account? Log in here »
Every once in a while, a project with rather foreign parameters crosses my path.
At a recent property, a minor kitchen facelift (part of a much larger renovation to ready a rental property) was heavily bound by budget constraints. Nonetheless, the look of the kitchen needed somewhat of an update without the high costs and hassles of a gut-and-remodel job.
Upon seeing this kitchen for the first time, it felt like walking into the past. The Arborite countertops, mismatched in colour, suggested an additional array of cabinets had been introduced at some point, without a countertop upgrade. Although new quartz counters would have clearly made a huge difference, it was not to be during this round of renovations. As such, it was necessary to address the main aesthetic issue which was indeed the backsplash.
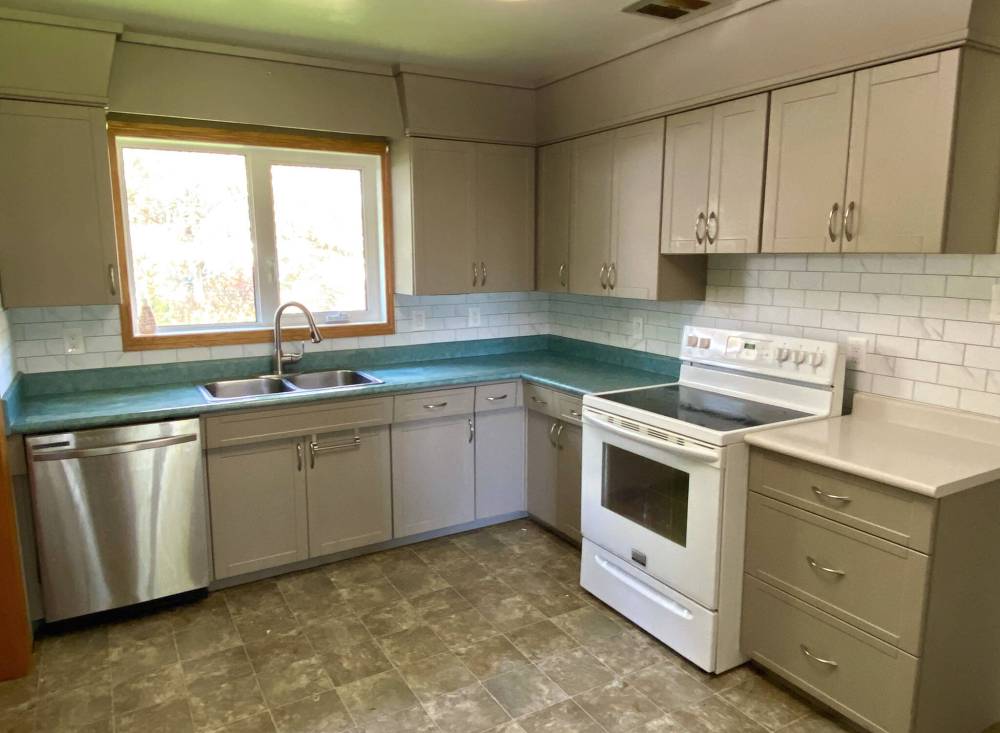
Marc LaBossiere / Free Press
A new peel-and-stick backsplash greatly improves a rental-property kitchen while adhering to a strict budget.
Prior to addressing the kitchen, the old backsplash (if you can call it that) was tantamount to an Arborite continuation, vertically up the back wall below the upper cabinets. And because the main L-shaped countertop is an odd aqua-blue colour, this darker hue serving as a backsplash did not well serve the kitchen’s look. Fortunately, the vertical Arborite had been installed using an adhesive that, over time, had become brittle, allowing the sheets of flat Arborite to be peeled off with just a little encouragement.
Once the old drywall was revealed, a new tiled backsplash would be introduced. However, the traditional approach of ceramic tile and grout did not bode well here, due to the old countertops including a four-inch rise along the back and because the counters may be replaced at a later date. A peel-and-stick tiling option was better suited. A white peel-and-stick product with something of a light-grey subway tile mosaic look was chosen. As it was somewhat neutral in appearance, it would also blend with the impending light-grey vinyl flooring installation to follow the kitchen work.
Having never dabbled with peel-and-stick tile sheets, my main concern was adherence — would the tiles actually bond well with the back wall?
Starting at one end, the first sheet was secured to the wall after back-measuring to ensure the layout would conform to the dimensions. To my delight, the tile stuck exceedingly well. So well that it would be necessary to take caution when installing subsequent tile sheets, as removing the tiles to adjust placement proved to be quite challenging.
Much like ceramic tiling, it was necessary to cut and notch tile to meet the back wall corners, and to allow for the various outlets and switches throughout the space. Unlike ceramic tiling, however, a wet saw was not the required tool of choice. Once the measurements were confirmed, a sheet was trimmed using a mitre saw or table saw. Notches were created using a door-jamb cutter, which is basically an oscillating tool that can precisely cut out small areas of tile. As this process unfolded, the back walls slowly acquired tile until all three were decoratively sheathed.
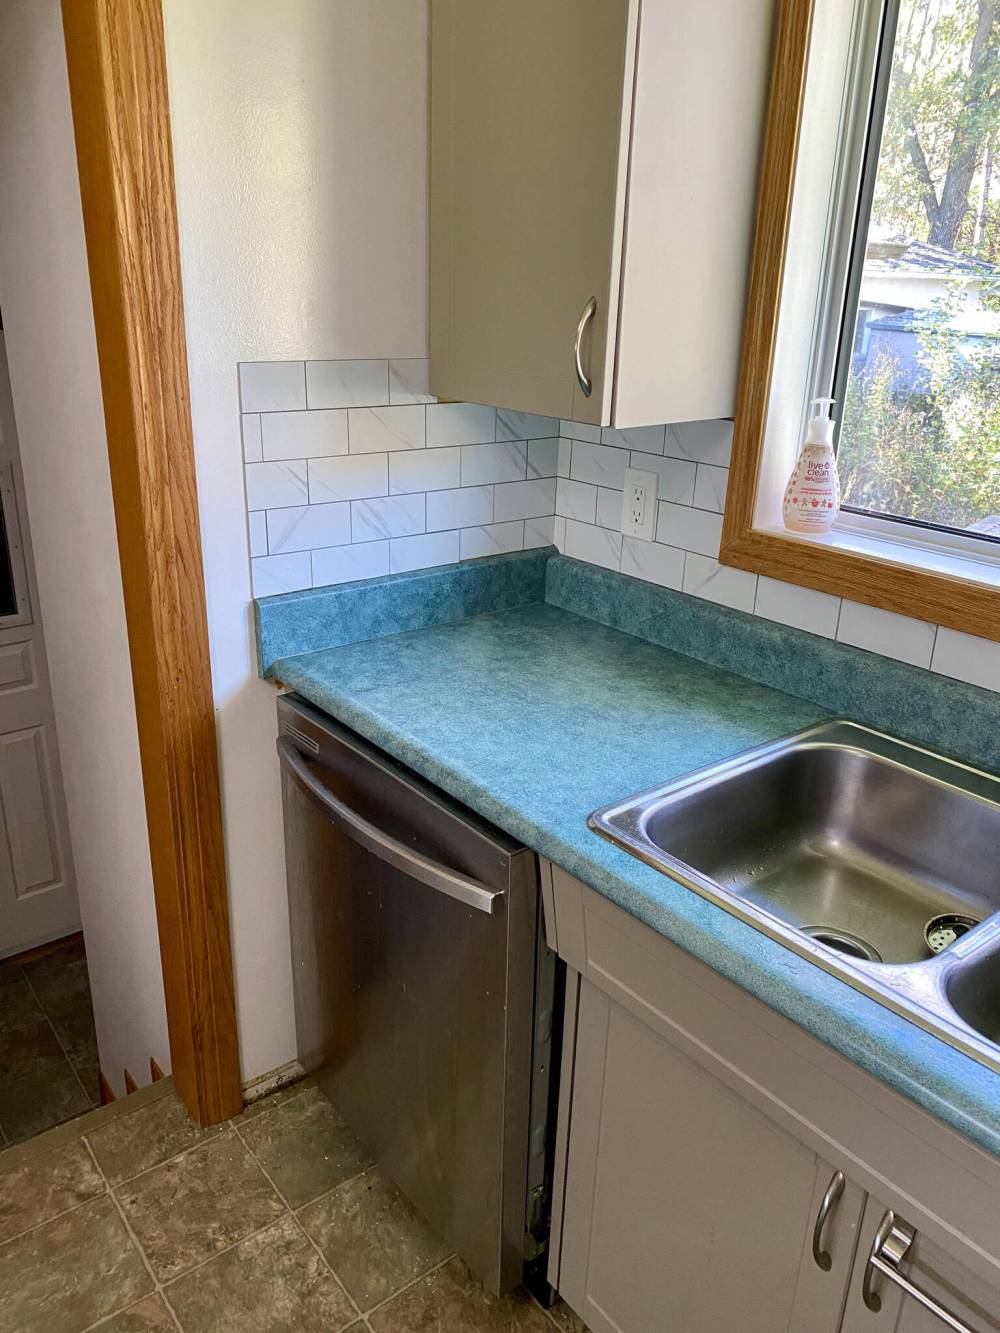
Starting at one clean end, the peel-and-stick tile mosaic is built along the wall.
The plates were then repositioned at every light switch and outlet. The seam along the countertop rise was sealed using clear silicone, while the seam along the underside at every upper cabinet was sealed with white silicone to better match the tile. At a glance from a distance, it was clearly a vast improvement and makes the kitchen seem bigger overall. And although the look of the kitchen would benefit from some other improvements, we did manage to stay on budget during this portion of the property renovation.
Although peel-and-stick tile remains an unlikely alternative choice in my tiling repertoire, this product did serve a purpose in this case. Peel-and-stick clearly could never be used in a tub and shower scenario for obvious reasons. As a kitchen backsplash, however, the ease of installation and variety of tile mosaic styles and colours does offer interesting options.
Moreover, peel-and-stick can be achieved in a single step, and avoids the mess of cutting ceramic tile that also requires grouting.
It’s a great choice for a DIY project, when traditional tiling may seem overwhelming.
RenoBoss.Inc@outlook.com
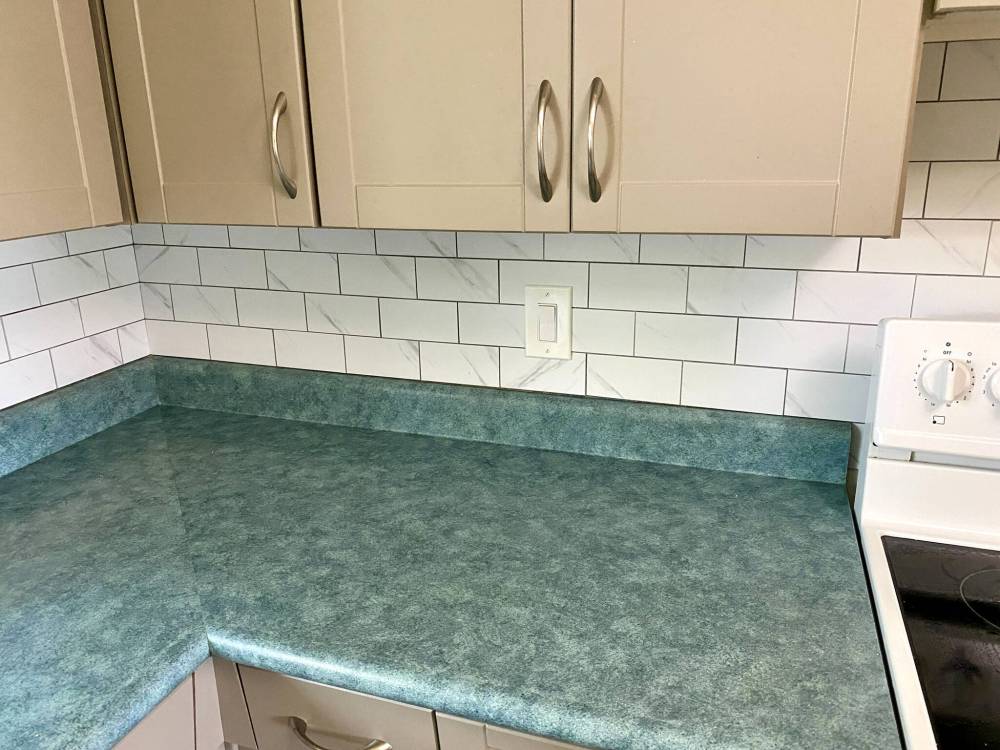
The tile mosaic is cut using a mitre saw, table saw and oscillating tool to meet the wall dimensions, and cater to outlet and switch locations.