

From drab to fab
Laundry room facelift makes things lighter, brighter
Advertisement
Read this article for free:
or
Already have an account? Log in here »
To continue reading, please subscribe:
Digital Subscription
One year of digital access for only $1.44 a week*
- Enjoy unlimited reading on winnipegfreepress.com
- Read the E-Edition, our digital replica newspaper
- Access News Break, our award-winning app
- Play interactive puzzles
*Billed as $5.77 plus GST every four weeks. After 52 weeks, price increases to the regular rate of $19.95 plus GST every four weeks. Offer available to new and qualified returning subscribers only. Cancel any time.
To continue reading, please subscribe:
Add Free Press access to your Brandon Sun subscription for only an additional
$1 for the first 4 weeks*
- Enjoy unlimited reading on winnipegfreepress.com
- Read the E-Edition, our digital replica newspaper
- Access News Break, our award-winning app
- Play interactive puzzles
*Your next Brandon Sun subscription payment will increase by $1.00 and you will be charged $17.95 plus GST for four weeks. After four weeks, your payment will increase to $24.95 plus GST every four weeks.
Read unlimited articles for free today:
or
Already have an account? Log in here »
An untidy, dingy or even dirty laundry area is an oxymoron — an insult to cleanliness.
An uninviting laundry room can also lead to procrastination when chores demand action. During a recent gutting and remodelling of a basement, there were subsidiary projects that needed to be tackled, and the laundry space would prove to be the most dramatic transformation.
It’s quite likely that many homeowners have endured a less-than-favourable laundry space. Typically, home renovations start elsewhere, with the kitchen, bathrooms, flooring and painting usually taking precedent. The laundry room is often tucked away in a corner of the basement behind a closed door. It took years, even decades, before my own laundry room was upgraded, and boy, what a difference it has made in our day-to-day rituals. My wife said it best: “I used to hate doing laundry until the reno, and now I look forward to being down there.”
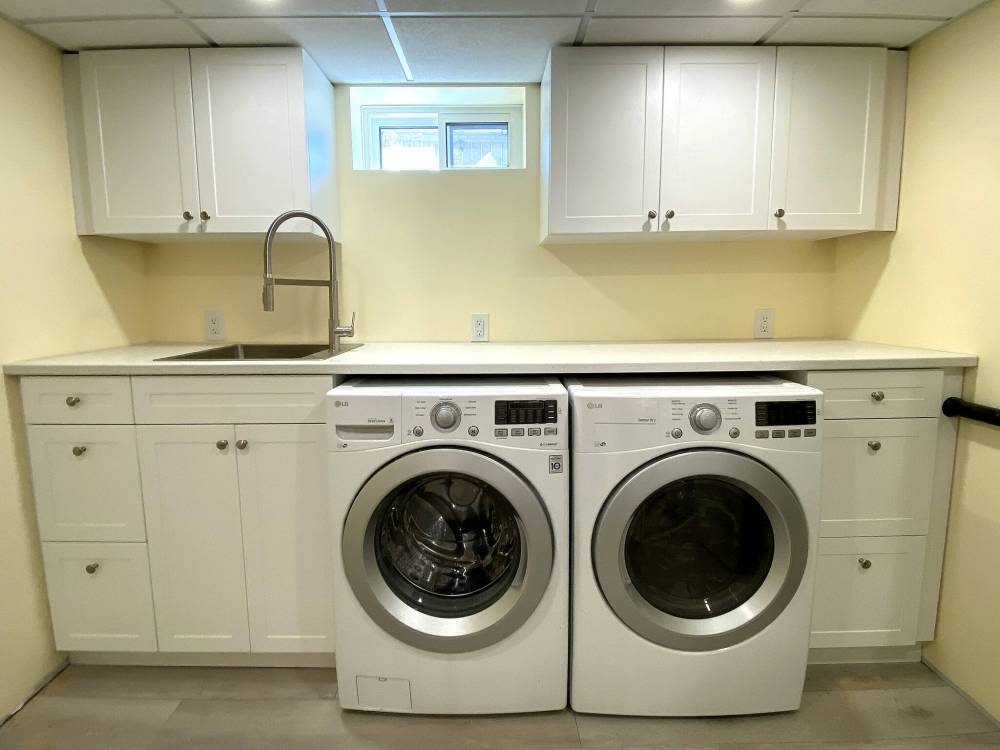
Marc LaBossiere photos / Free Press
After: new cabinets, countertop and sink have improved the space dramatically.
The basement renovation for my clients involved repositioning most inner walls to enhance the layout of the existing rooms. Although the laundry room square footage would diminished slightly as a result, the functionality would be greatly improved with the introduction of upper and lower cupboards for storage. A secondary “faux” wall would create a flat vertical surface upon which the cabinets could be mounted.
To start, the existing sump pump ABS drain feed was rerouted to accommodate the faux wall. Once this was done, the feed would run behind the new wall and below the existing window instead of awkwardly running along the ceiling. The existing dryer plug was lowered to within what would become the inset for the dryer, below the new Arborite countertop. The old laundry tub wash basin was abandoned and the water feeds were cleanly re-routed to accommodate a new stainless steel laundry sink and faucet, as well as new taps for the washer, which is also tucked next to the dryer within the wall inset. The washer ABS drain was repositioned, along with the trap for the laundry sink. Although the dryer vent and outlet were unfortunately near the window, the new cupboard design allowed it to be concealed inside the upper cabinets, and the main duct is also channeled behind the faux wall, peeking out just below counter elevation. The flex hose attached to the end of the duct is fastened to the dryer duct outlet.
Once the suspended ceiling was installed, along with new LED slim lighting, the washer and dryer were set into position atop the new vinyl plank flooring, which blends well with the newly painted, mellow-yellow wall. The lower cupboards were then placed along the back wall, secured with screws. The upper cupboards were mounted to the wall roughly 18 inches above the lowers, and an inch lower than the underside of the suspended ceiling tiles and grid. Once the finishing trim pieces were installed, the area truly began to take shape.
The countertop was challenging to install because it runs the entire length of the back wall. As such, the counter was cut roughly a quarter inch shorter to negotiate the installation within the two neighbouring walls. After securing the countertop to the lower cupboards using screws underneath, the sink location was scribed and cut out using a jigsaw, with the sink offset to accommodate the washer and dryer. Owing to the design of the upper cupboards, the new stainless-steel sink was installed so that the faucet was on the right. Once the sink was affixed to the countertop, the faucet was mounted. The water feeds were connected to the new shut-off valves below, and the sink drain connected to the new trap. A quick test revealed everything was operating properly and the bank of cabinets with plumbing became fully functional.
The comparison is striking — what was a dingy and unwelcoming space has evolved into an esthetically beautiful room that makes doing laundry almost fun!
I’ll never forget the homeowner’s reaction when she saw it for the first time — she gasped audibly during the big reveal. And the smile on her face seemed to dispel thoughts of what had once clearly been a less-than-appealing laundry room.
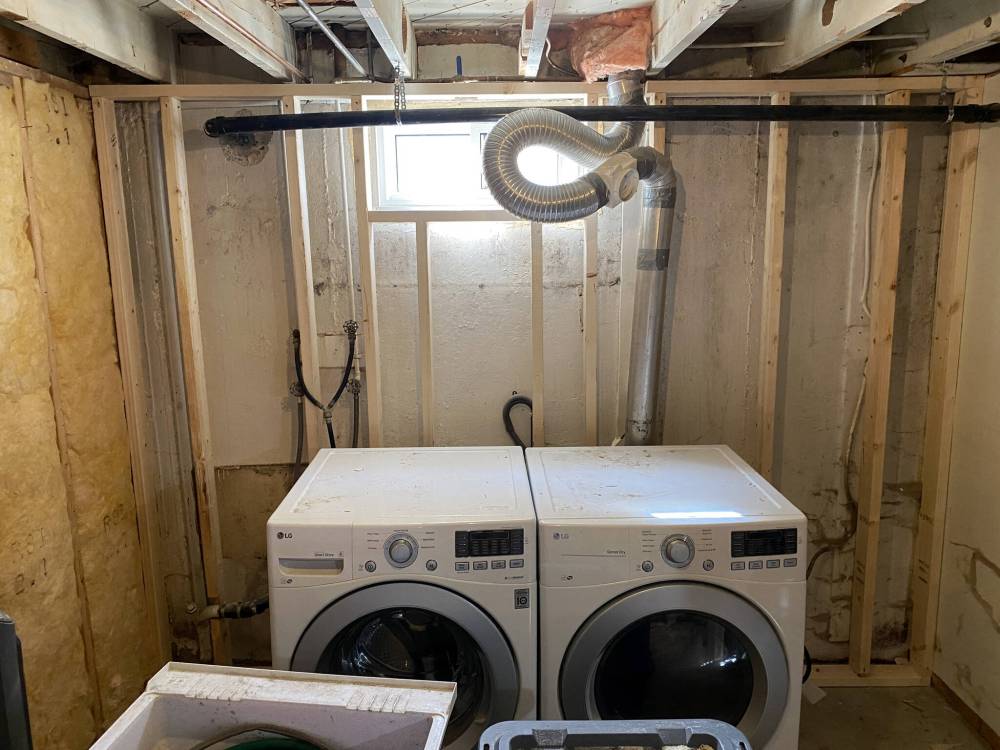
Before: the introduction of a faux wall behind the washer and dryer was the first step to reconfiguring the old dingy laundry room.
I’m so glad we were able to successfully upgrade the space. Doing laundry is essential, and this project within a project will surely lessen the dread and the tedium.