

One step at a time
Basement staircase gets an elegant update
Advertisement
Read this article for free:
or
Already have an account? Log in here »
To continue reading, please subscribe:

Digital Subscription
One year of digital access for only $205*
- Enjoy unlimited reading on winnipegfreepress.com
- Read the E-Edition, our digital replica newspaper
- Access News Break, our award-winning app
- Play interactive puzzles
*First annual payment billed as $205.00 + GST for one year. This annual subscription will automatically renew at $233.00 + GST every 52 weeks (10% off the regular annual price of $259.35). Offer available to new and qualified returning subscribers only. Cancel any time.
To continue reading, please subscribe:
Add Free Press access to your Brandon Sun subscription for only an additional
$1 for the first 4 weeks*
- Enjoy unlimited reading on winnipegfreepress.com
- Read the E-Edition, our digital replica newspaper
- Access News Break, our award-winning app
- Play interactive puzzles
*Your next Brandon Sun subscription payment will increase by $1.00 and you will be charged $17.95 plus GST for four weeks. After four weeks, your payment will increase to $24.95 plus GST every four weeks.
Read unlimited articles for free today:
or
Already have an account? Log in here »
Sometimes, when planning a renovation, the least obvious change creates the biggest impact.
Of course, functionality and esthetics must be considered early on. At a recent jobsite, the staircase leading to the lower level felt like a tunnel, with both walls running through to the basement. But by strategically notching the stairwell walls, the entry to the basement was made much more welcoming.
The mandate for the project was clear from the outset — homeowners wanted a revised layout that better utilizes space, with an updated look and feel. Beyond the awkward wall placements and waste of usable space, the staircase was a priority. Although it served its purpose, it had been built in a very utilitarian manner and was an eyesore — a real blemish in the basement.
Marc LaBossiere photos / Free Press
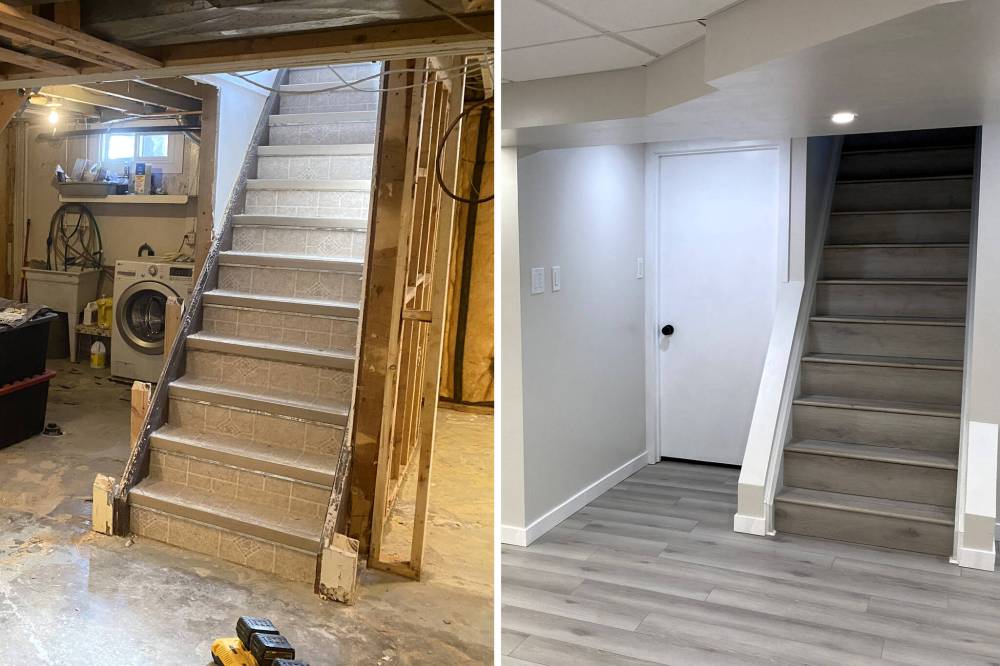
Before and after: non-load-bearing studs were cut away to make room for the new design.
After planning a new design, I determined that the walls on either side of the stairs had been erected after the main structural components of the lower level were put in place. In other words, the staircase walls were not load-bearing and could be altered without undermining the upper floor joists. As such, two elements were implemented within the new design: the laundry room door that had been flush with the front face of the lowest stair would now be recessed, creating a short hallway into the laundry, and — most importantly — the wall adjacent to the laundry entry would be cut away in order to open up the stairs into the main rec room, with a lesser cutaway on the opposing stair wall. This would greatly improve the look of the space, while allowing for a broader view of the basement area.
To prep the space, the studs on both sides of the stairs were cut away to meet the new framing requirements. A new cap was then secured to the tops of the studs, and the area was framed. With the structure now updated, the walls were drywalled, receiving tape and corner bead along with numerous coats of mud during the finishing stages prior to painting. Once the areas had been sanded and painted, focus shifted to the stairs themselves.
The old staircase had been sheathed with dated linoleum and rubber stair nosing. The nosing was removed, and each rise was built up vertically level to the protrusion of the 2 x 10 stair tread. At this stage, the decorative stringers on either side of the stairs were sanded and painted a slightly darker colour than the neighbouring walls. With the main surfaces along the stairs now taken care of, it was time to tackle the steps themselves.
The vinyl chosen for the main flooring throughout the basement was also used on the stairs. Each stair rise and tread received vinyl cut to length and width, until the entire staircase was sheathed. To secure the rises and treads, a high-bond adhesive was used to ensure the planks never shift or lift. Along the front edge of each stair, a matching top-mount nosing was glued into place, using painter’s tape to temporarily hold each nosing in place as the adhesive set and cured overnight. By morning, the nosings were fused to the treads.
The last step (pardon the pun) involved finishing the seams of the drywall along the decorative stringer with a combination of two types of PVC trim, mitred where required at the top and bottom of each stringer. The trim seams were then given a thin bead of white silicone to hide any gaps, and all edges of the vinyl received a clear bead of silicone to mitigate any gaps where the vinyl stair elements meet each other and the sides of the stringers.
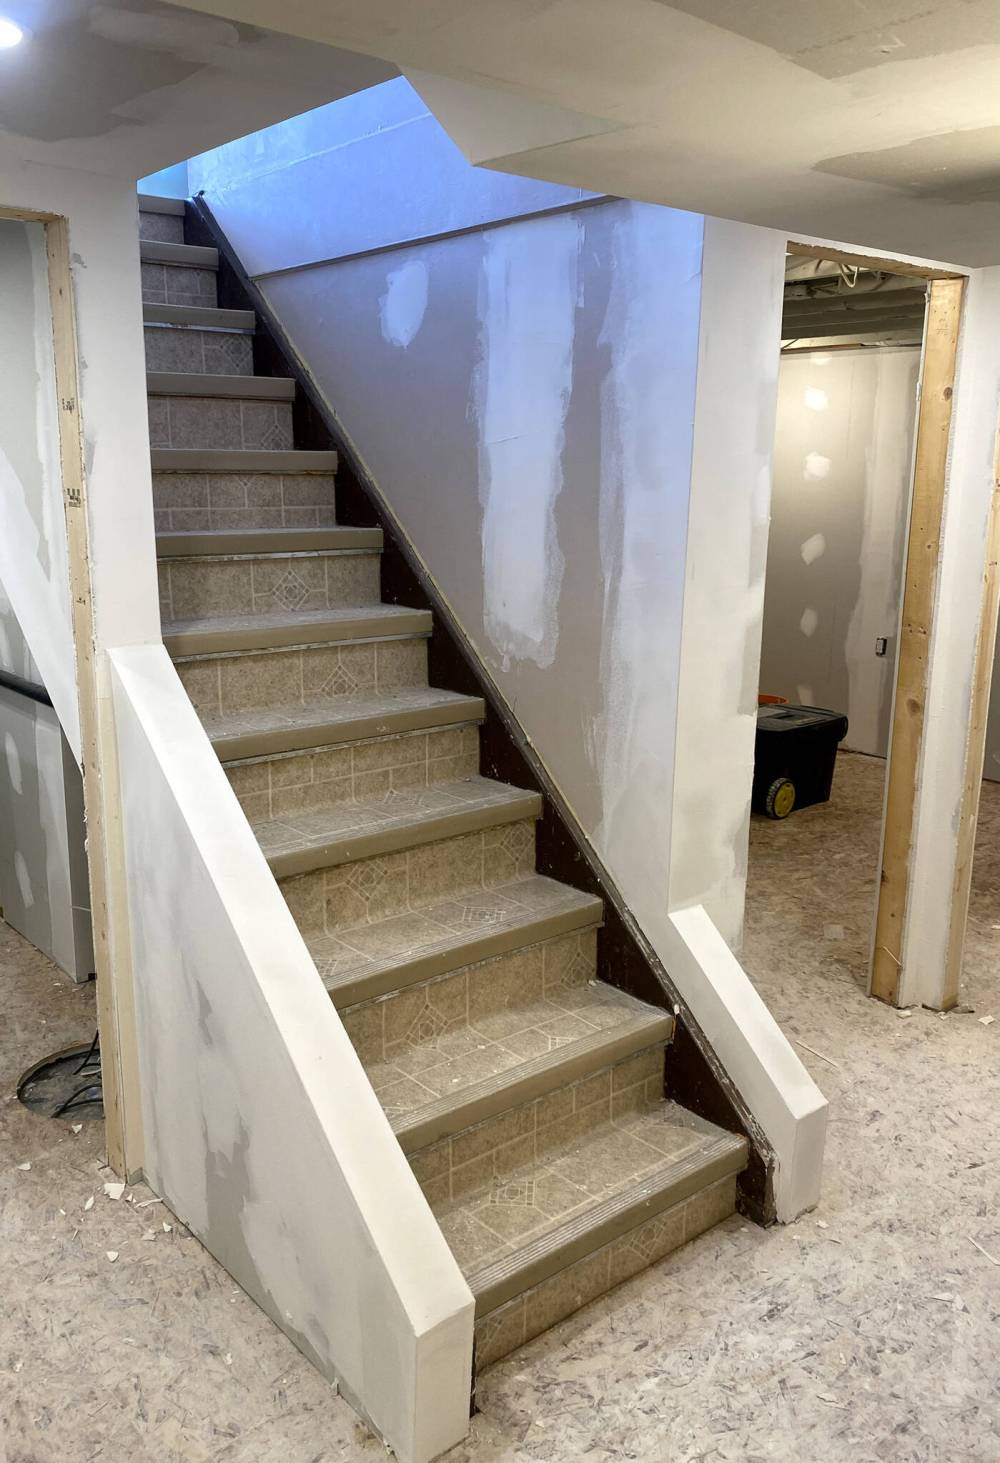
The newly framed stairwell wall is drywalled and mudded, using corner bead along all outer 90-degree edges.
Now, the staircase lets the basement area really shine. It’s an attractive update that serves its purpose well.
Not only do the notched stairwell walls seem to widen the perspective of the basement from both the entering and leaving points, but the basement itself seems bigger.
The lower level no longer feels like a cavern or a cellar, cut off from the main floor. These stairs are truly worthy of stares!
RenoBoss.Inc@outlook.com
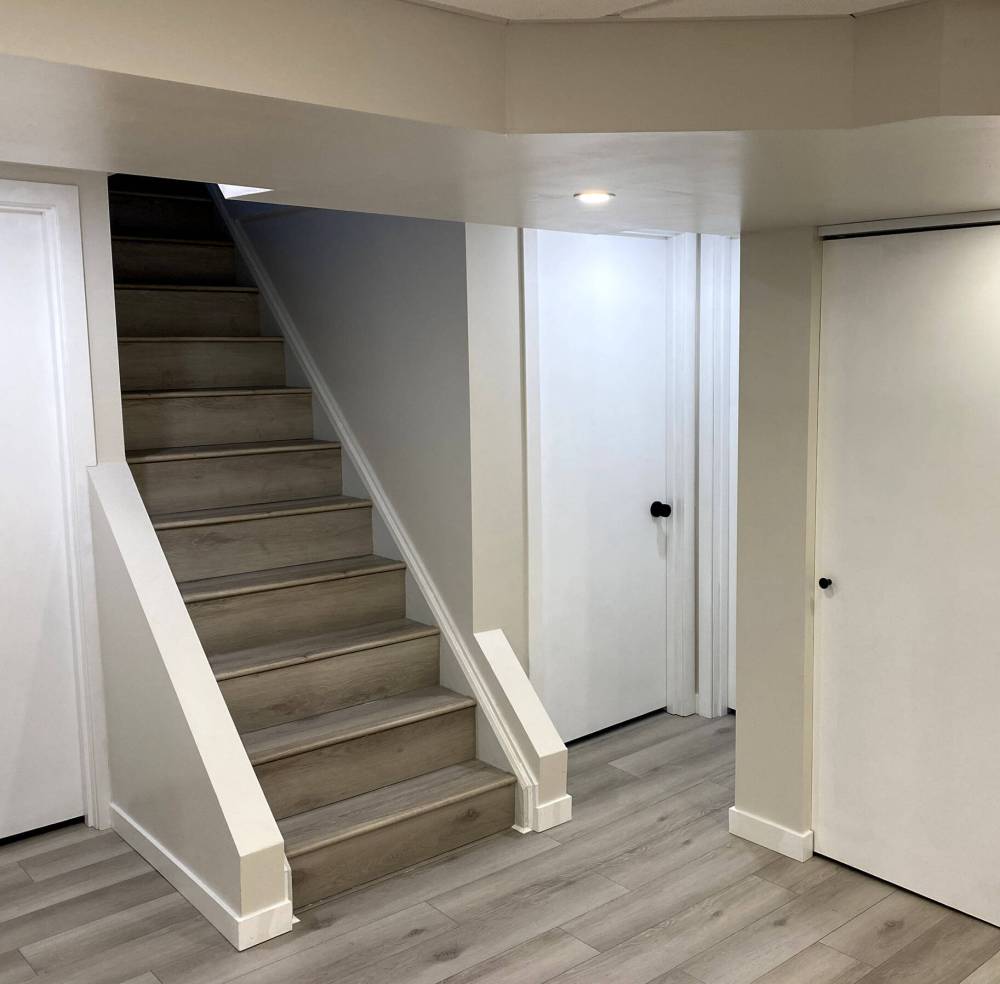
The stairwell walls were notched to improve the entry to the basement.