

Starting from scratch
After a deck was gouged during another project, the task was to make it look as good as new
Advertisement
Read this article for free:
or
Already have an account? Log in here »
To continue reading, please subscribe:

Digital Subscription
One year of digital access for only $205*
- Enjoy unlimited reading on winnipegfreepress.com
- Read the E-Edition, our digital replica newspaper
- Access News Break, our award-winning app
- Play interactive puzzles
*First annual payment billed as $205.00 + GST for one year. This annual subscription will automatically renew at $233.00 + GST every 52 weeks (10% off the regular annual price of $259.35). Offer available to new and qualified returning subscribers only. Cancel any time.
To continue reading, please subscribe:
Add Free Press access to your Brandon Sun subscription for only an additional
$1 for the first 4 weeks*
- Enjoy unlimited reading on winnipegfreepress.com
- Read the E-Edition, our digital replica newspaper
- Access News Break, our award-winning app
- Play interactive puzzles
*Your next Brandon Sun subscription payment will increase by $1.00 and you will be charged $17.95 plus GST for four weeks. After four weeks, your payment will increase to $24.95 plus GST every four weeks.
Read unlimited articles for free today:
or
Already have an account? Log in here »
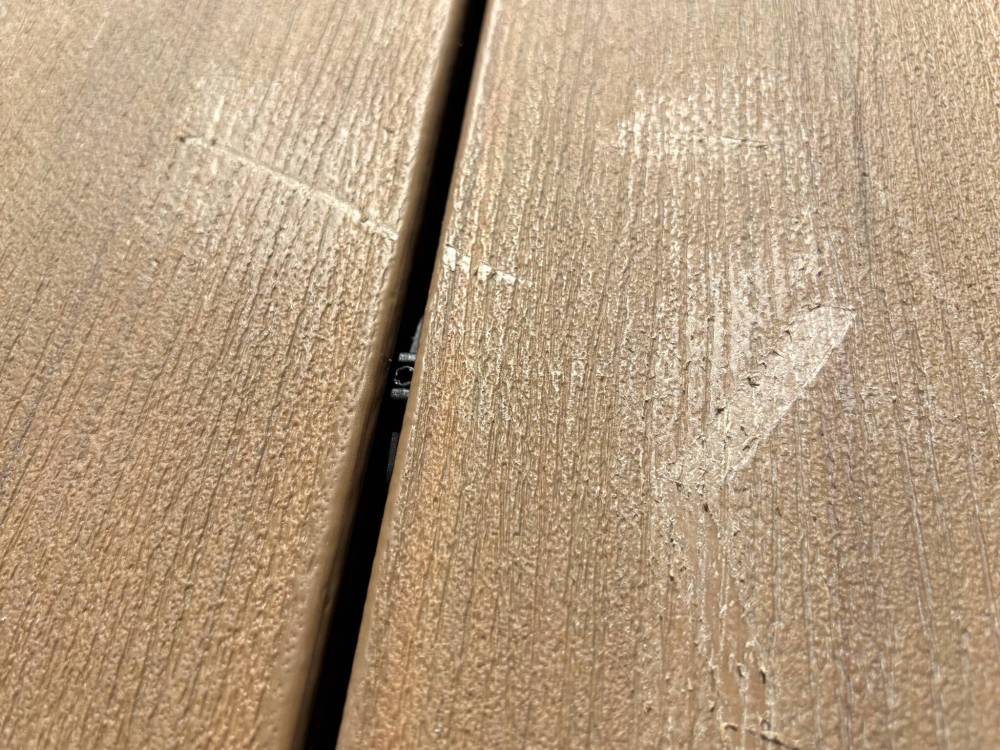
During a recent window installation, the composite deck became slightly damaged when the window was positioned there temporarily during the delivery. Unbeknownst to the delivery crew (who had struggled to place the 300-pound window unit using a dolly), the window had been placed atop a few acorns, which scratched and gouged several areas of the deck as they walked the window back towards the exterior wall.
I hadn’t noticed it either, until the project was completed and the homeowners brought it to my attention.
With any reno project, every effort is made to ensure the process goes as smoothly as possible, without affecting other areas of the home or property. In this case, the homeowners only noticed the damage to their top deck after thoroughly washing the area with a high-pressure spray nozzle. Although composite decks are easily scratched during normal use, these particular scrapes were quite noticeable — more like gouges than surface scratches. It quickly became evident that the heavy window had been set down on a few acorns (evident throughout the yard) and their shells had broken under the weight. When the window was moved, the abrasive edge of the shells created deep rifts in the deck — a very unfortunate scenario, since the homeowners had just recently had their deck re-sheathed in composite to replace old, treated lumber.
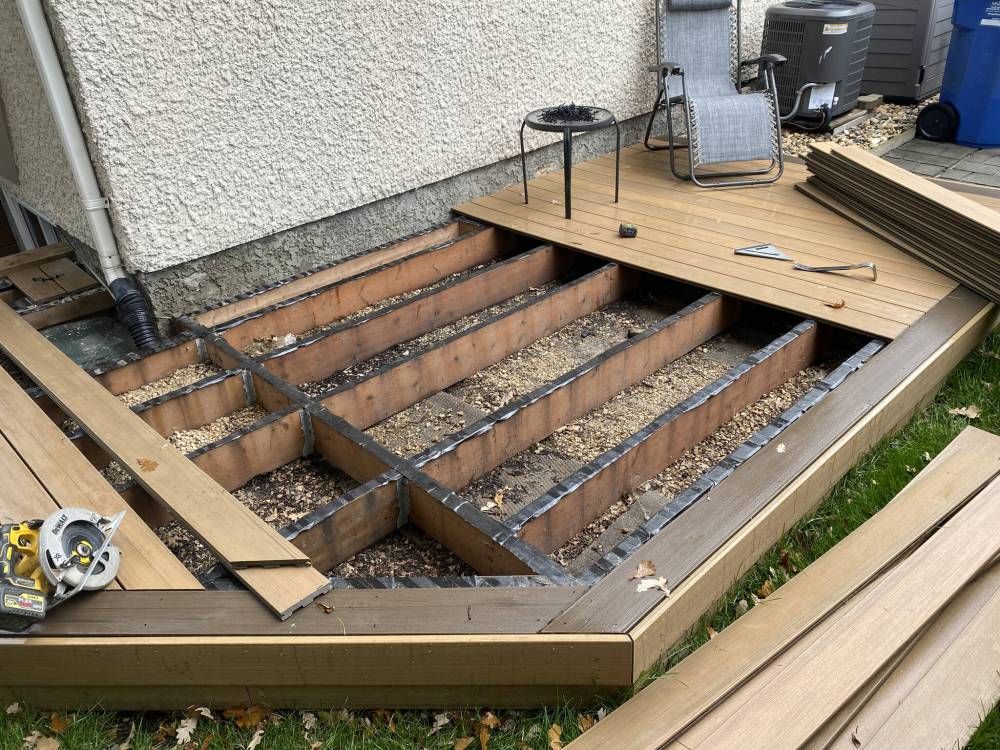
The area encompassing the damage is uninstalled to swap out bad boards for new.
In talking to the homeowners, I learned the brand and colour of the composite boards which, to my delight, was easily sourced locally. I then scheduled a quick visit to assess the number of boards required to remedy the damaged area. Luckily, no board to be replaced was longer than eight feet, allowing me to use halved, 16-foot lengths for the fix.
Unlike treated lumber decking, which can easily be fixed by pulling up an individual board for replacement, composite decking is installed like click flooring — by starting at one end and working through to the other. Because the scrapes and gouges were in the middle of the deck, a process to remove just the damaged boards was devised by first loosening the screws that hold the clips for the affected boards, and pulling out the entire area, carefully conserving boards that had no blemishes. Although the removal process was relatively easy, the re-installation required careful placement and an unconventional approach to reposition the final two planks.
One by one, the damaged boards were swapped out for new composite, cut to meet the existing lengths and mitred where required. The clips securing each of the grooved boards were refastened along the top of each joist using the existing holes, which was crucial in ensuring that the boards would once again fit. With the final two boards remaining, clips were loosely secured along the edge of the last board laid, as well as along the edge of the board opposite, so that the two boards could be urged into place with a bit of play. To get the clips in between the two final boards, the boards were dropped into position so that the leading edge of each board was at an angle, with the inner edge facing slightly upward. The last row of clips was then placed into the grooves, at each joist location. Once all the clips were in place, the boards were forced downward until they were level with the joists. The clips were then secured along the outer edges of each board, as well as between the two final boards.
Although I had been diligent in securing the clips, the final two boards were still quite stubborn, likely due to expansion and minor shifting. But soon the installation was a success and the deck was once again flawless, as it had been after the original installation.
Despite a successful window replacement that had been done with care, minor damage had occurred to the deck during the delivery of the window. I opted to assume responsibility for the damage instead of involving the supplier and their delivery crew who had unwittingly caused it — who would think to look for fallen acorns before setting a heavy window down?
Marc LaBossiere photos / Free Press
The deck was gouged after a heavy window had been set down on top of a few acorns, and then moved.
In the past, this supplier has always shown accountability for any issues that have arisen, whether because of product defects or any other reason. This time, I was more than willing to shoulder the burden and the costs and repair the damage myself. Along the way, I had a chance to improve the look of the hidden access hatch, and properly jig a circle around the downspout which leads through the top decking — it had originally been cut at awkward angles, which I could not abide.
Most importantly, the homeowners were thrilled that the issues were addressed in a timely manner without any fuss.
RenoBoss.Inc@outlook.com
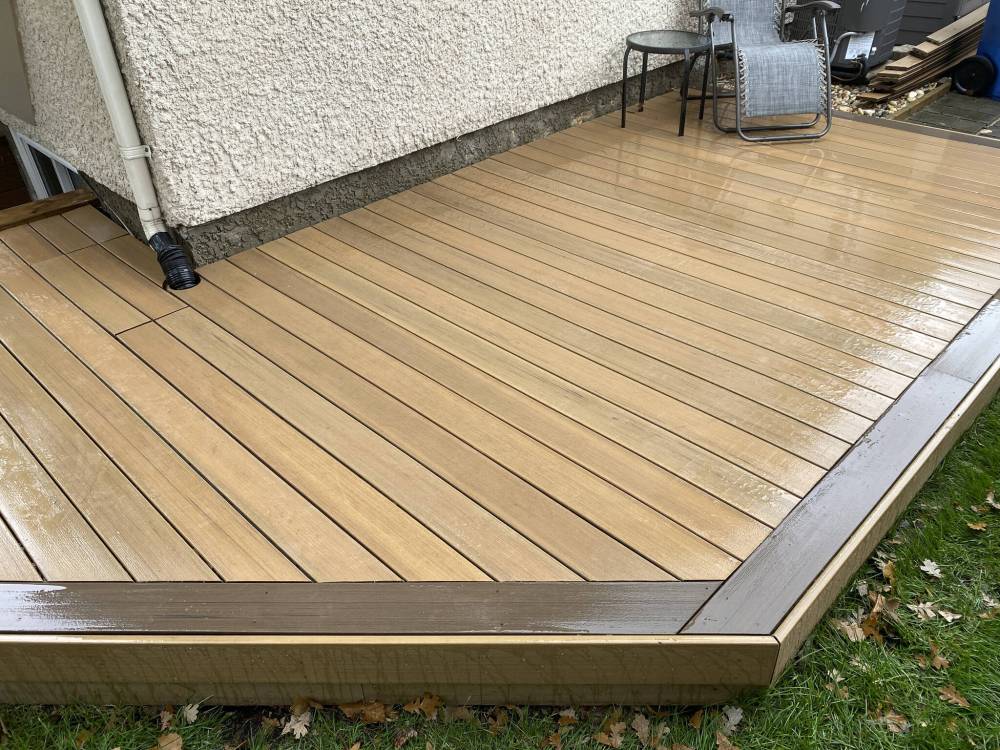
Replacing the damaged boards brought the decking back to flawless.