A cut above: Bring out the power tools for gourd creations
Advertisement
Read this article for free:
or
Already have an account? Log in here »
To continue reading, please subscribe:
Digital Subscription
One year of digital access for only $1.44 a week*
- Enjoy unlimited reading on winnipegfreepress.com
- Read the E-Edition, our digital replica newspaper
- Access News Break, our award-winning app
- Play interactive puzzles
*Billed as $5.77 plus GST every four weeks. After 52 weeks, price increases to the regular rate of $19.95 plus GST every four weeks. Offer available to new and qualified returning subscribers only. Cancel any time.
To continue reading, please subscribe:
Add Free Press access to your Brandon Sun subscription for only an additional
$1 for the first 4 weeks*
- Enjoy unlimited reading on winnipegfreepress.com
- Read the E-Edition, our digital replica newspaper
- Access News Break, our award-winning app
- Play interactive puzzles
*Your next Brandon Sun subscription payment will increase by $1.00 and you will be charged $17.95 plus GST for four weeks. After four weeks, your payment will increase to $24.95 plus GST every four weeks.
Read unlimited articles for free today:
or
Already have an account? Log in here »
Hey there, time traveller!
This article was published 27/10/2015 (4012 days ago), so information in it may no longer be current.
There are a million great ideas for carving pumpkins, and some of them are masterpieces. Most of us though, are just doing it for fun or as a well-supervised project with the kids.
Enter Tom Nardone with his three books Extreme Pumpkins, Extreme Pumpkins II and Extreme Halloween.
“My books are in bookstores everywhere now and on clearance tables everywhere starting on Nov. 1,” says Nardone, from Detroit.
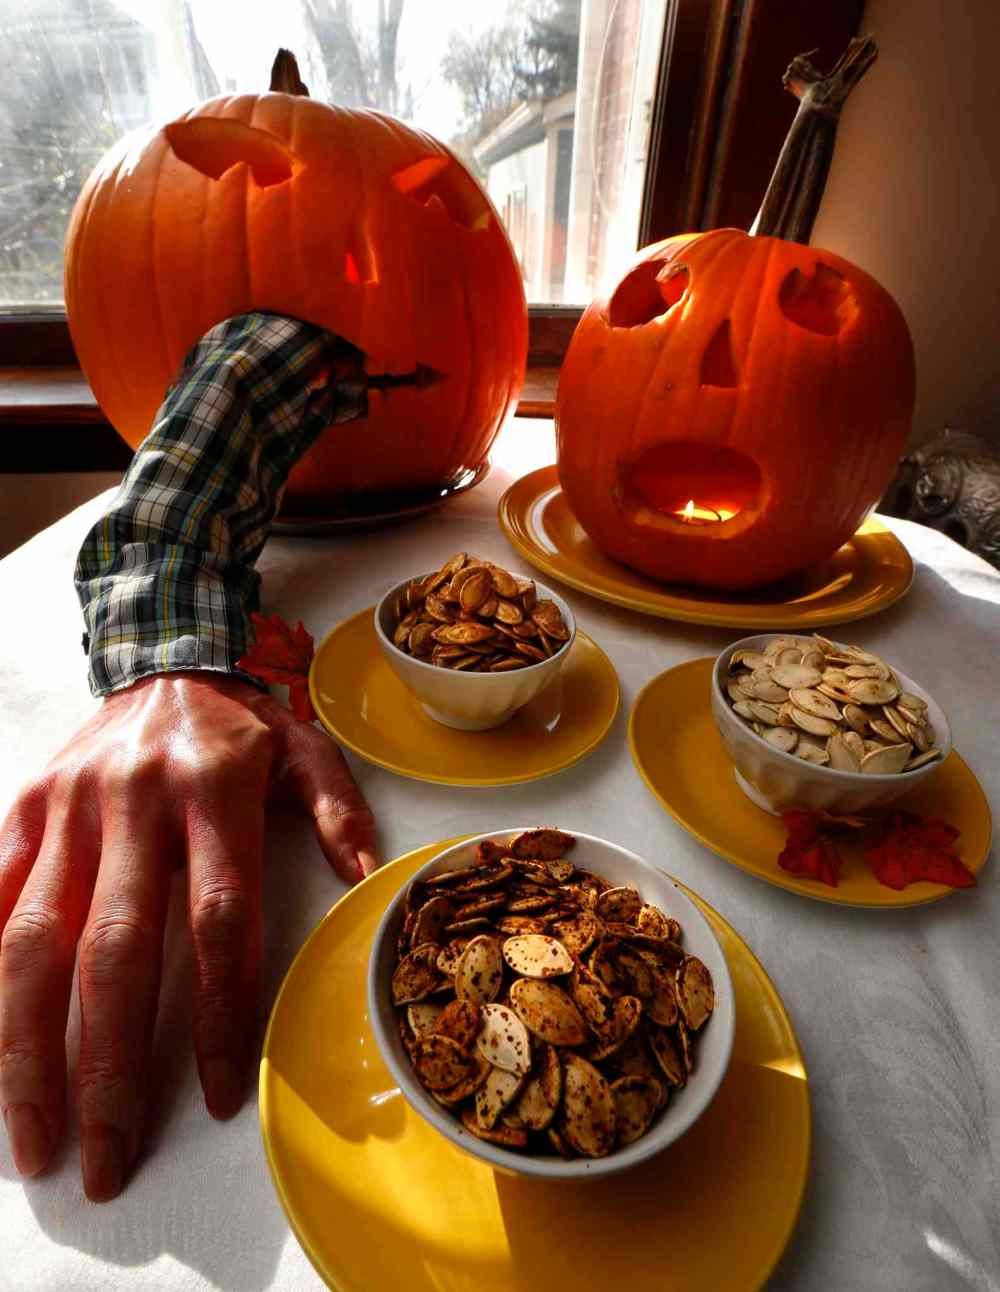
The pumpkin enthusiast is married with three kids and says his wife, Lisa, suffers every October.
“I have been carving pumpkins since 1996 when I bought a fixer-upper house in a neighbourhood that was inundated with trick-or-treaters,” Nardone says.
“I didn’t own any decorations, but I had power tools and pumpkins, so started doing my own thing, and it caught on,” he says.
Nardone’s carved hundreds of pumpkins over the years and started a website and a book series to spread the word.
No matter how naturally skilled you are, the basics are the same and Extreme Pumpkins is a good way to get started. You don’t have to be a master carver, as Nardone guides you through the basics and then shows you how to create a bigger scare using props.
Visit Nardone’s website, extremepumpkins.com, for lots more inspiration. He runs a contest and all the photos of the winners are there, as are a helpful get-started video and even free carving patterns.
“There are hundreds of winning pumpkins on the site you can use for inspiration,” he says.
If you are carving pumpkins with younger kids, don’t set the creative bar so high they become frustrated or discouraged. Keep it simple, keep it fun and use props to make even a simple carving really scary or goofy. Of paramount importance though, pumpkin choice is crucial, Nardone says.
“I like pumpkins that are taller than they are wide because that is the shape of the human face,” he says.
“Also, I like them large, and finally, I like an ugly pumpkin more than a perfect one, for personality.”
Once you’re picked a fresh-looking pumpkin with no mould or soft spots, you are on your way. Remember, kids need supervision with sharp tools.
Here are some of Tom Nardone’s top tips:
- Choose pumpkins for character. Nardone likes odd shapes for more interest.
- Decide how you will cut in to remove seeds. You can go through the top, the back or the bottom, depending on your design. You just need to get all of the seeds out.
- To cut the plug on the top, Nardone suggests a drywall saw. Cut in on a slight angle (like a cone) with a small jog to make it easy to replace the top. Plastic knives and scoops work well for basic cutting and scooping.
- Scoop out the guts. Nardone says if you scrape all of the insides down and then dump them out, you can keep your arm fairly clean. (I use a melon-baller to get the last of the guts out and to scrape the walls clean.)
- Draw the face. Nardone suggests dry erase markers, which can be easily wiped when making corrections.
- Nardone likes to use power tools to carve. Jigsaws are good for big chunks (such as eyes and mouth). He suggests a rotary tool like a Dremel to carve outer layers to add texture to the outside. Take your time, and use different-shaped knives and small handsaws to get your shapes. Nardone says if the carved pieces don’t pop out, slice large shapes into smaller pieces.
- Use props to make your pumpkin really shine: wood chips or charcoal for teeth, taffy candy for tongues, even foam insulation for brains. One of his suggestions is to buy dried pigs’ ears prepared as a chew for dogs. You can stick them right into the side of the gourd.
- Preserve your pumpkin if you want to display it early. Nardone suggests a spray with bleach-containing cleanser (you can mix 5 ml (1 tsp bleach) with 500 ml (2 cups) water in a spray bottle). This keeps bugs, mould and animals away.
There Will Be Seeds
If you carve pumpkins as a secondary mini-career, you better have a cooking plan. Tom Nardone likes his seeds with butter and salt.
“I roast about 10 per cent of the seeds that I carve,” he says. “I know that they don’t keep as long when you roast them with butter, but they don’t last long in my house.
“Also, I don’t rinse them — I like squash and butter and I like pumpkin guts stuck to my seeds.”
There are two ways to prepare pumpkin seeds: you can roast them or toast them. I prefer to toast them on the stove top in a cast iron pan. It’s faster and it’s easier to monitor them so they don’t become overdone. The other way is to roast them in the oven, which requires a little more care. Either way, here are few shared steps:
- Once you’ve scooped out the jack-o’-lantern, put the seeds in a large bowl of water and separate them from the pumpkin guts, then put the seeds in a strainer and give them a good rinse. Measure how many you have.
- Put the seeds in a pot with roughly 500 ml (2 cups) of water for every 125 ml (1/2 cup) pumpkin seeds. Bring it to a boil and let simmer for 10 minutes.
- Drain and dry well, very well if you are going to pan-toast the seeds.
Oven method
You can roast the pumpkin seeds plain and then later toss with flavourings, or add the flavouring first and then roast. If you add flavouring before roasting, keep a closer eye so the coating doesn’t burn. You may have to adjust your heat down slightly.
To oven-roast plain seeds, toss the pumpkin seeds in olive oil, enough to coat lightly. Spread them out on a sheet pan in a single layer.
Preheat the oven to 180 C (350 F). Checking and stirring every 5 to 7 minutes, roast for 10 to 30 minutes or longer until seeds start to brown. Timing will depend on the size of the seeds. (You can cool one or two and taste to see if they are ready enough).

Remove from oven to a large bowl and season. (Suggestions below).
Pan Method
To toast in a fry pan, make sure the seeds are dry. You want them to toast, not steam.
Warm a dry, fairly large, heavy skillet over moderate heat (cast iron works best). Add the seeds and stir constantly until golden and browning a little, about 10 minutes or longer. Remove to a bowl and season. (Suggestions below).
The recipes below should cover one cup of seeds. If coatings seem too sticky after cooking, spread the seeds on a sheet pan in the oven at 120 C (250 F) until they are more dry, but watch carefully.
Quick Toss Ideas
While seeds are warm from toasting or roasting, toss in a bowl with a little butter or olive oil and any one of the following: commercial popcorn seasoning; lemon pepper; a little Tabasco sauce; cumin and salt; sugar and cinnamon.
Or try some of these recipes:
Honey Butter
30 ml (2 tbsp) butter
15 ml (1 tbsp) honey
15 ml (1 tbsp) brown sugar
0.5 ml (1/8 tsp) salt
Melt all the ingredients together and toss onto warm roasted or toasted seeds. Spread on to tray and bake in preheated oven 120 C (250 F) for 15 minutes or longer until fairly dry, checking frequently. Remove from oven and let cool before transferring to a bowl.
Pumpkin Pie Spice
90 ml (6 tbsp) white sugar
1 ml (1/4 tsp) salt
2 ml (1/2 tsp) pumpkin pie spice (commercial blend)
15 ml (1 tbsp) vegetable oil
In a small bowl, mix the sugar, salt and pie spice. Heat the oil in a large skillet, moderate heat. Add toasted seeds to skillet and stir. Stir spice mix into seeds in skillet until spices mix is melted. Remove seeds and spread on sheet pan and place in oven at 120 C (250 F) until dry for 20 minutes or so, checking frequently. Remove from oven and let cool before transferring to a bowl.
Spicy Not Sweet
You may want to start with half the chili powder and taste the mix before adding.

7 ml (1 1/2 tsp) olive oil
5 ml (1 tsp) chili powder
7 ml (1 1/2 tsp) Tamari sauce
5 ml (1 tsp) garlic powder
Blend seasonings and oil together in a large bowl. Add cooked seeds and thoroughly toss. Place in 120 C (250 F) oven and bake for 10 minutes, or until fairly dry, stirring occasionally. Remove to bowl and add salt, if needed.
Cajun
5 ml (1 tsp) paprika (optional)
3 ml (3/4 tsp) Cajun seasoning, or to taste
salt to taste
1 dash Worcestershire sauce
7 ml (1 1/2 tsp) butter, melted
Toss cooked seeds in a bowl with paprika, Cajun seasoning and salt. Combine Worcestershire sauce and melted butter separately and pour over seasoned seeds. Stir well and spread over sheet pan. Bake in 120 C (250 F) oven for 5 to 7 minutes, stir, bake for 5 to 7 more minutes until dry. Cool, remove into a bowl.
Related Articles
Your guide to Halloween in the 'Peg
Advertisement Advertise With Us
Advertisement Advertise With Us