Creating gorgeous gourds
Carving holiday-themed pumpkins isn't just for kids
Advertisement
Read this article for free:
or
Already have an account? Log in here »
To continue reading, please subscribe:

Digital Subscription
One year of digital access for only $205*
- Enjoy unlimited reading on winnipegfreepress.com
- Read the E-Edition, our digital replica newspaper
- Access News Break, our award-winning app
- Play interactive puzzles
*First annual payment billed as $205.00 + GST for one year. This annual subscription will automatically renew at $233.00 + GST every 52 weeks (10% off the regular annual price of $259.35). Offer available to new and qualified returning subscribers only. Cancel any time.
To continue reading, please subscribe:
Add Free Press access to your Brandon Sun subscription for only an additional
$1 for the first 4 weeks*
- Enjoy unlimited reading on winnipegfreepress.com
- Read the E-Edition, our digital replica newspaper
- Access News Break, our award-winning app
- Play interactive puzzles
*Your next Brandon Sun subscription payment will increase by $1.00 and you will be charged $17.95 plus GST for four weeks. After four weeks, your payment will increase to $24.95 plus GST every four weeks.
Read unlimited articles for free today:
or
Already have an account? Log in here »
Hey there, time traveller!
This article was published 03/10/2018 (2846 days ago), so information in it may no longer be current.
We are at the gathering time of year, when the last of summer’s goodies are harvested to be brought inside to be enjoyed or stored. Also, for some reason, we must also indulge the irresistible urge to carve up unsuspecting cucurbita (that’s Latin for the genus to which pumpkins and squashes belong).
Why do we feel the need to blemish these lovely plants with our graffiti? It comes down to that which divides us all: you either love them or hate them.
You decorate them because you love them.
You carve them because you hate them.
It is the physical manifestation of the unending debate in the weeks before Thanksgiving and Halloween. Pumpkin pie: yes or hell, no? Pumpkin spiced coffee: heavenly brew or caffeinated atrocity?
The debate rages on in our household, year after year. With our kids (now grown), the power base is tipped with three firmly in favour of all things pumpkin — our children wisely siding with the one who cooks their food.
For the record, Halloween is not the only reason to carve a gourd. Thanksgiving brings an opportunity to expand the three triangle and a toothy grin repertoire to something pretty to welcome the holiday, and guests, to your table.
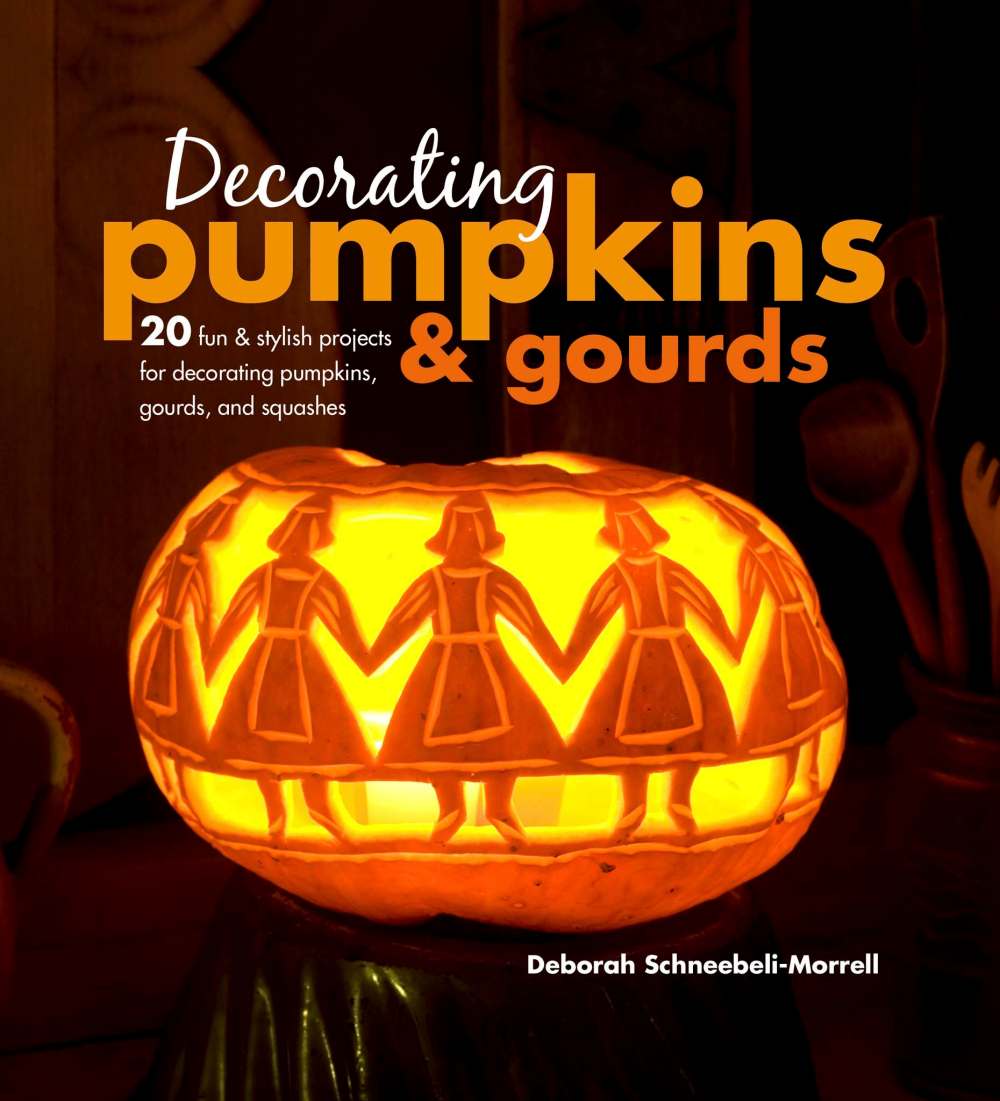
Deborah Schneebeli-Morrell’s autumnally appropriate Decorating Pumpkins & Gourds: 20 Fun & Stylish Projects For Decorating Pumpkins, Gourds, and Squashes (CICO Books, 96 pg, $17.95) will inspire you to get beyond the jack-o-lantern and try your hand at a garden or table lantern.
U.K.-based Schneebeli-Morrell is a fine arts-trained, award-winning artist and gardener with a list of art and craft books and magazine contributions under her belt including: Pebble Mosaics, The Art of Papercutting, and Grow Your Own Vegetables in Pots. Find her here: (facebook.com/deborah.schneebelimorrell)
With this manual, she offers 20 easy-to-do projects using simple tools. Schneebeli-Morrell sticks with simple lines, curves and dots or easy-to-duplicate patterns that anyone can do, so you can get results the first time around.
Some of the projects hollow out the gourds, but some add simple surface decoration, relying on the contrast between the shell and the flesh to make them visible. And it won’t matter what the shape of the gourd is, as long as it’s free from rot or soft spots.
Before you start carving into your squash or pumpkin, give it a thorough wash with soap and water. If you are not planning to eat it after decorating, (such as a jack-o-lantern) wipe it with a solution of 5 ml (1 tsp) of bleach to 1 litre (4 cups) of water. Repeat when you are finished carving, inside and out. This will slow any mould or rot. You will not be able to consume the vegetable after carving.
You need a few tools. Regular kitchen knives aren’t ideal, as I proved to myself this past weekend trying to hack my way through a spaghetti squash with my kitchen-drawer arsenal. I did it, but it wasn’t pretty when I was done.
According to Schneebelli-Morrell, some good items to have on hand include: wood-carving tools; pumpkin-carving kits; a nylon scrubber to smooth the inside; water-soluble crayon to draw surface designs; piercing tools like a bradawl, which is similar to a screwdriver, but pointed; and a linoleum-cutting tool.
Here are two patterns to try, excerpted from Decorating Pumpkins & Gourds by Deborah Schneebeli-Morrell. Used with permission from CICO Books.
Please note: These projects are meant for adults, so if children are helping out, they need close supervision at all times.
Garden Lanterns
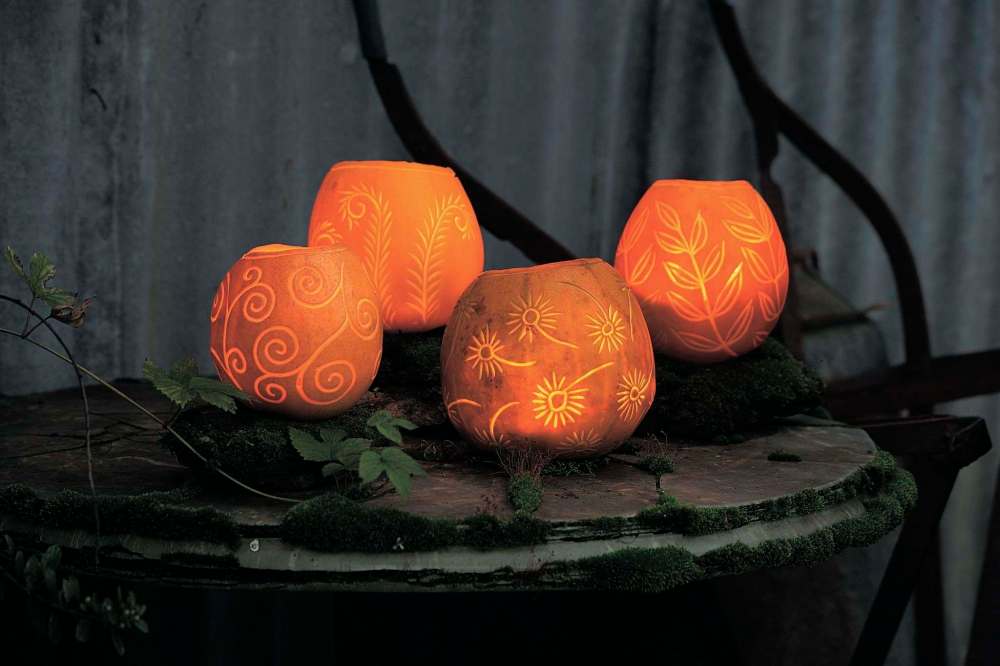
This gorgeous collection has been engraved with designs inspired by the garden. They are a mixed group of medium-sized pumpkins with soft flesh that is easier to extract, while the yellow one with the fern leaf design is, in fact, an unusual courgette with lovely smooth skin that is easy to decorate.
The images have been created by engraving the lines using a simple linocutting tool. This is very easy to do and when you become more adept, you will be able to draw with the tool without marking the design first.
You will need:
- 4 medium-sized yellow pumpkins
- Craft knife
- Water-soluble crayon (optional)
- Kitchen knife
Assorted scooping spoons
- Nylon pot scourer
- Lino-cutting tool with narrow V-shaped blade
- Small glass jars and candles or nightlights
Method:
- Cut a circular hole in the top of the pumpkin using the craft knife (mark it first with the crayon if you are nervous about cutting a circle freehand). You may need to cut through again with a longer knife to release the ‘lid’. Make sure that you cut the opening large enough to receive the jar containing the candle.
- Pull out the flesh and seeds, then scoop out any remaining using the pumpkin scoop. As you reduce the thickness of the skin, use a smaller spoon and work around the inside to ensure an even thickness. You can rub it gently with the pot scourer to achieve a smooth finish. The skin needs to be only about 5 mm (¼ inch) thick to allow light to glow through the lino-cut lines.
- Use the crayon to mark the daisy motifs all around the pumpkin, spacing them evenly so they don’t touch. If you are a confident artist, you may prefer to draw freehand as this produces a looser, more confident line
- Using the lino-cutting tool and starting at the base of the stem, work the petals outwards from the centre of the flower. Continue until the surface of the pumpkin is decorated. Insert the glass jar and candle or nightlight.
Lino-Cut Squash
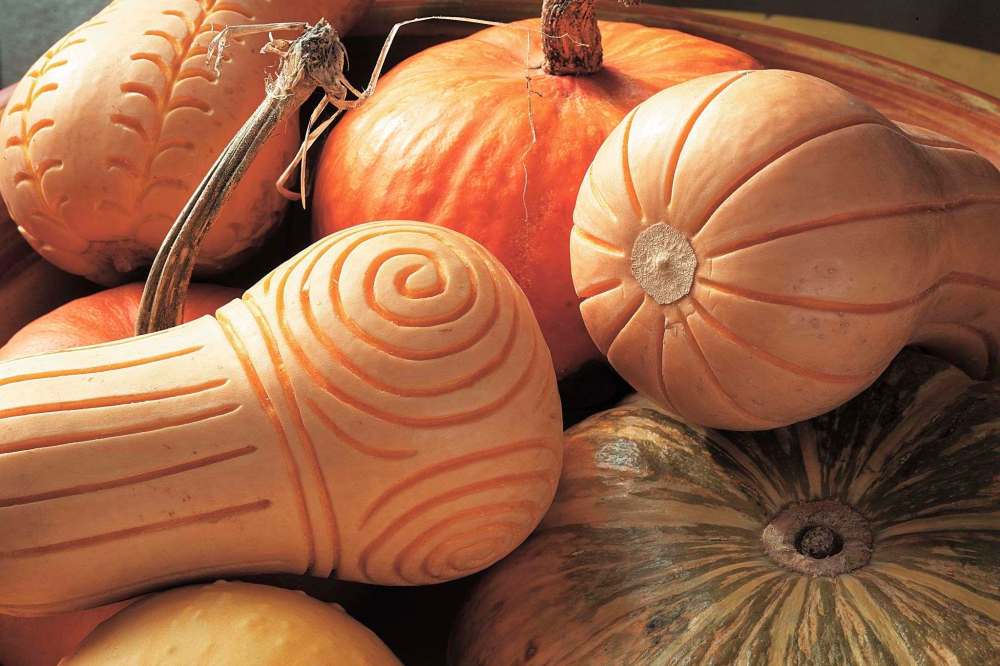
Some squash or pumpkins are very dense and grow into such interesting shapes that it is difficult to hollow them out to turn into lanterns. You can, however, decorate them simply in a way that enhances and exaggerates the natural form.
Why not do this and display them for a couple of days in a large bowl before you cut them up and use them to create a delicious meal? If you do this, don’t peel the squash first.
Simply cut into pieces, each with a part of the decoration on the skin, bake in the oven and surprise your guests when they discover a uniquely patterned vegetable on their plate.
You will need:
- Small, hard squash, such as acorn or butternut
- Lino-cutting tool
Method:
- An acorn squash has ridges and furrows which are usually fairly evenly spaced, running from the base to the stem. Use the lino-cutting tool to cut a line along the base of each of the furrows, leaving a gap at both ends.
- Make smaller cuts radiating out from these lines, creating a feathered effect. These should run towards the stem. Start each one from the central vertical line working outwards — this helps to create a tapered end.
- A butternut squash has a smooth skin and is slightly pear-shaped. Use the lino-cutting tool to create two horizontal lines around the base of the elongated section
- On the upper half, create a series of vertical lines ending just below the stem. On the more bulbous base section, create several spirals to fill the lower section. This is easy to do as long as you turn the squash rather than the lino-cutting tool to create an even line.
Twitter: @WendyKinginWpg